Products for USB Sensing and Control

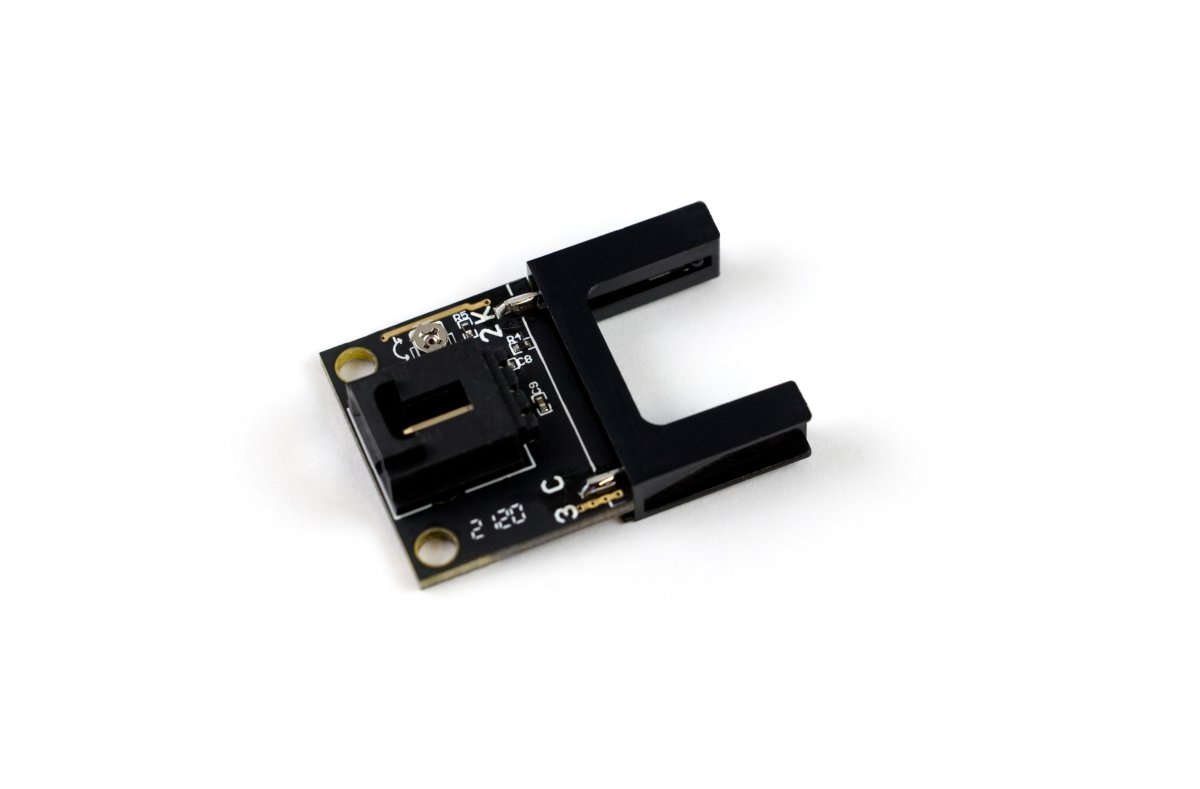


For applications that involve detecting or counting small objects passing through a narrow space, this Phidget is the perfect fit. When there is no object blocking the beam, the signal will drop low. When an object breaks the beam, the signal will jump up. You can adjust the sensitivity using the trim potentiometer depending on the type of object you're trying to sense or count.
The PRX2300 connects directly to a VINT port using the VoltageInput or DigitalInput channel class. Have a look at the Connection & Compatibility tab for a list of compatible VINT Hubs, and check the User Guide tab for recommendations on which channel class to use for your application.
This device can be controlled by a VINT Hub. For more information about VINT, have a look at the VINT Overview page. You can use a Phidget Cable to simply and easily connect the two devices. Here's a list of all of the different VINT Hubs currently available:
| Product | Board Properties | |||
|---|---|---|---|---|
| Part Number | Price | Number of VINT Ports | VINT Communication Speed Max | Controlled By |
 VINT Hub Phidget
|
$40.00 | 6 | 1 Mbit/s | USB (Mini-USB) |
 1-Port VINT Hub Phidget
|
$24.00 | 1 | 1 Mbit/s | USB (USB-A) |
 VINT Hub Phidget
|
$35.00 | 6 | 1 Mbit/s | USB (Mini-USB) |
 VINT Hub Phidget
|
$30.00 | 6 | 100 kbit/s | USB (Mini-USB) |
 Wireless VINT Hub
|
$60.00 | 6 | 100 kbit/s | Local Network (Ethernet or Wi-Fi) |
 PhidgetSBC4
|
$120.00 | 6 | 100 kbit/s | — |
Use a Phidget cable to connect this device to the hub. You can solder multiple cables together in order to make even longer Phidget cables, but you should be aware of the effects of having long wires in your system.
| Product | Physical Properties | |
|---|---|---|
| Part Number | Price | Cable Length |
 Phidget Cable 10cm
|
$1.50 | 100 mm |
 Phidget Cable 30cm
|
$1.75 | 300 mm |
 Phidget Cable 60cm
|
$2.00 | 600 mm |
 Phidget Cable 90cm
|
$2.00 | 900 mm |
 Phidget Cable 120cm
|
$2.25 | 1.2 m |
 Phidget Cable 150cm
|
$2.50 | 1.5 m |
 Phidget Cable 180cm
|
$2.75 | 1.8 m |
 Phidget Cable 350cm
|
$3.00 | 3.5 m |
 Phidget Cable Kit
|
$10.00 | 80 mm |
The PRX2300 shines a beam of infrared light between its prongs, and can detect when the beam is broken by a small object. This sensor's signal can be read using the Digital Input channel class when it is connected to a VINT hub.
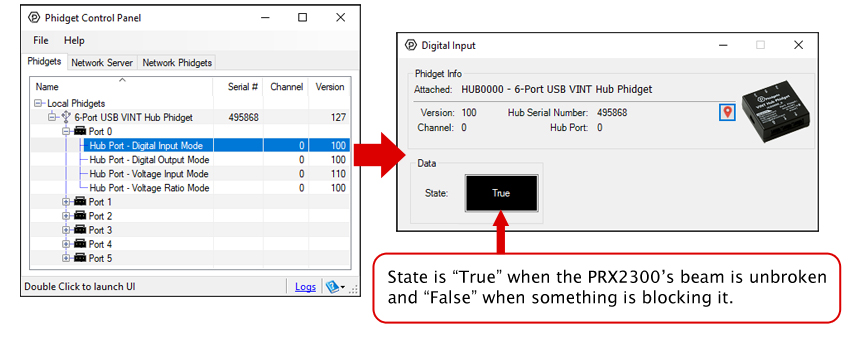
Double click on the Digital Input channel class under the port your PRX2300 is connected to.
1. Setting up your Programming Environment
Before you open a Phidget channel in your program, you can set these properties to specify which channel to open. You can find this information through the Control Panel.
1. Open the Control Panel and double-click on the red map pin icon:

2. The Addressing Information window will open. Here you will find all the information you need to address your Phidget in your program.

See the Phidget22 API for your language to determine exact syntax for each property.
You can use the PRX2300 by plugging it into a VINT Hub port and opening that port in VoltageInput or DigitalInput mode. For applications that involve opaque objects large enough to block the whole beam at once, we recommend using DigitalInput mode. For small or translucent objects, using VoltageInput may be necessary since a partial beam break may not result in a voltage high enough to register a state change (e.g. 1.8V in the case of the HUB0000).
The PRX2300 has a small trim potentiometer on board to adjust the voltage offset.
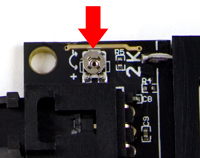
If you're using this Phidget in DigitalInput mode (are detecting large opaque objects that will strongly break the beam), rotate the potentiometer counter-clockwise toward the (+). No further calibration is needed.
If you're using this Phidget in VoltageInput mode, we recommend adjusting the voltage offset until it sits at around 1.25V when the beam is not blocked. Next, you should write a short program that will log all of the voltage data to a text file or spreadsheet (and set the data interval to the minimum value in order to catch all of the data), so you can determine which voltage spikes indicate and object and which voltage spikes are just noise.
For example, suppose you tested the sensor and observed 4 objects pass through, resulting in the following data:
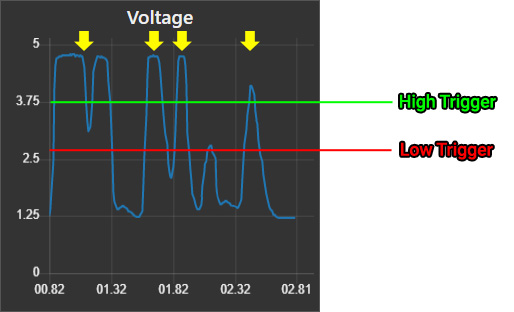
If we assume the first two peaks are actually one object that just happened to allow some of the beam to pass, and the fifth peak is a false positive, then we can assume the peaks indicated by the four yellow arrows are the data that correspond with the four objects. In order for our program to correctly identify these, we need to set a high trigger (indicated by the green line) well above the fifth peak, but below the sixth peak. Similarly, in order to prevent the first two peaks from counting as two separate events, we must set the low trigger below the dip in between them, but above the dip between the next two peaks.
Once you've done enough testing to determine where your high and low triggers should be set, you just need to add a bit of logic to your voltage change event. If the voltage is higher than your high trigger, you can set a global variable that indicates that an object has been sensed, and you should not reset that variable until the voltage has dropped back down below the low trigger. Here's and example of what the event handler might look like in Python if our high trigger is 3.75V and our low trigger is 2.7V:
eventTriggered = 0

def onVoltageChange(self, voltage):
    if voltage > 3.75 and eventTriggered == 0
        eventTriggered = 1
        print("Object detected!")

    if voltage < 2.7 and eventTriggered == 1
        eventTriggered = 0
Try adjusting the sensitivity trim pot on the PRX2300. If it's turned all the way clockwise, you will get this behavior. If it's still stuck on "False" after adjusting the sensitivity, try cleaning the emitter and receiver on the inside of the prongs to clear away any debris that could be blocking the infrared beam.
| Sensor Properties | |
|---|---|
| Controlled By | Voltage Input |
| Sensor Type | Proximity (Infrared) |
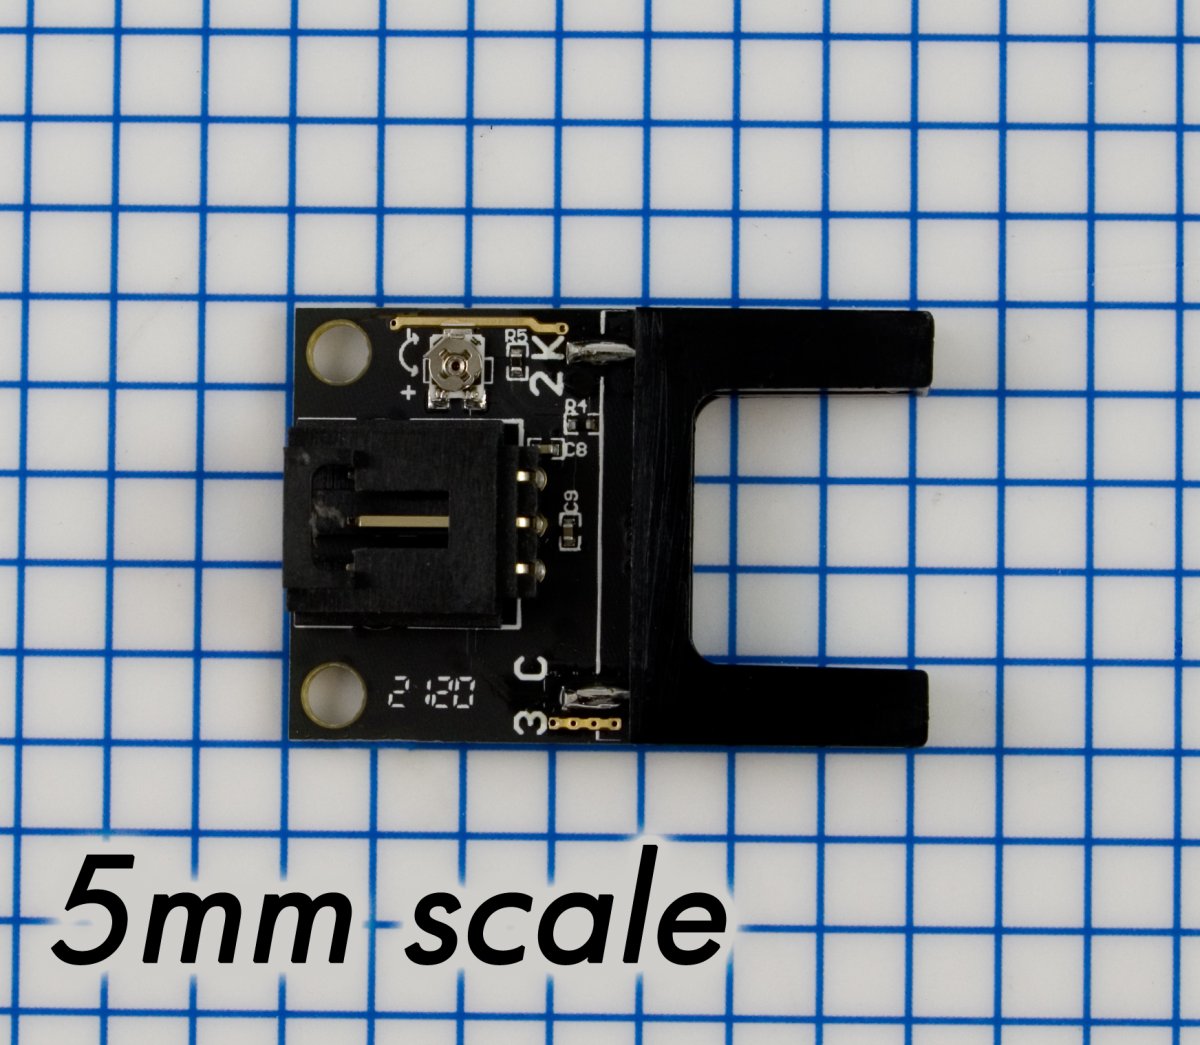
| Detecting Distance Max | 15 mm |
| Electrical Properties | |
| Current Consumption Min | 17 mA |
| Current Consumption Max | 21 mA |
| Customs Information | |
| Canadian HS Export Code | 8473.30.00 |
| American HTS Import Code | 8473.30.51.00 |
| Country of Origin | CN (China) |
| Date | Board Revision | Device Version | Comment |
|---|---|---|---|
| July 2020 | 0 | N/A | Product Release |
This device doesn't have an API of its own. It is controlled by opening a DigitalInput or VoltageInput channel on the Phidget that it's connected to. For a list of compatible Phidgets, see the Connection & Compatibility tab.
You can find details for the DigitalInput and VoltageInput API on the API tab for the Phidget that this sensor connects to. For more information on which of these two channel classes you should use, see the User Guide tab.
| Product | Sensor Properties | |||
|---|---|---|---|---|
| Part Number | Price | Controlled By | Sensor Type | Detecting Distance Max |
 Motion Sensor Phidget
|
$15.00 | Voltage Input | Motion (PIR) | — |
 Beam Break Phidget
|
$10.00 | Voltage Input | Proximity (Infrared) | 15 mm |
 IR Reflective Sensor 10cm
|
$9.00 | VoltageRatio Input | Proximity (Infrared) | 100 mm |
 Capacitive Proximity Sensor - 15mm
|
$30.00 | Digital Input (5V) | Proximity (Capacitive) | 15 mm |
 Capacitive Proximity Sensor - 8mm
|
$20.00 | Digital Input (5V) | Proximity (Capacitive) | 8 mm |
 Capacitive Proximity Sensor - 8mm
|
$20.00 | Digital Input (5V) | Proximity (Capacitive) | 8 mm |
 Proximity Sensor Inductive - 5mm
|
$10.00 | Digital Input (5V) | Proximity (Inductive) | 5 mm |
 Inductive Proximity Sensor - 5mm
|
$10.00 | Digital Input (5V) | Proximity (Inductive) | 5 mm |
 Inductive Proximity Sensor - 8mm
|
$15.00 | Digital Input (5V) | Proximity (Inductive) | 8 mm |
 Magnetic Contact Switch
|
$2.50 | Digital Input (5V) | Proximity (Magnetic) | 19 mm |
 Magnetic Proximity Sensor - 10mm
|
$15.00 | Digital Input (5V) | Proximity (Magnetic) | 10 mm |
 Miniature Magnetic Contact Switch
|
$2.50 | Digital Input (5V) | Proximity (Magnetic) | 12 mm |
 Diffuse IR Proximity Sensor - 80cm
|
$24.00 | Digital Input (5V) | Proximity (Infrared) | 800 mm |
 IR Reflective Proximity Sensor - 2m
|
$20.00 | Digital Input (5V) | Proximity (Infrared) | 2 m |
 IR Beam Break Proximity Sensor - 15mm
|
$20.00 | Digital Input (5V) | Through-Beam (Infrared) | 15 mm |
 IR Beam Break Proximity Sensor - 30mm
|
$22.00 | Digital Input (5V) | Through-Beam (Infrared) | 30 mm |
 IR Beam Break Proximity Sensor - 50mm
|
$24.00 | Digital Input (5V) | Through-Beam (Infrared) | 50 mm |
 IR Beam Break Proximity Sensor - 5m
|
$26.00 | Digital Input (5V) | Through-Beam (Infrared) | 5 m |
 IR Beam Break Proximity Sensor - 10m
|
$30.00 | Digital Input (5V) | Through-Beam (Infrared) | 10 m |
 IR Beam Break Proximity Sensor - 15m
|
$32.00 | Digital Input (5V) | Through-Beam (Infrared) | 15 m |