LCD Character Display Guide
LCD displays are a great way to display information to users. This guide covers the basics of text LCDs and graphic LCDs.

Quantity Available: 348
| Qty | Price |
|---|---|
| 10 | $28.50 |
| 25 | $25.50 |
| 50 | $22.50 |
| 100 | $21.00 |
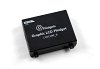
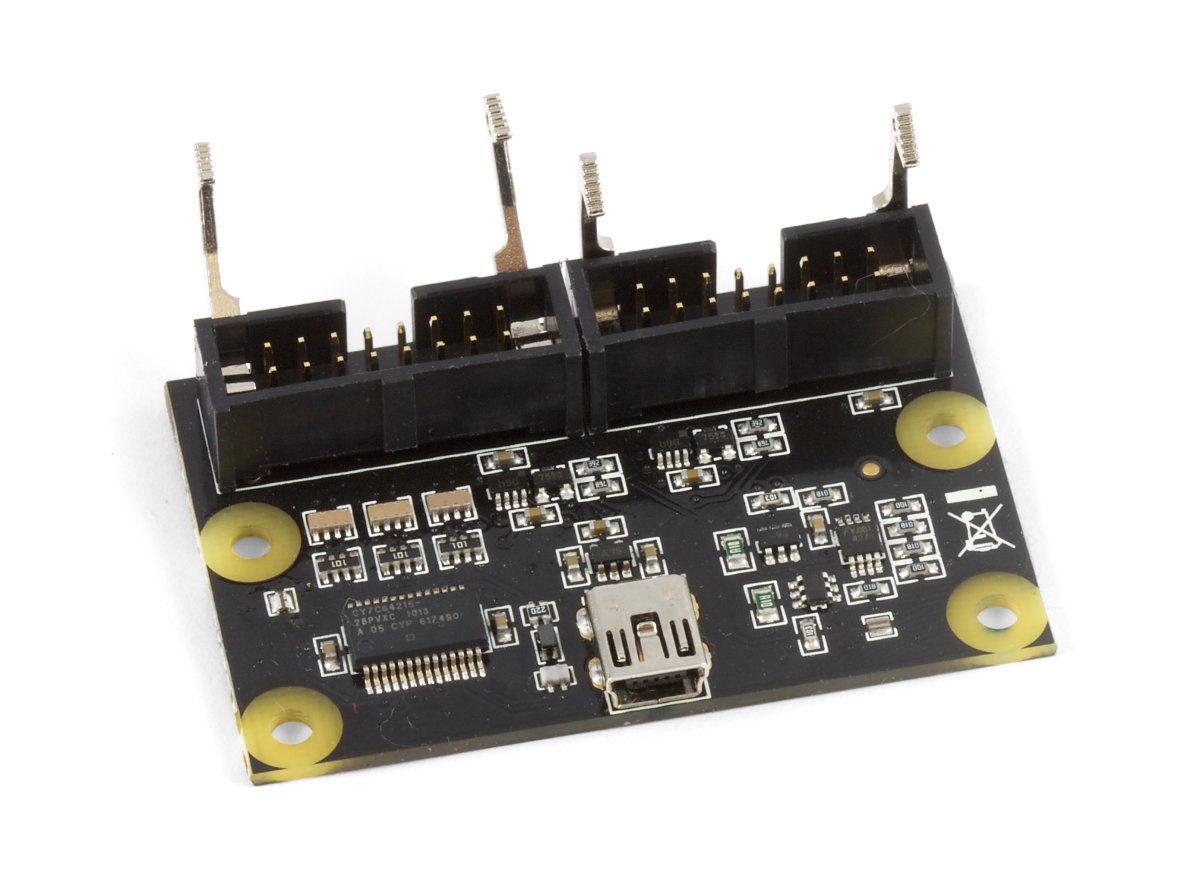
The PhidgetTextLCD Adapter lets you connect one or two HD44780 LCD modules. The adapter can handle up to 4 lines of 40 characters, depending on the LCD module you are using. You can separately adjust the backlight and the character contrast of each LCD module. It connects directly to your computer via USB.
This adapter supports the following LCD screen sizes:
1x8, 1x16, 1x40
2x8, 2x16, 2x20, 2x24, 2x40
4x16, 4x20, 4x40
Welcome to the 1204 user guide! In order to get started, make sure you have the following hardware on hand:
Next, you will need to connect the pieces:
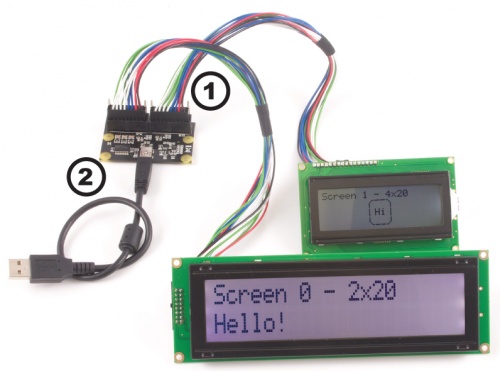
Now that you have everything together, let's start using the 1204!
In order to demonstrate the functionality of the 1204, the Phidget Control Panel running on a Windows machine will be used.
The Phidget Control Panel is available for use on both macOS and Windows machines.
To open the Phidget Control Panel on Windows, find the ![]() icon in the taskbar. If it is not there, open up the start menu and search for Phidget Control Panel
icon in the taskbar. If it is not there, open up the start menu and search for Phidget Control Panel
To open the Phidget Control Panel on macOS, open Finder and navigate to the Phidget Control Panel in the Applications list. Double click on the ![]() icon to bring up the Phidget Control Panel.
icon to bring up the Phidget Control Panel.
For more information, take a look at the getting started guide for your operating system:
Linux users can follow the getting started with Linux guide and continue reading here for more information about the 1204.
After plugging the 1204 into your computer and opening the Phidget Control Panel, you will see something like this:
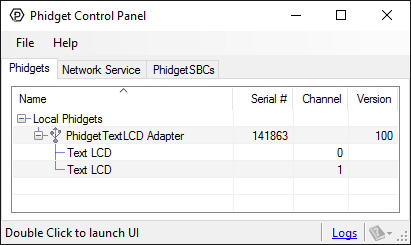
The Phidget Control Panel will list all connected Phidgets and associated objects, as well as the following information:
The Phidget Control Panel can also be used to test your device. Double-clicking on an object will open an example.
Double-click on the LCD object, labelled Text LCD, in order to run the example:
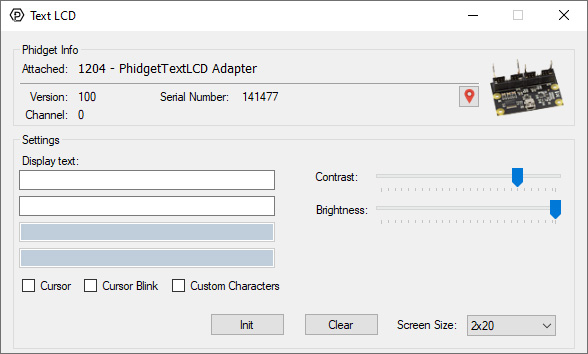
General information about the selected object will be displayed at the top of the window. You can also experiment with the following functionality:
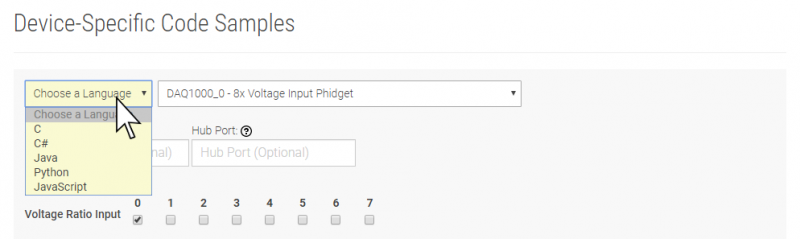
You are now ready to start writing your own code for the device. The best way to do that is to start from our Code Samples.
Select your programming language of choice from the drop-down list to get an example for your device. You can use the options provided to further customize the example to best suit your needs.
Once you have your example, you will need to follow the instructions on the page for your programming language to get it running. To find these instructions, select your programming language from the Programming Languages page.
Liquid Crystal Displays are display devices used to convey information through arrangements of pixels. Graphic and Text LCDs are the most common types available for electronic products. The 1204 supports the following screen sizes (lines x characters): 1x8, 2x8, 1x16, 2x16, 4x16, 2x20, 4x20, 2x24, 1x40, 2x40, 4x40. Please note that your program has no way of automatically detecting the size of the attached screen, so you need to set the screen size with call from Phidget22 API in order to have text strings display properly.
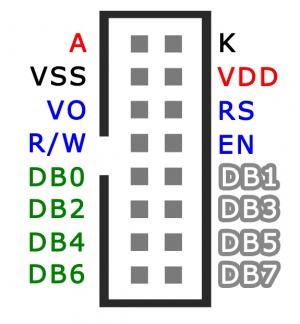
Below is a pinout diagram for the connector on the 1204, with descriptions of each pin. Remember to use the end of the cable with the larger connector with the 1204 if you want the wire colors to be consistent with the diagram.
| Pin | Description |
| A | LED Anode (+) |
| K | LED Cathode (-) |
| VSS | Board Ground |
| VDD | Supply Voltage (5V) |
| VO | LCD Operating Voltage |
| RS | Register Selector |
| R/W | Read/Write Signal |
| DB0-DB7 | Data Bus Lines |
Text LCDs display full text strings set in software. Since text characters are defined from the ASCII standard library, other ASCII standard set characters and glyphs can also be sent to the text LCD. This can be done easily by using unicode characters within your text string. In C#, this may look something like this:
tLCD.WriteText(LCDFont.Dimensions_5x8, 0, 0, "Apple starts with \u0041");
The four parameters of the WriteText method are as follows:
In this example, the string \u indicates that a unicode character follows, and the unicode character 0041 represents the capital letter A (you can also reference it with '\x41', which is the same character in hexadecimal). After the LCD converts the unicode character, the above example would cause the LCD screen to read Apple starts with A. A chart of all ASCII standard set character codes is available here.
Custom characters can also be generated for the 1204. A custom character can be any arrangement of pixels within the space allotted for a single character. Single characters are made up of pixels arranged in a grid 5 pixels wide by 8 pixels high. Once generated, custom characters can be stored in any one of eight volatile memory locations on the PhidgetTextLCD, and can be recalled with a simple API command from software. Custom characters are designed by creating a byte array of ones and zeroes, like this:
	Byte[] heart = new Byte[] {
		0,0,0,0,0,
		0,1,0,1,0,
		1,1,1,1,1,
		1,1,1,1,1,
		0,1,1,1,0,
		0,0,1,0,0,
		0,0,0,0,0,
		0,0,0,0,0 };
The above bitmap creates a character that looks like a heart. In order to use this bitmap on your screen, you have to assign it to a memory location and use it in a WriteText call.
	tLcd.SetCharacterBitmap(LCDFont.Dimensions_5x8, "\x1", heart);
	tLcd.WriteText(LCDFont.Dimensions_5x8, 0, 0, "Heart: \x1");
The above code causes the string Heart: ♥ to display on the screen. You can store up to eight characters at the same time; one character in each of the locations \x1 to \x8. If you set a character to location \x9, it will be the same as setting \x1. Likewise, \xA will set \x2, and so on for \xB, \xC, etc.
| Part Number | 1204_0B |
| Electrical Properties | |
|---|---|
| Current Consumption Max | 500 mA |
| Current Consumption Min | 34 mA |
| Current Consumption Max (1x8 or 2x8 screen) | 200 mA |
| Current Consumption Max (2x20 or 2x24 screen) | 76.5 mA |
| Current Consumption Max (4x40 screen) | 181 mA |
| Current Consumption Max (Backlight) | 400 mA |
| Available External Voltage | 5 V DC |
| USB Speed | Full Speed |
| Board Properties | |
| Controlled By | USB (Mini-USB) |
| USB Stack | HID |
| Driver Support | Phidget21, Phidget22 |
| Physical Properties | |
| Operating Temperature Min | 0 °C |
| Operating Temperature Max | 70 °C |
| Customs Information | |
| Canadian HS Export Code | 8471.80.00 |
| American HTS Import Code | 8471.80.40.00 |
| Country of Origin | CN (China) |
| Date | Board Revision | Device Version | Packaging Revision | Comment |
|---|---|---|---|---|
| August 2011 | 0 | 100 | Product Release, requires phidget21 2.1.8+ | |
| August 2011 | 0 | 101 | getLabelString fixed for labels longer than 7 characters | |
| January 2018 | 0 | 101 | B | Removed USB cable from packaging |
| Channel Name | API | Channel |
|---|---|---|
| Text LCD | LCD | 0 - 1 |
This adapter can interface up to two text LCD screens. Each screen comes packaged with the cable required to connect it to the PhidgetTextLCD Adapter. Note that the 4x40 screen requires both ports on the TextLCD, so you can only interface one screen of this size.
| Product | LCD Screen | |||
|---|---|---|---|---|
| Part Number | Price | Number of Rows | Characters per Row | Character Width |
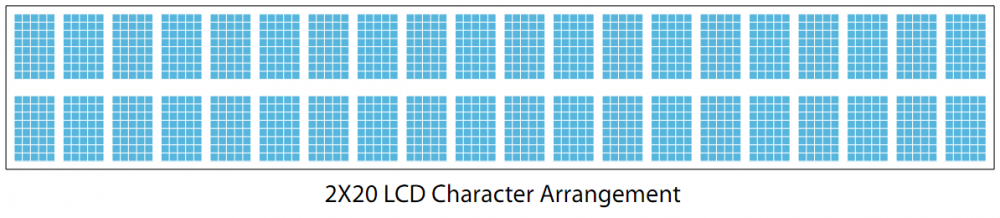
 LCD Screen 2x20 (12.7mm Characters)
|
$25.00 | 2 | 20 | 5.9 mm |
 LCD Screen 2x20 (5.5mm Characters)
|
$18.00 | 2 | 20 | 3.2 mm |
 LCD Screen 2x40 (5.5mm Characters)
|
$25.00 | 2 | 40 | 3.2 mm |
 LCD Screen 4x20 (4.75mm Characters)
|
$20.00 | 4 | 20 | 3 mm |
 LCD Screen 4x40 (4.89mm Characters)
|
$35.00 | 4 | 40 | 2.8 mm |
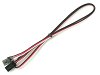
Each LCD screen we sell comes with the appropriate cable, but if you need a replacement or need to wire up a custom screen, you can find the extra cables in the table below:
| Product | Physical Properties | ||||
|---|---|---|---|---|---|
| Part Number | Price | Connector A | Connector B | Cable Length | Cable Gauge |
 LCD cable (1x16 connector)
|
$3.50 | Amphenol Mini PV 65863 | Molex 50-57-9416 | 300 mm | 26 AWG |
 LCD cable (2x8 connector)
|
$3.50 | Amphenol Mini PV 65863 | Amphenol Mini PV 65863 | 300 mm | 26 AWG |
 LCD cable (for 40x4 Screen)
|
$3.50 | Amphenol Mini PV 65863 (x2) | Amphenol Mini PV 65863 | 300 mm | 26 AWG |
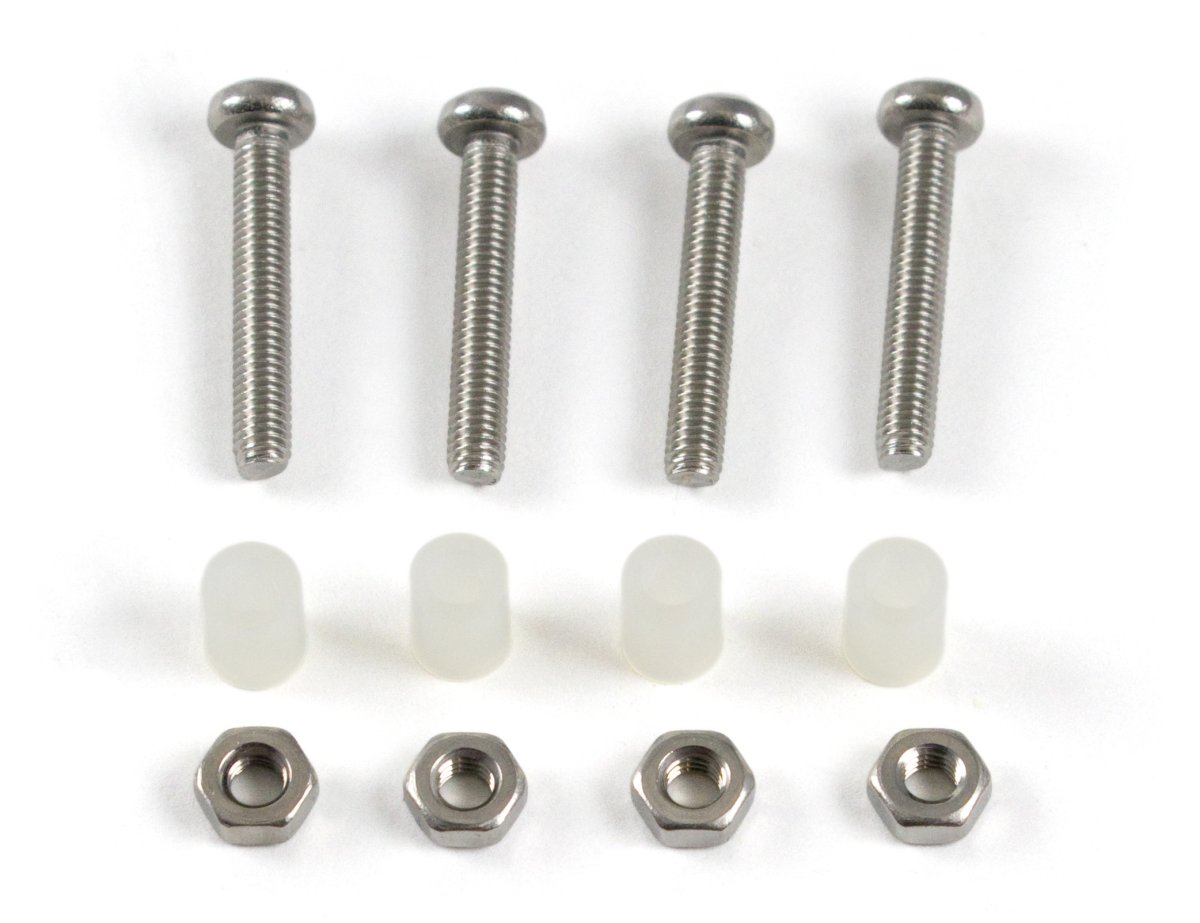
You can protect your board from dust and debris by purchasing an enclosure. An enclosure will also prevent unintentional shorts caused by objects touching the pins on the bottom of the board or any terminal screws.
| Product | Physical Properties | |
|---|---|---|
| Part Number | Price | Material |
 Acrylic Enclosure for the 1204
|
$9.00 | Clear Acrylic |
Use a USB cable to connect this Phidget to your computer. We have a number of different lengths available, although the maximum length of a USB cable is 5 meters due to limitations in the timing protocol. For longer distances, we recommend that you use a Single Board Computer to control the Phidget remotely.
| Product | Physical Properties | |||
|---|---|---|---|---|
| Part Number | Price | Connector A | Connector B | Cable Length |
 USB-A to Mini-B Cable 28cm 24AWG
|
$3.00 | USB Type A | USB Mini-B | 280 mm |
 USB-A to Mini-B Cable 28cm Right Angle
|
$3.50 | USB Type A | USB Mini-B (90 degree) | 280 mm |
 USB-A to Mini-B Cable 60cm 24AWG
|
$3.50 | USB Type A | USB Mini-B | 600 mm |
 USB-A to Mini-B Cable 83cm Right Angle
|
$4.50 | USB Type A | USB Mini-B (90 degree) | 830 mm |
 USB-A to Mini-B Cable 120cm 24AWG
|
$4.00 | USB Type A | USB Mini-B | 1.2 m |
 USB-A to Mini-B Cable 180cm 24AWG
|
$4.00 | USB Type A | USB Mini-B | 1.8 m |
 USB-A to Mini-B Cable 450cm, 20 AWG 2C
|
$12.00 | USB Type A | USB Mini-B | 4.5 m |
 USB-C to Mini-B Cable 60cm 24AWG
|
$5.00 | USB Type C | USB Mini-B | 600 mm |
 USB-C to Mini-B Cable 180cm 24AWG
|
$6.00 | USB Type C | USB Mini-B | 1.8 m |