Control Your Phidgets From Anywhere
Host a website on your Raspberry Pi to access your Phidgets!
by Lucas
Introduction
In this project, we will host a website on a Raspberry Pi that displays data from a Humidity Phidget. We want to avoid modifying our router settings, so we will use PiTunnel to access to our website from anywhere.
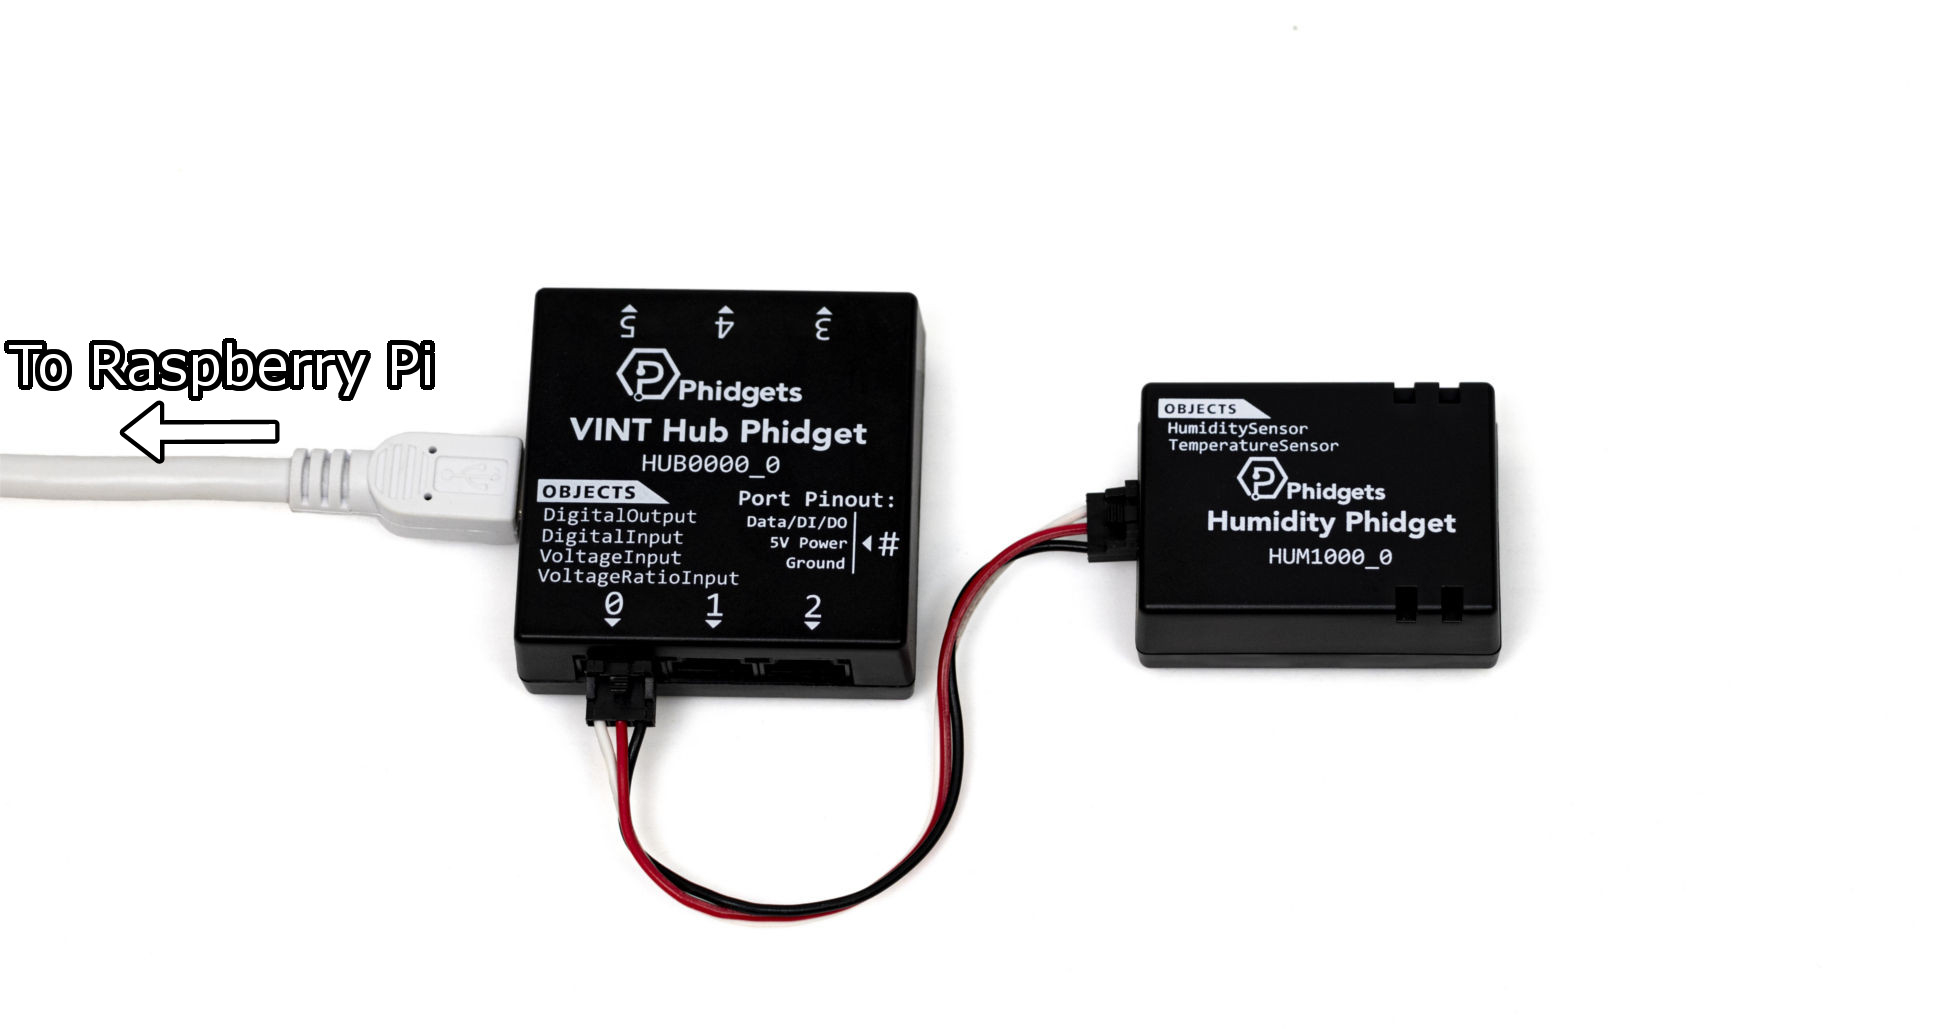
Hardware
Software
This project assumes you are familiar with the basic operation of Phidgets.
Overview
- We will be hosting a website on the Raspberry Pi.
- The website will display data from a Humidity Phidget using the Phidget22 Javascript API.
- We will use PiTunnel to make the website available from anywhere.
Install Phidget Libraries
If you haven't already set up your Raspberry Pi to work with Phidgets, follow the instructions shown here.
Note: Make sure to install the Phidget22 Network Server package.
Set Up a Web Server on the Raspberry Pi
There are many ways to do this, here are two:
- Follow the Raspberry Pi instructions here
- Install the phidget22wwwjs package which will create a server at /var/phidgets/www
In this project, we will assume you used the first option.
Create a Webpage
After setting up your webserver, navigate to /var/www/html and replace the contents of index.html with the following:
<!doctype html>
<html lang="en">
<head>
<meta charset="utf-8">
<title>Humidity Phidget Data</title>
<script src="sha256.min.js"></script>
<script src="phidget22.min.js"></script>
</head>
<script>
function connectPhidgets(){
var local = location.hostname; //get host location
var conn = new phidget22.Connection(8080, local);
conn.connect().then(runExample);
}
function runExample() {
var humiditySensor0 = new phidget22.HumiditySensor();
humiditySensor0.onAttach = function onHumiditySensor0_Detach() {
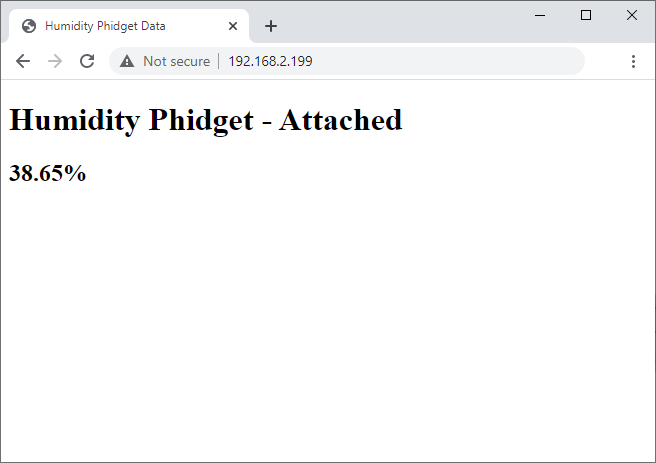
document.getElementById("mainLabel").innerHTML = "Humidity Phidget - Attached";
};
humiditySensor0.onDetach = function onHumiditySensor0_Detach() {
document.getElementById("mainLabel").innerHTML = "Humidity Phidget - Detached";
};
humiditySensor0.onHumidityChange = function onHumiditySensor0_HumidityChange(humidity) {
document.getElementById("dataLabel").innerHTML = humidity + "%";
};
humiditySensor0.open(5000);
}
</script>
<body onload="connectPhidgets()">
<div>
<h1 id="mainLabel">Humidity Phidget Data - Detached</h1>
<h2 id="dataLabel">?</h2>
</div>
</body>
</html>
Place the following files in the same location as the index.html
- phidget22.min.js
- sha256.min.js
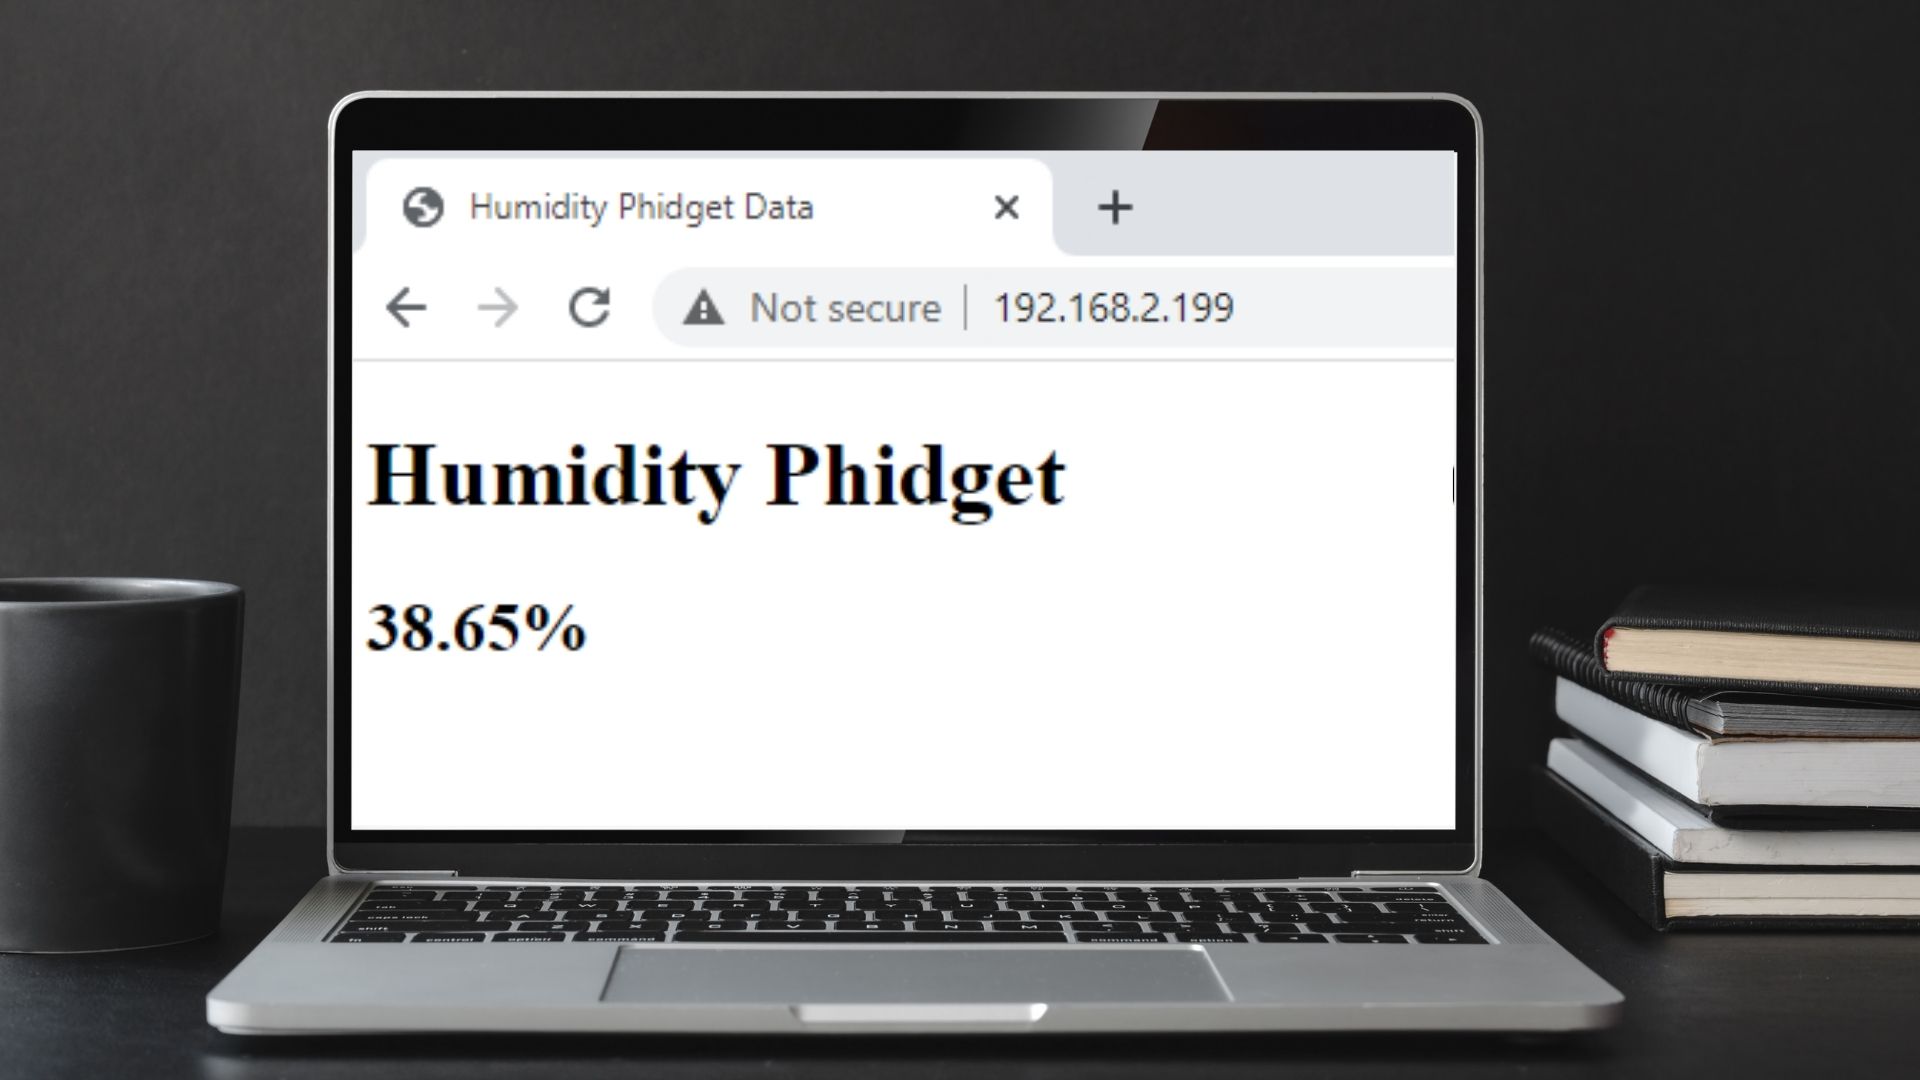
Navigate to your website on your local network and you will see the following:
Configure PiTunnel
Navigate to PiTunnel and create a free account.
After creating an account, instructions for setting up your Raspberry Pi will be shown.
Next, you will need to create two tunnels:
- The first tunnel will be for your website.
- The second tunnel will be for your Phidget22 Javascript connection.
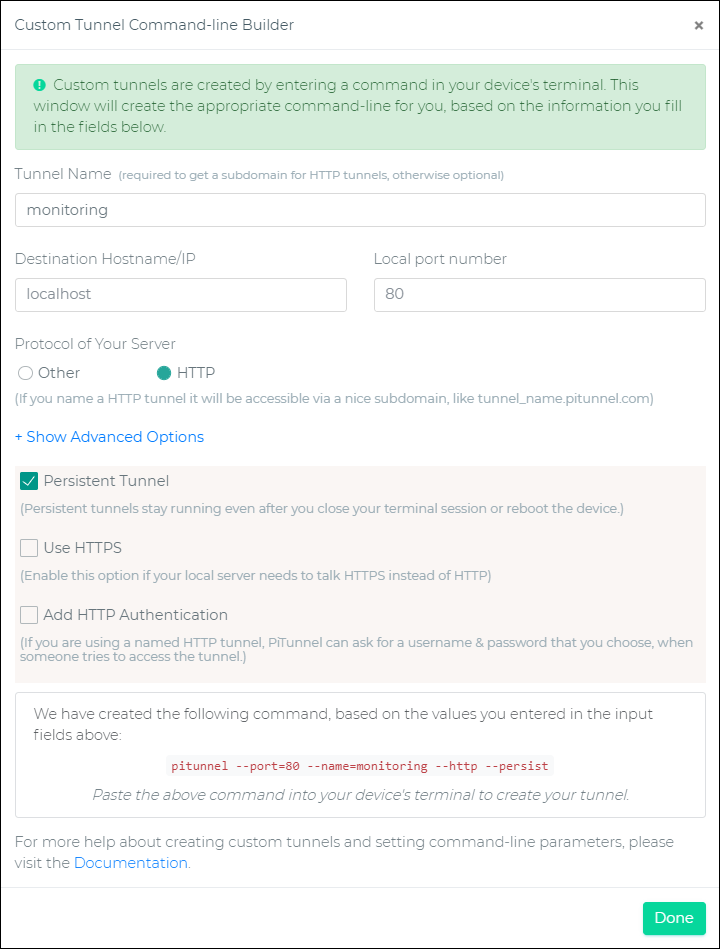
Name your first tunnel monitoring and follow the format below:
Name your second tunnel phidgets and follow the format below:

After creating your tunnels, your configuration should look something like this:

Finally, modify your Javascript connection to access the new tunnel:
function connectPhidgets(){
    var conn = new phidget22.Connection(48172, 'pitunnel.com');
    conn.connect().then(runExample);
}
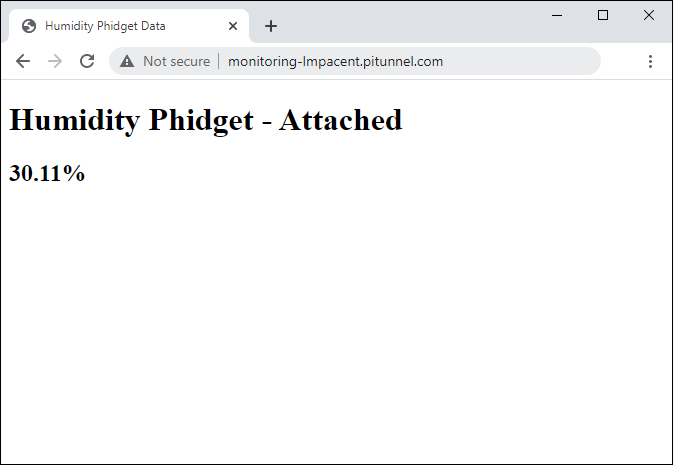
You will now be able to access your website from anywhere and connect to your Phidgets!
Things to Note:
- When accessing your website, you must do so over http as the Phidget22 Network Server does not implement a secure websocket.
- The free version of PiTunnel only allows you to create one custom tunnel and no static ports. This means your ports will change every few hours. For example, in the code directly above, the port is set to 48172, however, that port will eventually change, leaving you with a bad connection. In order to avoid this, upgrade to the paid version, or use an alternative service.
- Make sure to secure your tunnel.