Pet Food Supply Monitor Using Load Cells and Phidgets - Part 2
by Lucas
Part 2 Preview
Introduction
If you haven't seen part 1 of this project, check it out first!
The goal of part 2 will be to create a system that logs your pet's weight. In order to do this we must create a large scale that will sit
in front of the water/food bowl scales that were built in the last project. This will allow us to log her weight whenever she eats. We should also allow
users to view the weight data via the web page we created in the last project.
Hardware
- SBC3003 - Phidget SBC4
- PhidgetBridge 4-Input or Wheatstone Bridge Phidget
- Load cells
- A simple scale like this
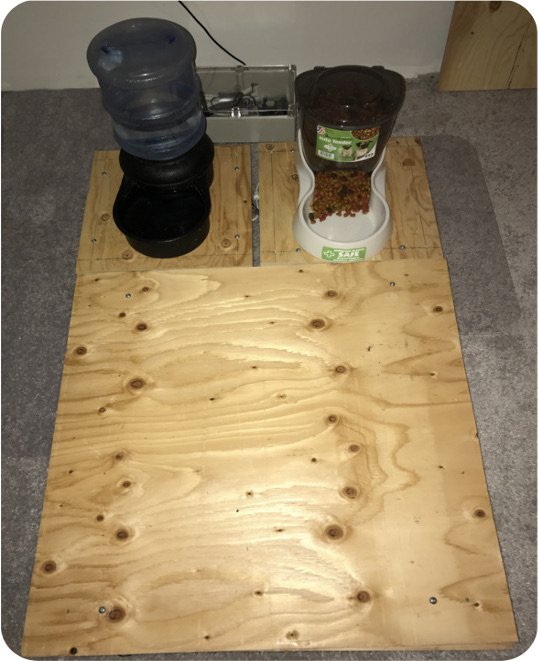
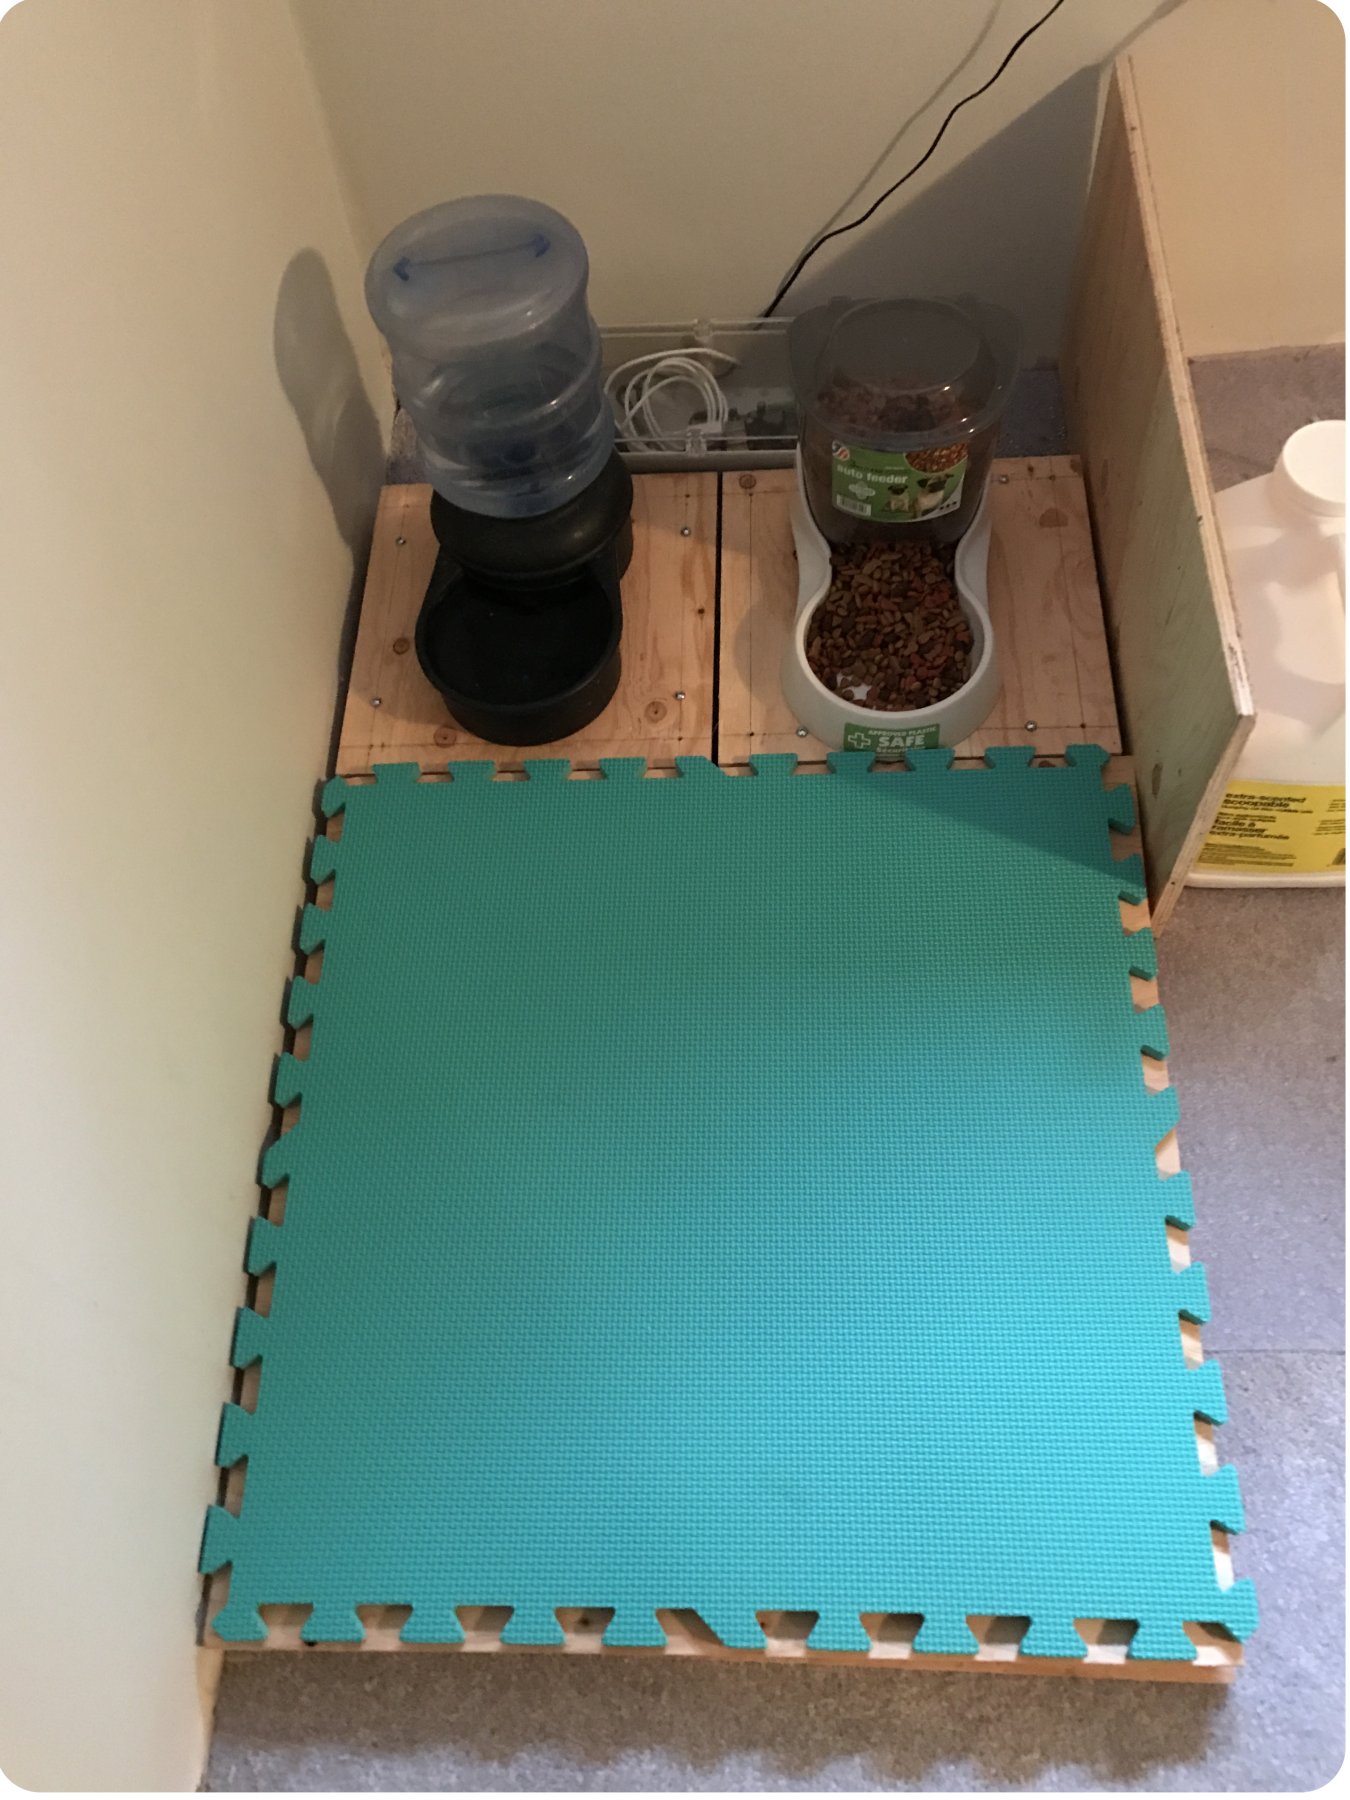
The new scale measures 24" x 24" and is again made of plywood. For the final installation the food bowls will be moved into the corner of the room and a spare piece of plywood will be attached to the side of the scales so that the cat can only access the food and water when she is sitting on the scale.
Software
Libraries and Drivers
This project assumes that you are somewhat familiar with the basic operation of Phidgets (i.e. attaching and opening devices, reading data, etc). If this is your first time building a Phidgets project with JavaScript or a Phidget SBC, please refer to the JavaScript page or SBC page for instructions on how to setup your environment and get started.
Overview
We will modify our simple C program will that runs on the Phidget SBC to do the following:
- Monitor weight of the cat when she is eating and log to a file.
We will modify our JavaScript code to do the following:
- Read weight information from log file and graph using vis.js
Step 1: Modify SBC Code
We need to make the following modifications to our C program running on the Phidget SBC:
- Utilize another channel from the PhidgetBridge 4-Input to interface with the load cells from our new scale.
- Create a function that will allow us to accurately weigh the cat based on the data from the load cells.
- After weighing, store weight information to a file on the Phidget SBC.
Adding Another VoltageRatioInput Channel
#define WEIGHT_BRIDGE_CHANNEL 	1
#define BRIDGE_SERIALNUM		141009
#define WEIGHT_DATAINT			500
...
int main(void)
{
	...
	PhidgetVoltageRatioInputHandle weight;
	...
	//create weight VoltageRatioInput
	result = PhidgetVoltageRatioInput_create(&weight);
	if (result != EPHIDGET_OK) {
		Phidget_log(PHIDGET_LOG_ERROR, "failed to create voltage ratio object");
		return 1;
	}
	result = Phidget_setDeviceSerialNumber((PhidgetHandle)weight, BRIDGE_SERIALNUM);
	if (result != EPHIDGET_OK) {
		Phidget_log(PHIDGET_LOG_ERROR, "failed to set device serial number");
		return 1;
	}
	result = Phidget_setChannel((PhidgetHandle)weight, WEIGHT_BRIDGE_CHANNEL);
	if (result != EPHIDGET_OK) {
		Phidget_log(PHIDGET_LOG_ERROR, "failed to set channel");
		return 1;
	}
	result = PhidgetVoltageRatioInput_setOnVoltageRatioChangeHandler(weight, onVoltageRatioChangeHandler, NULL);
	if (result != EPHIDGET_OK) {
		Phidget_log(PHIDGET_LOG_ERROR, "failed to set on voltage ratio change handler");
		return 1;
	}
	result = Phidget_openWaitForAttachment((PhidgetHandle)weight, 2000);
	if (result != EPHIDGET_OK) {
		Phidget_log(PHIDGET_LOG_ERROR, "failed to open food channel");
		return 1;
	}
	result = PhidgetVoltageRatioInput_setBridgeEnabled(weight, 1);
	if (result != EPHIDGET_OK) {
		Phidget_log(PHIDGET_LOG_ERROR, "failed to enable bridge");
		return 1;
	}
	result = PhidgetVoltageRatioInput_setBridgeGain(weight, BRIDGE_GAIN_1);
	if (result != EPHIDGET_OK) {
		Phidget_log(PHIDGET_LOG_ERROR, "failed to enable bridge");
		return 1;
	}
	result = PhidgetVoltageRatioInput_setDataInterval(weight, WEIGHT_DATAINT);
	if (result != EPHIDGET_OK) {
		Phidget_log(PHIDGET_LOG_ERROR, "failed to set data interval");
		return 1;
	}
	...
}
You can see the code for adding another channel above. Note the following lines of code:
result = PhidgetVoltageRatioInput_setOnVoltageRatioChangeHandler(weight, onVoltageRatioChangeHandler, NULL);result = PhidgetVoltageRatioInput_setDataInterval(weight, WEIGHT_DATAINT);
We will subscribe to the change event instead of using a get function like we did for the water and food scales.
By subscribing to the change event we can receive updates about the state of the scale at a constant rate that is determined by WEIGHT_DATAINT.
Weighing The Cat
The onVoltageRatioChangeHandler implementation is shown below.
#define WEIGH_TIME 5000
...
double m[3] = {your calibration value, your calibration value, your calibration value};
double b[3] = {your calibration value, your calibration value, your calibration value};
double animalsWeight = 0;
int numSamples = 0;
int weighing = 0;
void
onVoltageRatioChangeHandler(PhidgetVoltageRatioInputHandle ch, void *ctx, double ratio) {
	double weight = m[2]*ratio + b[2]; //convert to weight
	if(weight > 5){ //if weight > 5 lbs, assume cat is on scale
		if(weighing == 0){
			Phidget_log(PHIDGET_LOG_INFO,"Weighing started");
			weighing = 1;
		}
		numSamples++;
		animalsWeight += weight;
	}else{
		if(weighing){
			Phidget_log(PHIDGET_LOG_INFO,"Weighing ended, logging averaged weight");
			if(numSamples*WEIGHT_DATAINT >= WEIGH_TIME){ //only log if we have at least 5 seconds worth of data
				animalsWeight /= numSamples;
				logData(animalsWeight);
			}
			//reset all variables
			numSamples = 0;
			animalsWeight = 0;
			weighing = 0;
		}
	}
}
Here is a breakdown of the code above:
- Convert voltage ratio value to a weight value (pounds).
- If there is enough weight on the scale, assume the cat has stepped on and begin taking samples.
- After the cat has stepped off the scale and the measured weight drops, determine if we have taken enough samples for a viable measurement. Currently we need at least 5 seconds worth of data before we will log.
- Log data to file and reset variables.
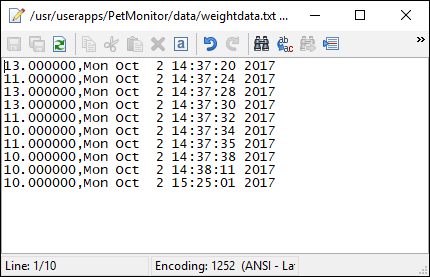
Those are the only changes we need for our C program. The next step will be modifying our JavaScript code in order to graph the data that is stored in the
weightdata.txt file.
Step 2: Graph using vis.js
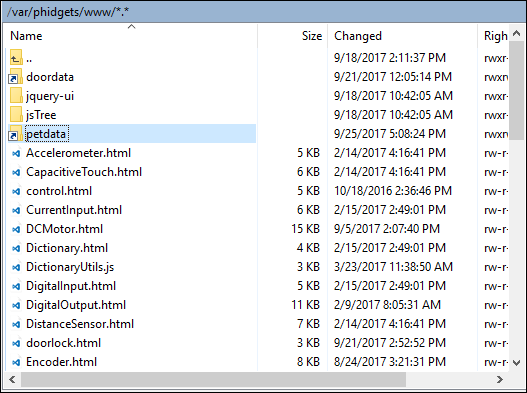
For my program, the weight data was logged to /usr/userapps/PetMonitor/data/weightdata.txt, therefore, in order for my webpage to access the file, I created a
link to the data folder at my webservers docroot location. Note, I labeled the folder 'petdata' in order to differentiate between different data links.
Graphing was done using vis.js
function loadDataGraph() {
//grab data stored by C program, there is a link to weightdata.txt in the docroot location
var url = '/petdata/weightdata.txt';
var options = {
		legend: true,
		width: '75%',
		interpolation: false
	};

	var jq = $.get(url);
	jq.fail(function(jq,textStatus,errorThrown){
		console.log('loadDataGraph() failed');
	});
	jq.done(function(rawdata){
		console.log('success getting raw data');
		var groups = new vis.DataSet();
		groups.add({
			id:0,
			content: "Pet weight"
		});
		var container = document.getElementById('visualization');
		var data = rawdata.split('\n');
		var wdata = [];
		for (var d in data) {
			var l = data[d].split(',');
			if (l.length != 2)
			continue;
			wdata.push({ x: new Date(l[1]), y: parseFloat(l[0]), group: 0});
		}
		var dataset = new vis.DataSet();
		dataset.add(wdata);
		graph = new vis.Graph2d(container, dataset, groups, options);
});
}
Conclusion
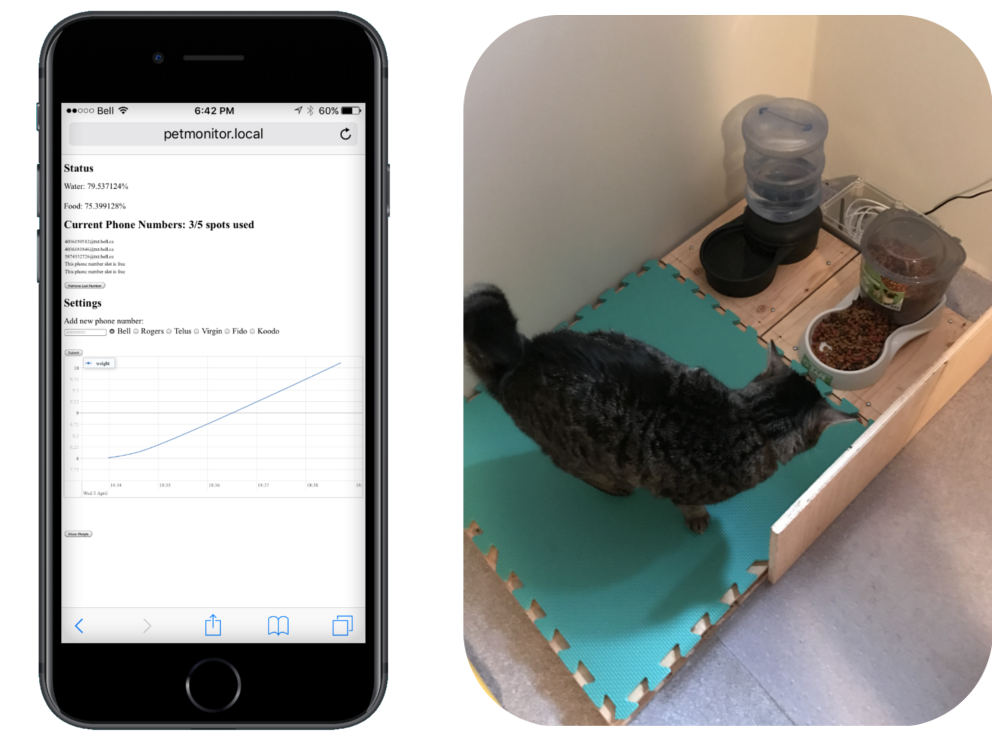
Upon completion of part 2, we have a pet monitoring system that does the following:
- Monitors status of water and food bowls. User can view current status via webpage, and are notified by text message if either drops below 5% full.
- Ability to modify list of phone numbers via webpage.
- Pet's weight is logged and graphed upon user's request on webpage.
The final installation image is shown below. If you have any questions or want to share your project, let us know!.