Lock up with Phidgets
by Lucas

Source Code
Introduction
I recently installed a small shed in my yard.
The shed is secured using a small padlock, however, there is only one key and it seems to always get misplaced. Implementing a door lock using Phidgets will allow the following:
- Use RFID tags to gain access to shed.
- Shed can be remotely unlocked.
People who regularly access the shed will be provided with a RFID tag like this which they can put in their wallet and forget about. I'll also create a webpage which will modify a PhidgetDictionary, allowing me to remotely open the shed. This will be useful for lending out tools without having to be home.
Hardware
- SBC3003 - Phidget SBC4
- PhidgetRFID Read-Write
- Lock-style solenoid.
- Power supply - make sure the voltage matches your solenoid.
- Relay - pick one that suits the current rating of your solenoid.
- RFID tags - pick a tag that suits your needs.
- Miniature Magnetic Contact Switch - this will allow us to know if the door is physically open or not.
Software
Libraries and Drivers
This project assumes that you are somewhat familiar with the basic operation of Phidgets (i.e. attaching and opening devices, reading data, etc). If this is your first time building a Phidgets project with JavaScript or a Phidget SBC, please refer to the JavaScript page or SBC page for instructions on how to setup your environment and get started.
Overview
A simple C program will run on the Phidget SBC and perform the following tasks:
- Connect to a PhidgetRFID.
- Connect to a PhidgetDigitalOutput. This will control a relay which, in turn, will control power to our solenoid.
- Connect to a PhidgetDigitalInput. This will allow us to interface with the contact switch, which gives us the real state of door.
- Connect to a PhidgetDictionary. This will allow information from the web page to be passed to the C program on the SBC.
- Log when the door is opened/closed. We can graph this on the web page.
The web page will perform the following tasks:
- Connect to a PhidgetDictionary. By pressing a button on the page a user can modify a dictionary key. The C program will get an update when this happens and unlock the shed.
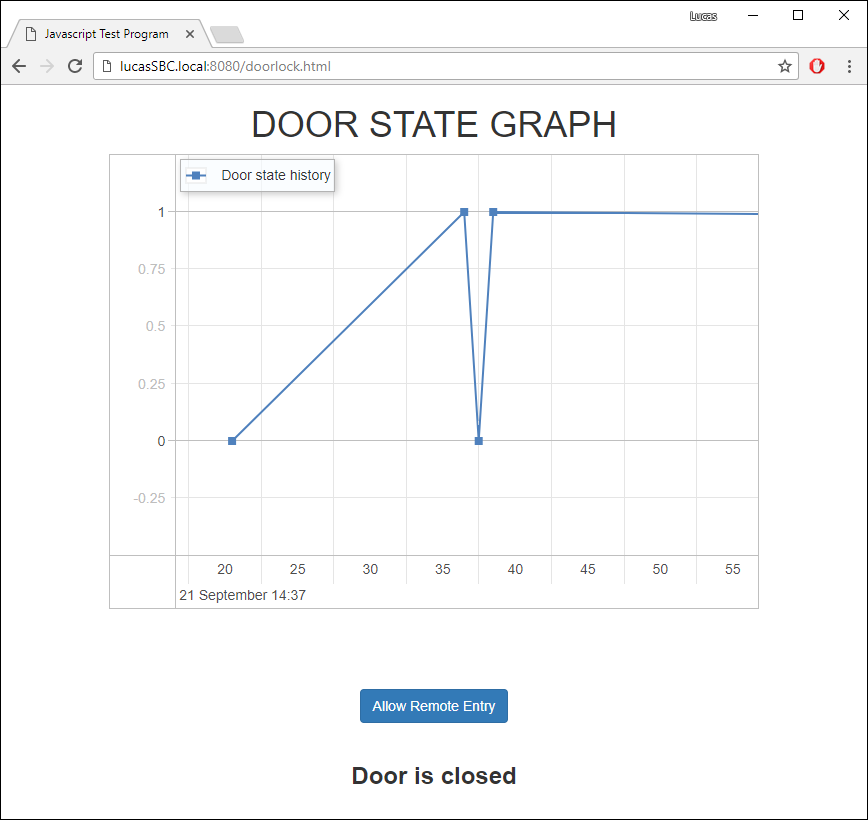
- Graph door state history.
Step 1: Server Configuration
The server configuration was very basic, and added only a single dictionary channel. To create a new dictionary, open the
SBC Web Interface and navigate to:
Phidgets->phidget22NetworkServer->Phidget Dictionaries

This dictionary will store some key-value pairs that will be used throughout the program. These are described below:
- remoteopen - This value will be updated via the web interface. The C program will unlock the door if this value is true.
- isDoorOpen - This value will be changed when the state of the magnetic contact switch changes. It will be shown via the web page and let users know if the door is open or closed.
Step 2: C Program on Phidget SBC
Enable server discovery and logging
The first thing we should do in our main function is enable server discovery and enable Phidget logging.
result = PhidgetLogging_enable(PHIDGET_LOG_INFO, "/path/to/logfile");
if (result != EPHIDGET_OK) {
	Phidget_log(PHIDGET_LOG_ERROR, "failed to enable logging");
	return 1;
}
result = PhidgetNet_enableServerDiscovery(PHIDGETSERVER_DEVICE);
if (result != EPHIDGET_OK) {
	Phidget_log(PHIDGET_LOG_ERROR, "failed to enable server discovery");
	return 1;
}
Create and Initialize PhidgetRFID
#define RFID_SERIALNUM 377511
...
int main(void){
...
	PhidgetRFIDHandle rfid;
	PhidgetReturnCode result;
	...
	result = Phidget_setDeviceSerialNumber(rfid, RFID_SERIALNUM);
	if (result != EPHIDGET_OK) {
		Phidget_log(PHIDGET_LOG_ERROR, "failed to set device serial number");
		return 1;
	}
	result = PhidgetRFID_setOnTagHandler(rfid, onTagHandler, NULL);
	if (result != EPHIDGET_OK) {
		Phidget_log(PHIDGET_LOG_ERROR, "failed to set on tag handler");
		return 1;
	}
	result = Phidget_openWaitForAttachment(rfid, 2000);
	if (result != EPHIDGET_OK) {
		Phidget_log(PHIDGET_LOG_ERROR, "failed to open");
		return 1;
	}
	result = PhidgetRFID_setAntennaEnabled(rfid, 1);
	if (result != EPHIDGET_OK) {
		Phidget_log(PHIDGET_LOG_ERROR, "failed to set antenna enabled");
		return 1;
	}
...
}
Create and Initialize everything else
Aside from the PhidgetRFID, we will also need to create and initialize the following:
- PhidgetDigitalOutput - this object will control the relay that will in turn control the solenoid.
- PhidgetDigitalInput - this object will interface with the magnetic contact switch. Subscribe to the change event and get notified immediately if the door has been opened or closed.
- PhidgetDictionary - this channel will allow us to send/receieve information from the web page. Subscribe to the change event and get notified immediately if the user wants to remotely unlock the door.
Use the PhidgetRFID template above to create the channels listed above, or, take a look at the provided code.
Main code
The main code for this project is fairly simple:
- Our main loop first checks if the dictionary has been updated.
dictionaryUpdatewill only be true if a user has remotely unlocked the door via the web page. If they have, we will recieve aonDictionaryUpdateevent. - Next, we check if
tagReadis true. This value is also updated via an event that we subscribed to earlier. When the PhidgetRFID detects a tag, it will notify our program through theonTagHandlerevent. We can then check if the tag has an expected value, and if so, unlock the door. - We also have the
onStateChangeHandlerevent which will notify us when the state of the magnetic switch has changed. When this happens, we simply update the PhidgetDictionary and the user can see the current state of the door via the web page.
int tagRead = 0; //flag that is used in main loop
int dictionaryUpdate = 0; //flag that is used in main loop
...
//Update handlers for PhidgetRFID, PhidgetDigitalInput, and PhidgetDictionary
void CCONV
onTagHandler(PhidgetRFIDHandle ch, void *ctx, char* tag, PhidgetRFID_Protocol protocol) {
	tagRead = 1;
	strcpy(name, tag);
	Phidget_log(PHIDGET_LOG_INFO, "got tag - %s", name);
}
void CCONV
onDictionaryUpdate(PhidgetDictionaryHandle ch, void *ctx, const char *key, const char* value){
	if(strcmp(key,"remoteopen") == 0)
		if(strcmp(value, "1") == 0)
			dictionaryUpdate = 1;
}
void CCONV
onStateChangeHandler(PhidgetDigitalInputHandle ch, void* context, int state){
	if(state){
		PhidgetDictionary_set(dict,"isDoorOpen","Door is closed");
		Phidget_log(PHIDGET_LOG_INFO, "Door is closed");
	}
	else{
		PhidgetDictionary_set(dict,"isDoorOpen","Door is open");
		Phidget_log(PHIDGET_LOG_INFO, "Door is open");
	}
}
...
//Function that activates relay
void changeDoorState(PhidgetDigitalOutputHandle ch, int state){
	PhidgetReturnCode result;
	result = PhidgetDigitalOutput_setState(ch, state);
	if(result != EPHIDGET_OK){
		const char* error;
		Phidget_getErrorDescription(result, &error);
		Phidget_log(PHIDGET_LOG_ERROR, "failed to set door state - %s", error);
		return;
	}
	Phidget_log(PHIDGET_LOG_INFO, "door state set to %d", state);
	logData(state);

}
...
int main(void){
...
	while (1) {
		if(dictionaryUpdate){ //if remote open has been activated
			Phidget_log(PHIDGET_LOG_INFO,"Remotely opening door");
			dictionaryUpdate = 0;
			changeDoorState(dig, ON);
			ssleep(5);//activate solenoid for 5 seconds
			changeDoorState(dig,OFF);
			PhidgetDictionary_set(dict,"remoteopen","0");
		}
		if (tagRead) {
			int activate = 0;
			tagRead = 0;
			if (strcmp(name, "User1") == 0)
				activate = 1;
			else if (strcmp(name, "User2") == 0)
				activate = 1;
			if(activate){
				changeDoorState(dig, ON);
				ssleep(5);//activate solenoid for 5 seconds
				changeDoorState(dig,OFF);
			}
		}
		sleep(1);
	}
...
}
Step 3: Graph using vis.js
To start, you can take a look at the doorlock.html file that is included with this project. This file should be placed at
/var/phidgets/www
For my program, the door status data was logged to /usr/userapps/doorlock/data/doorstatus.txt, therefore, in order for my web page to access the file, I created a
link to the data folder at my webservers docroot location.

The reference to this folder is made in the loadDataGraph() function as shown below:
function loadDataGraph(){
var url = '/doordata/doorstate.txt';
...
Graphing was done using vis.js
The installation project will detail how to remotely access your web page. For extra information on remotely accessing your web page, check out this project.
Conclusion
Stay tuned for the installation project!