OS - Linux: Difference between revisions
No edit summary |
|||
| (297 intermediate revisions by 10 users not shown) | |||
| Line 1: | Line 1: | ||
<metadesc>Communicate over USB with sensors, controllers and relays with Phidgets! Program in Linux using a wide variety of programming languages.</metadesc> | |||
[[Category:OS]] | |||
{| | |||
|style="vertical-align:middle; width: 60%;"| | |||
==Getting Started with Linux== | |||
Welcome to using Phidgets with Linux! | |||
If you are ready to go, the first step in creating Linux applications with Phidgets is installing our libraries. | |||
|{{TOC limit|3}} | |||
|} | |||
===Install=== | |||
The first step to using Phidgets with Linux is installing the Phidget22 libraries. | |||
{{LinuxSupport}} | |||
If you're running one of the supported distros, we recommend using the '''Package Install'''. For other systems, you can use the '''Source Install'''. | |||
=== | |||
<div class="bigTabs"> | |||
<tabber> | |||
Package Install= | |||
====Install Script==== | |||
To run the install script and install phidget22, enter the following command in the terminal: | |||
{{LinuxInstallScript}} | |||
====Manual Install==== | |||
To install our package repository manually, enter the following command in the terminal, replacing ''distro'' with your distro codename: | |||
{{LinuxGetKey}} | |||
We support Debian releases from 6 to current, and Ubuntu LTS releases from 14.04 to current. If you are using another flavour of Linux (such as Mint), which is based on Ubuntu or Debian, use the corresponding Ubuntu or Debian codename. | |||
Update your package lists: | |||
{{LinuxAptUpdate}} | |||
Finally, install the Phidget package by entering the command below: | |||
{{LinuxAptInstall}} | |||
====Additional Packages==== | |||
You may also want to apt-get install the following optional packages: | |||
* '''libphidget22-dev''': The C development libraries for Phidget22 | |||
* '''libphidget22extra''': Extra runtime library required for the Network Server and Admin tools | |||
* '''phidget22networkserver''': The [[Phidget Network Server]], which enables use of Phidgets over your network | |||
* '''libphidget22java''': The Java libraries for Phidget22 | |||
* '''phidget22admin''': An administrator utility for listing Phidgets and upgrading firmware | |||
* '''phidget22wwwjs''': The JavaScript libraries for Phidget22. This package also installs the HTML examples which can be accessed through the web interface | |||
The libraries are now installed on your machine. Next, set up the UDev rules below. | |||
|-| | |||
< | Source Install= | ||
< | ====Source Install==== | ||
To install our libraries, first install libusb-1.0 development libraries. The exact command and package name will vary depending on distribution. For Debian based distributions, including Ubuntu and Mint, the command would be: | |||
<syntaxhighlight lang=bash> | |||
apt-get install libusb-1.0-0-dev | |||
</syntaxhighlight> | |||
Next, download and unpack the following files: | |||
*[https://cdn.phidgets.com/downloads/phidget22/libraries/linux/libphidget22.tar.gz libphidget22] (Mandatory) | |||
*[https://cdn.phidgets.com/downloads/phidget22/libraries/linux/libphidget22extra.tar.gz libphidget22extra] (Optional - needed by NetworkServer and Admin) | |||
*[https://cdn.phidgets.com/downloads/phidget22/libraries/linux/libphidget22java.tar.gz libphidget22java] (Optional - Java Libraries) | |||
*[https://cdn.phidgets.com/downloads/phidget22/servers/linux/phidget22networkserver.tar.gz phidget22networkserver] (Optional - [[Phidget Network Server]]) | |||
*[https://cdn.phidgets.com/downloads/phidget22/tools/linux/phidget22admin.tar.gz phidget22admin] (Optional - Phidget Admin Tool) | |||
Open the README file that is included at the top of each directory. This file will give you important information about how to properly install the files. | |||
Libraries are installed in /usr/local/lib by default. If you run into trouble finding the libraries during linking or at runtime, this probably means that /usr/local/lib is not on the library path for your distribution. | |||
You can handle this in a number of ways: | |||
Specify a different install folder during compile | |||
<syntaxhighlight lang=bash>./configure --prefix=/usr && make && sudo make install</syntaxhighlight> | |||
OR Add /usr/local/lib to the system-wide library path | |||
<syntaxhighlight lang=bash>echo /usr/local/lib >> /etc/ld.so.conf && sudo ldconfig</syntaxhighlight> | |||
OR Add /usr/local/lib in your local shell every time | |||
<syntaxhighlight lang=bash>export LD_LIBRARY_PATH=$LD_LIBRARY_PATH:/usr/local/lib</syntaxhighlight> | |||
The libraries are now installed on your machine. Next, you should set the UDev Rules. | |||
</ | </tabber> | ||
</div> | </div> | ||
=== Setting UDev Rules === | |||
By default, Linux will not grant permission to regular users to access physical hardware as a security feature. This means that in order to run Phidgets code from user space you must grant yourself root privileges via sudo. For example: | |||
sudo ./HelloWorld | |||
You can grant access manually or, more commonly, set up a rules file to do it automatically keying off of the vendor code for Phidget USB devices. To do this, create a text file called "99-libphidget22.rules" with the following contents: | |||
# All current and future Phidgets - Vendor = 0x06c2, Product = 0x0030 - 0x00af | |||
SUBSYSTEMS=="usb", ACTION=="add", ATTRS{idVendor}=="06c2", ATTRS{idProduct}=="00[3-a][0-f]", MODE="666" | |||
Where mode 666 means every user has permission to read and write to the specified file/device. You need to then move this file to "/etc/udev/rules.d". Now you can run Phidget related code as a regular user without the OS denying permission. | |||
===Verify=== | |||
The best way to verify that your libraries are working properly is to compile and run an example program. | |||
First, download and unpack this C example: | |||
*[https://cdn.phidgets.com/downloads/phidget22/examples/c/Manager/Phidget22_HelloWorld_C_Ex.zip HelloWorld C example] | |||
'''Note:''' If using the Debian intallation methods, you will need to install the '''libphidget22-dev''' package to use the C libraries for Phidget22 | |||
Next, open the terminal at the example location. Compile the example by entering the following command: | |||
<syntaxhighlight lang=bash> | |||
< | gcc HelloWorld.c -o HelloWorld -lphidget22 | ||
. | </syntaxhighlight> | ||
</ | |||
= | Run the HelloWorld example: | ||
<syntaxhighlight lang=bash> | |||
./HelloWorld | |||
</syntaxhighlight> | |||
Your terminal should look something like this: | |||
[[File:linux_helloworld.PNG|link=|center]] | |||
The HelloWorld program will simply communicate when a Phidget has been attached or detached, as can be seen in the image above. | |||
Your Phidget is now able to communicate with your development machine. The next step is selecting a programming language so you can start to write some code! | |||
== | ==Programming== | ||
Ready to write some code? Select one of the programming languages below: | |||
{{Programming_Languages_Table}} | |||
== | ==Older Versions== | ||
If you need older versions of the Phidget22 Linux libraries, [{{SERVER}}/downloads/phidget22/libraries/linux/libphidget22/ click here]. | |||
If you need Phidget21 Linux Libraries, [{{SERVER}}/downloads/phidget21/libraries/linux/libphidget/ click here]. | |||
Latest revision as of 16:40, 21 March 2024
Getting Started with LinuxWelcome to using Phidgets with Linux! If you are ready to go, the first step in creating Linux applications with Phidgets is installing our libraries. |
Install
The first step to using Phidgets with Linux is installing the Phidget22 libraries.
| Debian 6 (Squeeze) | i386 | armel | |||
| Debian 7 (Wheezy) | |||||
| Debian 8 (Jessie) | armhf | ||||
| Debian 9 (Stretch) | |||||
| Debian 10 (Buster) | amd64 | arm64 | |||
| Debian 11 (Bullseye) | |||||
| Debian 12 (Bookworm) | |||||
| Ubuntu Xenial 16.04 LTS | i386 | armhf | |||
| Ubuntu Bionic 18.04 LTS | amd64 | arm64 | |||
| Ubuntu Focal 20.04 LTS | |||||
| Ubuntu Jammy 22.04 LTS | |||||
| Ubuntu Noble 24.04 LTS | |||||
If you're running one of the supported distros, we recommend using the Package Install. For other systems, you can use the Source Install.
Install Script
To run the install script and install phidget22, enter the following command in the terminal:
curl -fsSL https://www.phidgets.com/downloads/setup_linux | bash -
apt-get install -y libphidget22
curl -fsSL https://www.phidgets.com/downloads/setup_linux | sudo -E bash -
sudo apt-get install -y libphidget22
Manual Install
To install our package repository manually, enter the following command in the terminal, replacing distro with your distro codename:
wget -qO /usr/share/keyrings/phidgets.gpg \
  https://www.phidgets.com/gpgkey/pubring.gpg
echo deb [signed-by=/usr/share/keyrings/phidgets.gpg] \
  http://www.phidgets.com/debian distro main \
  > /etc/apt/sources.list.d/phidgets.list
sudo wget -qO /usr/share/keyrings/phidgets.gpg \
  https://www.phidgets.com/gpgkey/pubring.gpg
echo deb [signed-by=/usr/share/keyrings/phidgets.gpg] \
  http://www.phidgets.com/debian distro main | sudo tee \
  /etc/apt/sources.list.d/phidgets.list > /dev/null
We support Debian releases from 6 to current, and Ubuntu LTS releases from 14.04 to current. If you are using another flavour of Linux (such as Mint), which is based on Ubuntu or Debian, use the corresponding Ubuntu or Debian codename.
Update your package lists:
apt-get update
sudo apt-get update
Finally, install the Phidget package by entering the command below:
apt-get install libphidget22
sudo apt-get install libphidget22
Additional Packages
You may also want to apt-get install the following optional packages:
- libphidget22-dev: The C development libraries for Phidget22
- libphidget22extra: Extra runtime library required for the Network Server and Admin tools
- phidget22networkserver: The Phidget Network Server, which enables use of Phidgets over your network
- libphidget22java: The Java libraries for Phidget22
- phidget22admin: An administrator utility for listing Phidgets and upgrading firmware
- phidget22wwwjs: The JavaScript libraries for Phidget22. This package also installs the HTML examples which can be accessed through the web interface
The libraries are now installed on your machine. Next, set up the UDev rules below.
Source Install
To install our libraries, first install libusb-1.0 development libraries. The exact command and package name will vary depending on distribution. For Debian based distributions, including Ubuntu and Mint, the command would be:
apt-get install libusb-1.0-0-dev
Next, download and unpack the following files:
- libphidget22 (Mandatory)
- libphidget22extra (Optional - needed by NetworkServer and Admin)
- libphidget22java (Optional - Java Libraries)
- phidget22networkserver (Optional - Phidget Network Server)
- phidget22admin (Optional - Phidget Admin Tool)
Open the README file that is included at the top of each directory. This file will give you important information about how to properly install the files.
Libraries are installed in /usr/local/lib by default. If you run into trouble finding the libraries during linking or at runtime, this probably means that /usr/local/lib is not on the library path for your distribution.
You can handle this in a number of ways:
Specify a different install folder during compile
./configure --prefix=/usr && make && sudo make install
OR Add /usr/local/lib to the system-wide library path
echo /usr/local/lib >> /etc/ld.so.conf && sudo ldconfig
OR Add /usr/local/lib in your local shell every time
export LD_LIBRARY_PATH=$LD_LIBRARY_PATH:/usr/local/lib
The libraries are now installed on your machine. Next, you should set the UDev Rules.
Setting UDev Rules
By default, Linux will not grant permission to regular users to access physical hardware as a security feature. This means that in order to run Phidgets code from user space you must grant yourself root privileges via sudo. For example:
sudo ./HelloWorld
You can grant access manually or, more commonly, set up a rules file to do it automatically keying off of the vendor code for Phidget USB devices. To do this, create a text file called "99-libphidget22.rules" with the following contents:
- All current and future Phidgets - Vendor = 0x06c2, Product = 0x0030 - 0x00af
SUBSYSTEMS=="usb", ACTION=="add", ATTRS{idVendor}=="06c2", ATTRS{idProduct}=="00[3-a][0-f]", MODE="666"
Where mode 666 means every user has permission to read and write to the specified file/device. You need to then move this file to "/etc/udev/rules.d". Now you can run Phidget related code as a regular user without the OS denying permission.
Verify
The best way to verify that your libraries are working properly is to compile and run an example program.
First, download and unpack this C example:
Note: If using the Debian intallation methods, you will need to install the libphidget22-dev package to use the C libraries for Phidget22
Next, open the terminal at the example location. Compile the example by entering the following command:
gcc HelloWorld.c -o HelloWorld -lphidget22
Run the HelloWorld example:
./HelloWorld
Your terminal should look something like this:
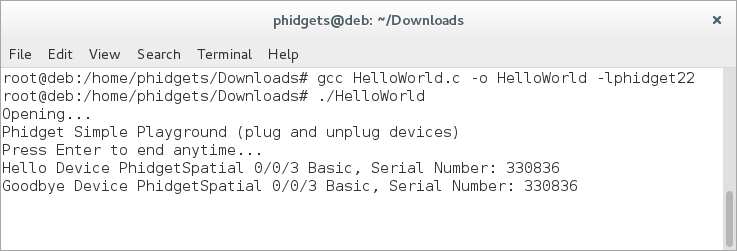
The HelloWorld program will simply communicate when a Phidget has been attached or detached, as can be seen in the image above.
Your Phidget is now able to communicate with your development machine. The next step is selecting a programming language so you can start to write some code!
Programming
Ready to write some code? Select one of the programming languages below:
| Core Languages | Mobile Languages | Other Languages |
Older Versions
If you need older versions of the Phidget22 Linux libraries, click here.
If you need Phidget21 Linux Libraries, click here.