Language - Objective C
Get Started
With the Phidget22 library, it's easy to create Objective C applications that work with Phidget devices.
Objective C Libraries
If you've installed the Phidget drivers for macOS or iOS, then you already have the files you need for your project.
macOS Considerations
Legacy Phidgets running a HID USB stack require a driver extension (macOS 10.15 and newer) or a kernel extension (macOS 10.14 and earlier). During development, we recommend downloading the appropriate package which will install the extension. When deploying applications, review the README in the macOS Development Files for information about bundling the extension with your application.
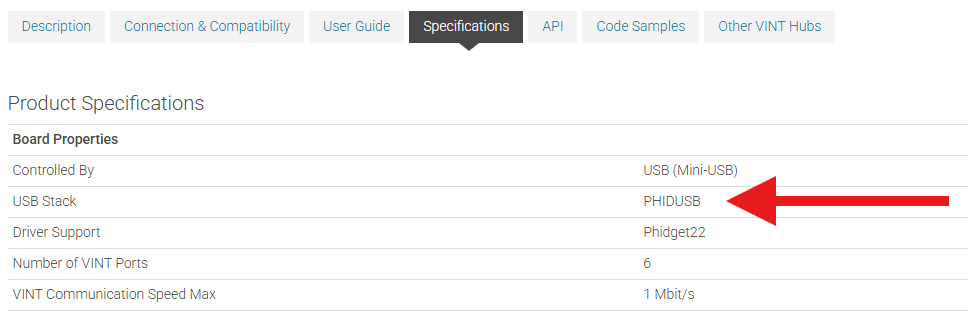
Determining USB Stack
To determine which USB stack your device is running, navigate to the product page and then to the specification tab, and look for the USB Stack specification. If you are using a VINT device, navigate to the product page for the VINT Hub you are using.
Example Code
You can find examples for macOS and iOS on our Code Samples page.

XCode Configuration
Xcode is an IDE provided by Apple that can be used to develop code in a wide variety of programming languages, including Objective C.
macOS
Use Our Examples |
||
| Start the example by pressing the Run button: | 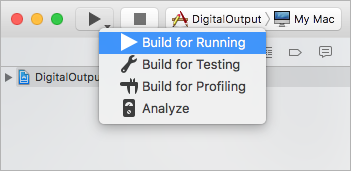
| |
| The application will attach to the Phidget and show you some basic information. Here is an example of a Digital Output channel on a RFID Phidget. | 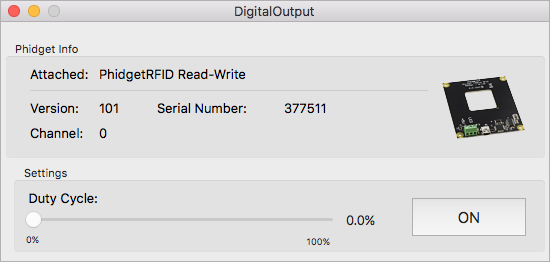
| |
| You should now have the example up and running for your device. Play around with the device and experiment with some of the functionality. The next step is configuring your project and writing your own code. | ||
Starting a New Project
| ||
| When you are building a project from scratch, or adding Phidgets to an existing project, you'll need to configure your development environment to properly link the Phidget iOS library. To begin, create a new Xcode project and select a macOS Cocoa application. | 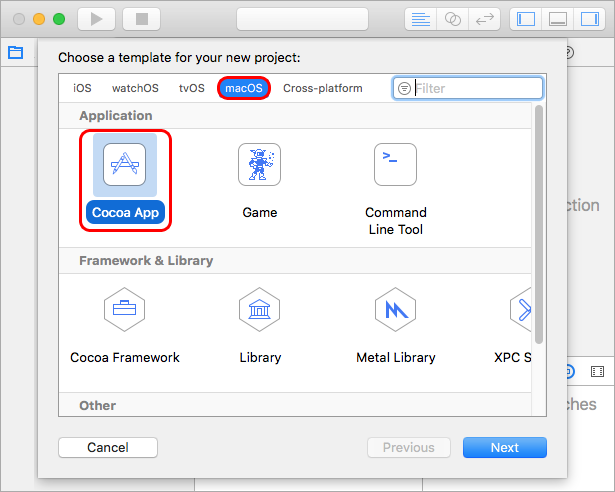
| |
| Navigate to your target's Build Settings and find the Framework Search Path setting. | 
| |
| Add a reference to /Library/Frameworks where the Phidget22 framework is installed. | 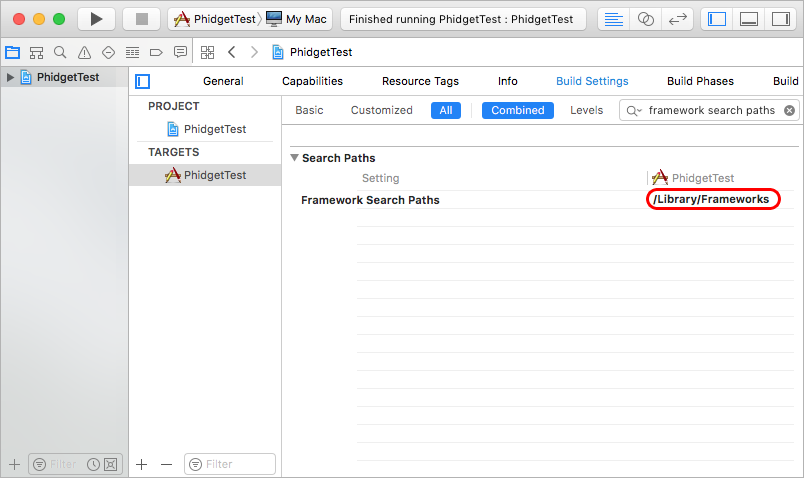
| |
| Next, navigate to the Linked Frameworks and Libraries setting under General and add a reference to the Phidget22 framework which is installed to /Library/Frameworks. | 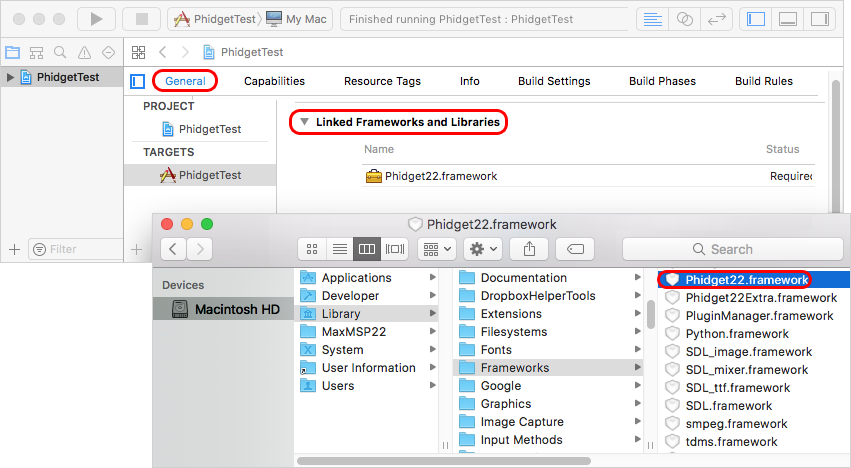
| |
Lastly, navigate to your header file and add a reference to phidget22.h
#import <Phidget22/phidget22.h>Your project now has access to Phidgets. See Phidget Programming Basics for guidance on writing your own code. | ||
iOS
Use Our Examples |
||
To develop iOS apps in Objective C, we'll be using XCode on a macOS development machine. You'll need both:
| ||
| Unpack the Objective-C example and navigate to Phidget.xcodeproj. Open the file in Xcode. | 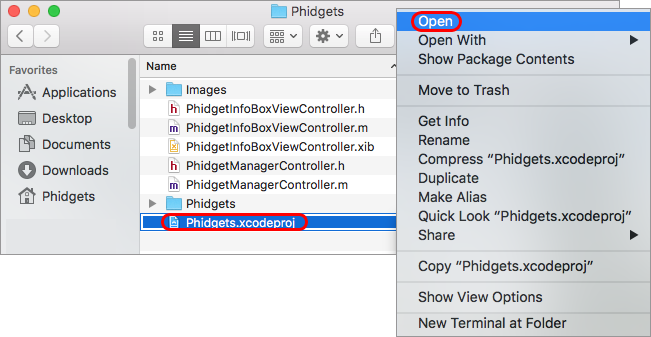
| |
| With Phidgets as your target, navigate to Build Settings and find the Header Search Paths setting. | 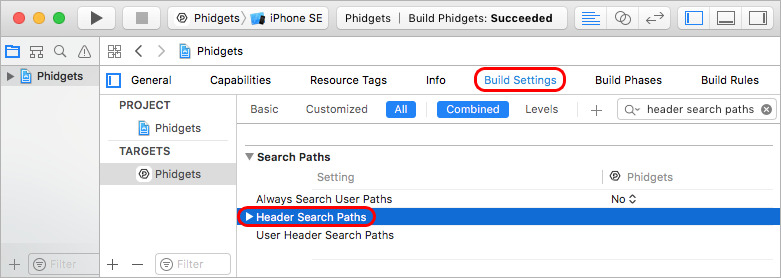
| |
| The header file phidget22.h was included in the Phidget iOS libraries download. Add a reference to the folder that contains phidget22.h under the Header Search Paths setting. | 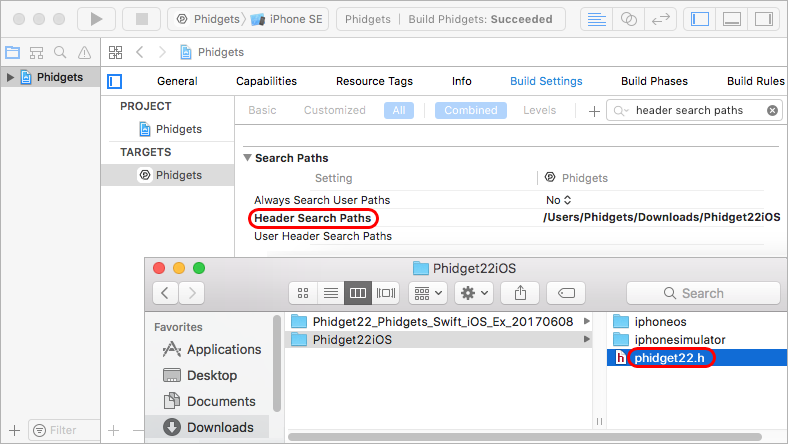
| |
| Next, find the Other Linker Flags setting. | 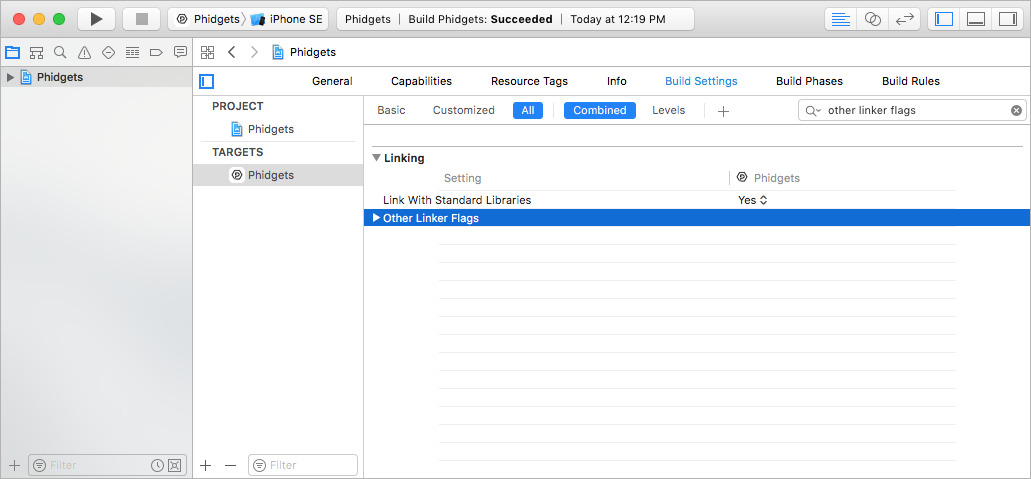
| |
| Add a reference to the Phidget libraries that were included in the Phidget iOS libraries download. | 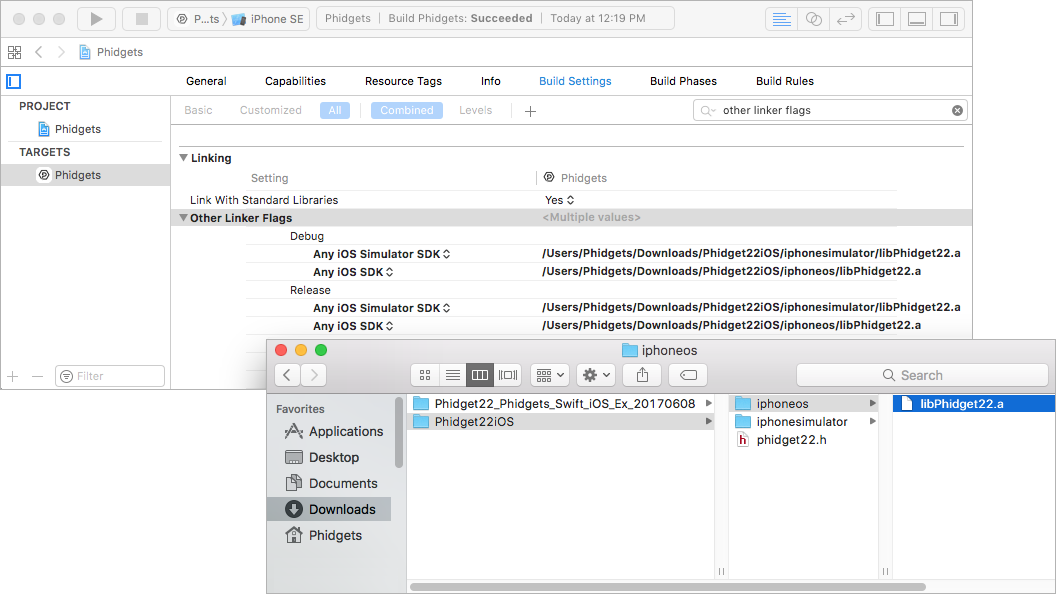
| |
| Now that the library files are linked, simply select the type of device you would like the application to run on and press play. | 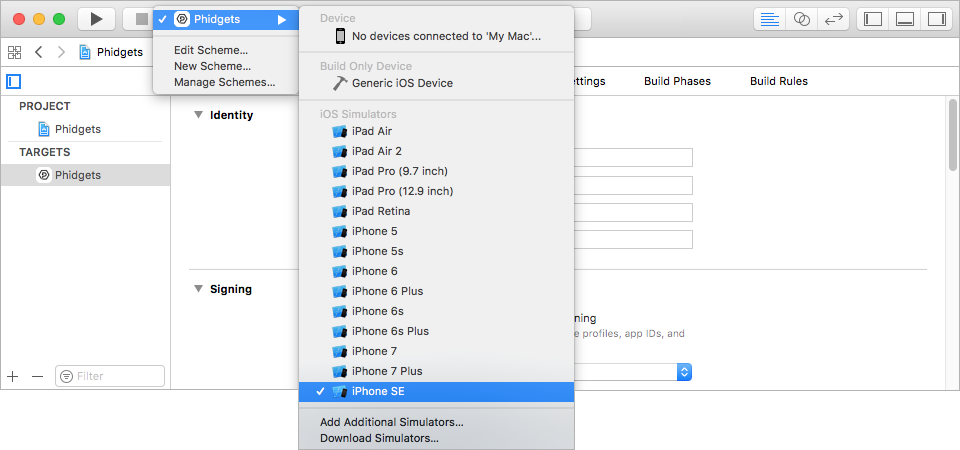
| |
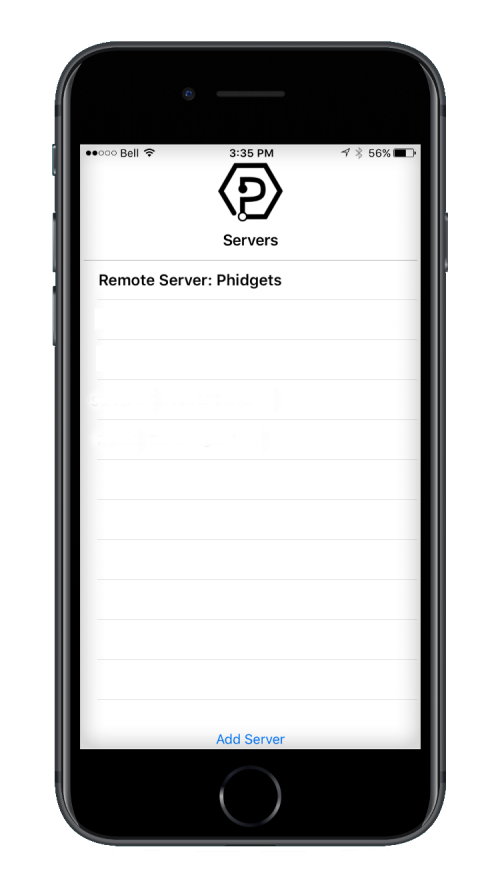
| The application will detect any servers that are currently online and have Phidgets connected. Here is an example output. First, confirm that the Phidgets Example is working. Then, run the example for your specific device by selecting your server and then continue to navigate through the hierarchy until you reach your device. After tapping your device, the example will show automatically. Currently, we have example programs for the following classes:
|
| |
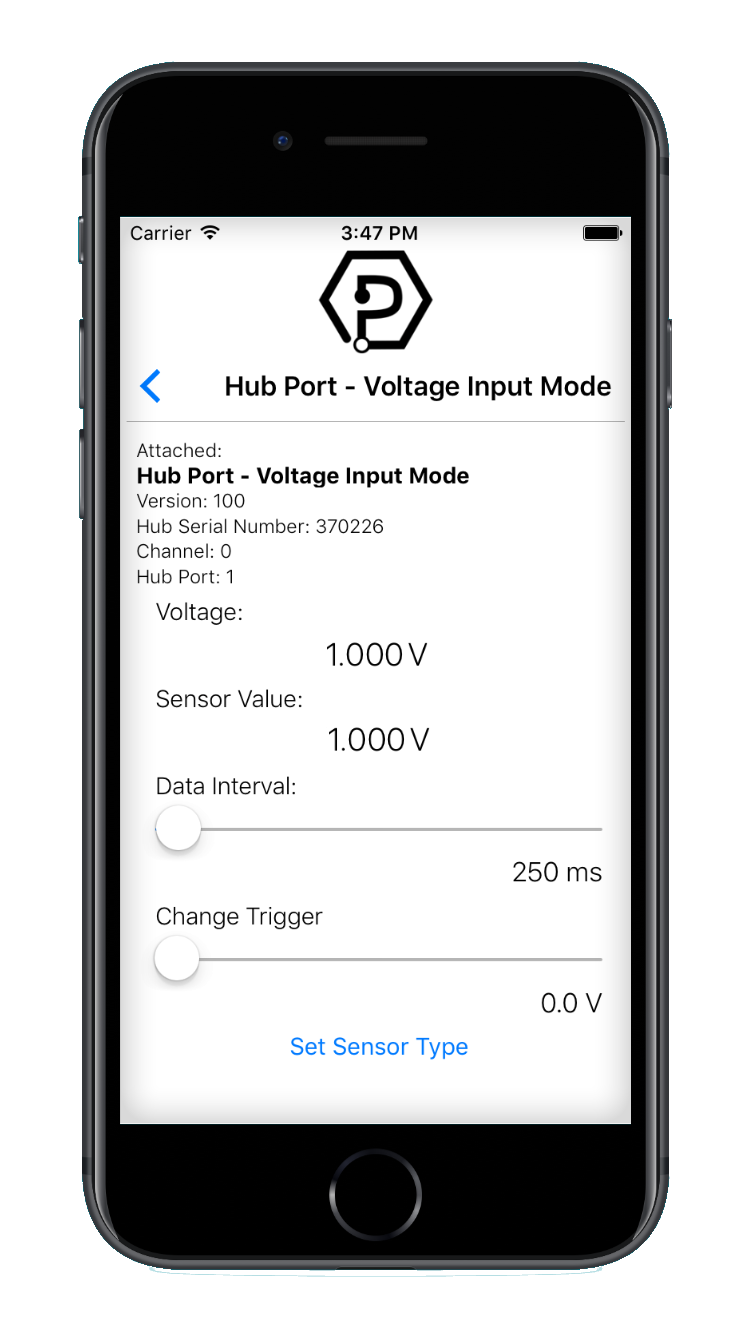
| Here is an example of what the VoltageInput example looks like. You should now have the example up and running for your device. Play around with the device and experiment with some of the functionality. When you are ready, the next step is configuring your project and writing your own code! |
| |
Starting a New Project
| ||
| Select an iOS application. For this tutorial's purposes, we will use a Single View Application. | 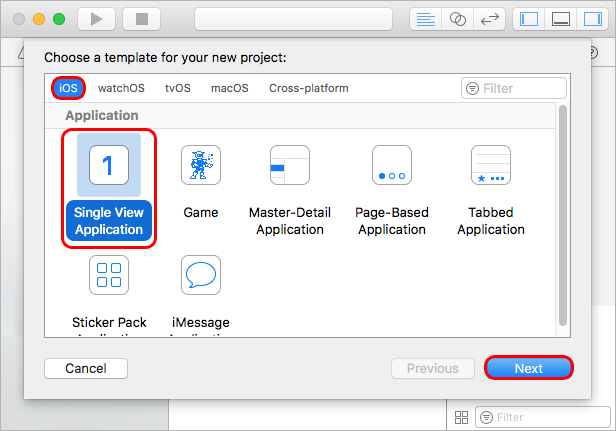
| |
| Name the project, select Objective-C as the language, and choose which devices will be supported. | 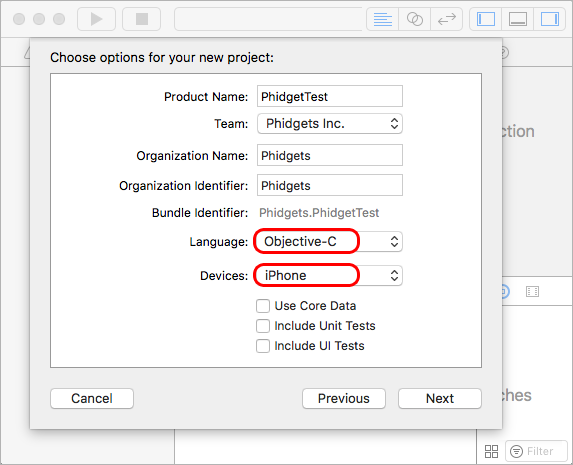
| |
| Now that your project is created, you need to add references to the Phidget iOS libraries in the same way you added them to run our example code earlier in this guide.
After you have linked the Phidget iOS libraries, simply add a reference to phidget22.h in your header file: #import <Phidget22/phidget22.h>The project now has access to Phidgets and we are ready to begin coding. See Phidget Programming Basics for guidance on writing your own code. | ||
Phidget Programming Basics
To learn more about the structure of the example code, visit our Phidget Programming Basics guide.