Home Automation With Phidgets
Introduction
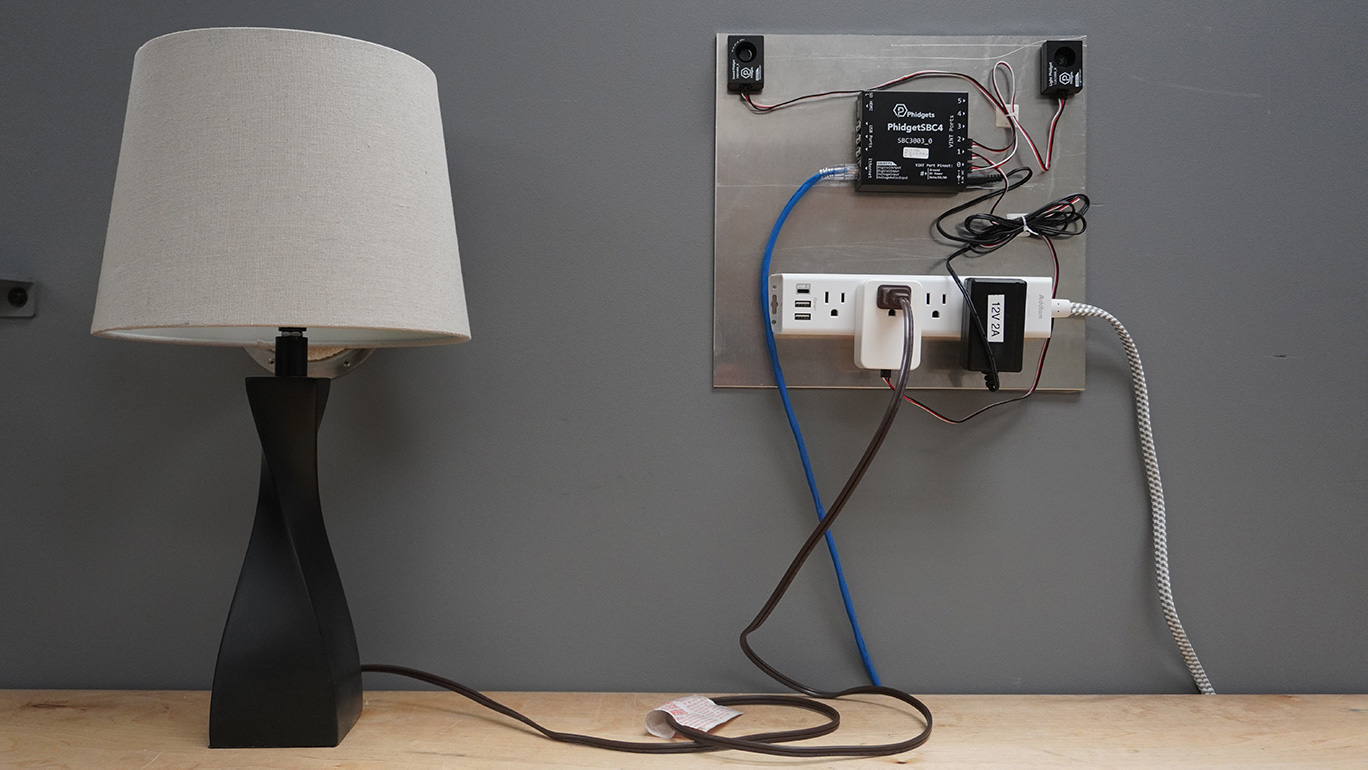
This project will provide a basic introduction to home automation with Phidgets. Ambient light and sound information will be monitored, and users will be able to control a single light source through a web interface.
Parts

This project utilizes the following hardware:
- Phidget SBC4 - SBC3003_0
- WiFi USB Adapter (RT5370) or a network cable
- Light Phidget - LUX1000_0
- Sound Phidget - SND1000_0
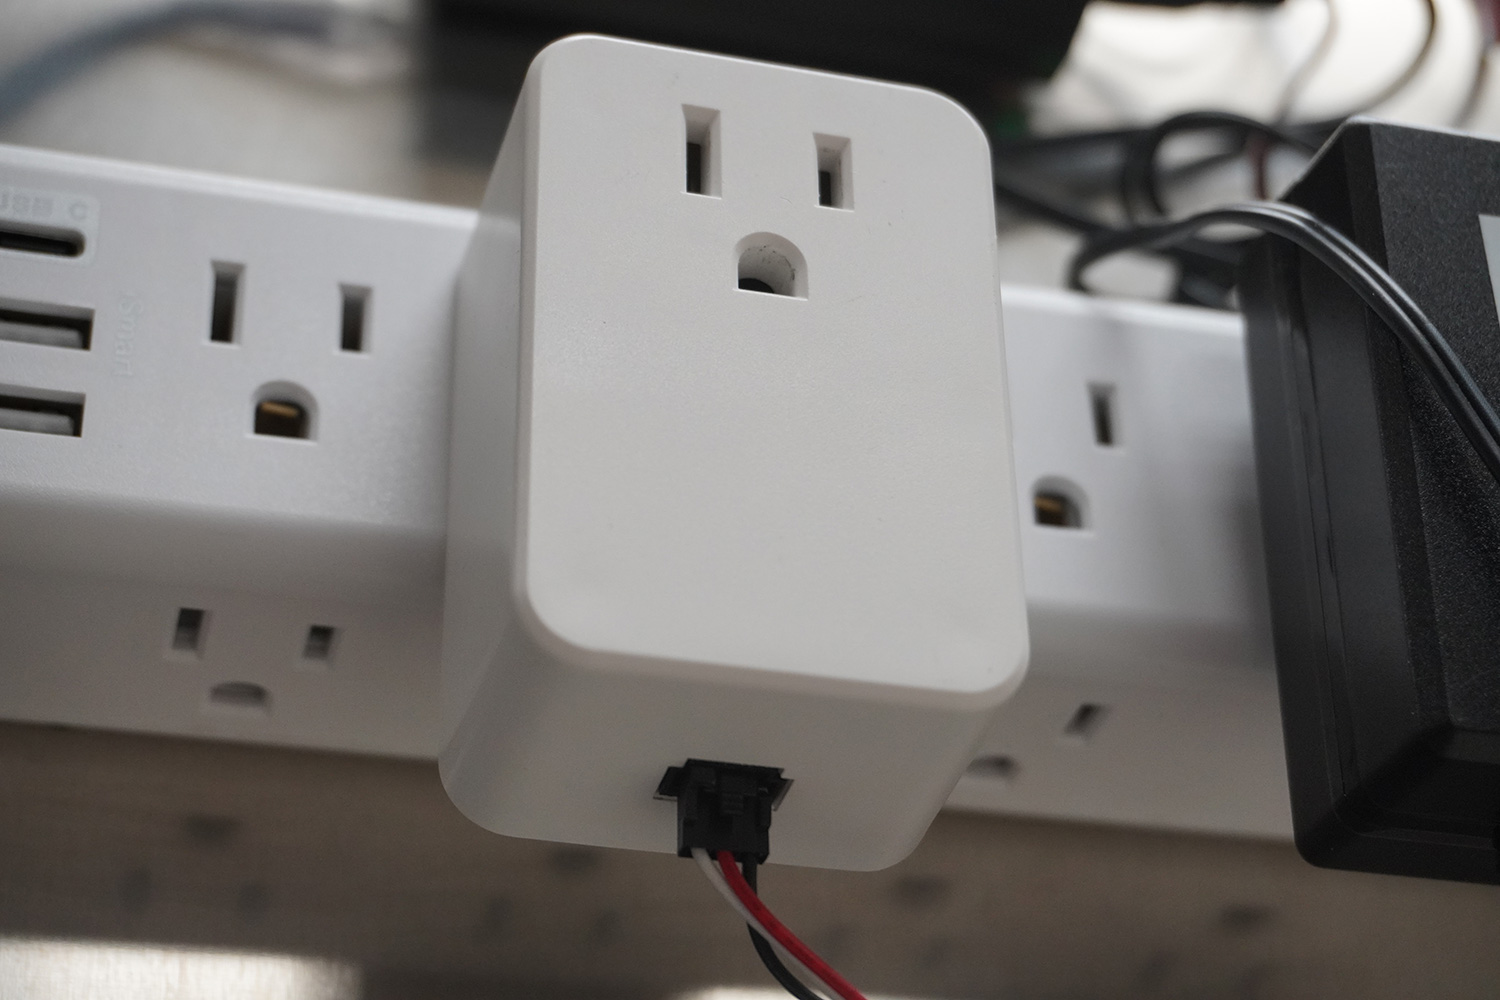
- Power Plug Phidget - PSU1000_0
- Phidget Cables
Assembly

For this basic demonstration, the sensors were simply adhered to an aluminum plate using a hook-and-loop style fastener. For a long-term installation, you may consider a more durable method.
Lighting Control
In order to control a light source through a web interface, a Power Plug Phidget is utilized. This device makes it easy and safe to control a 120VAC appliance, like a lamp.
Software
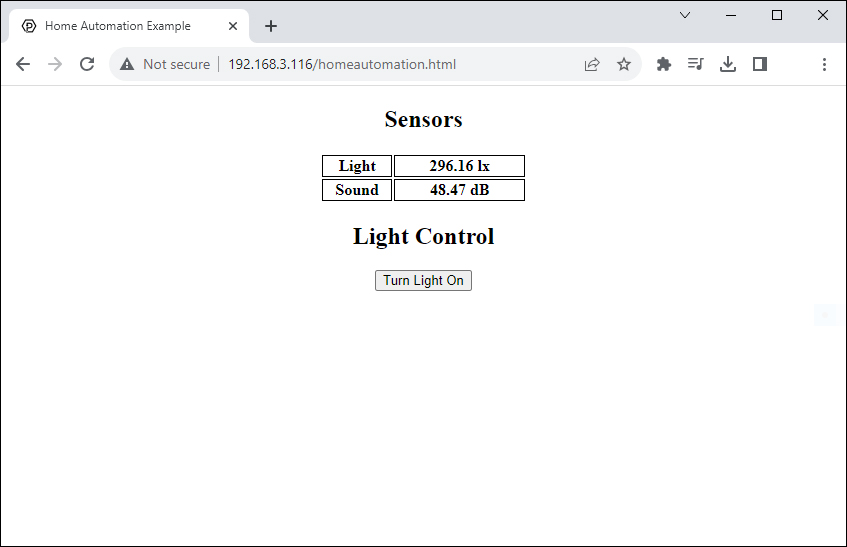
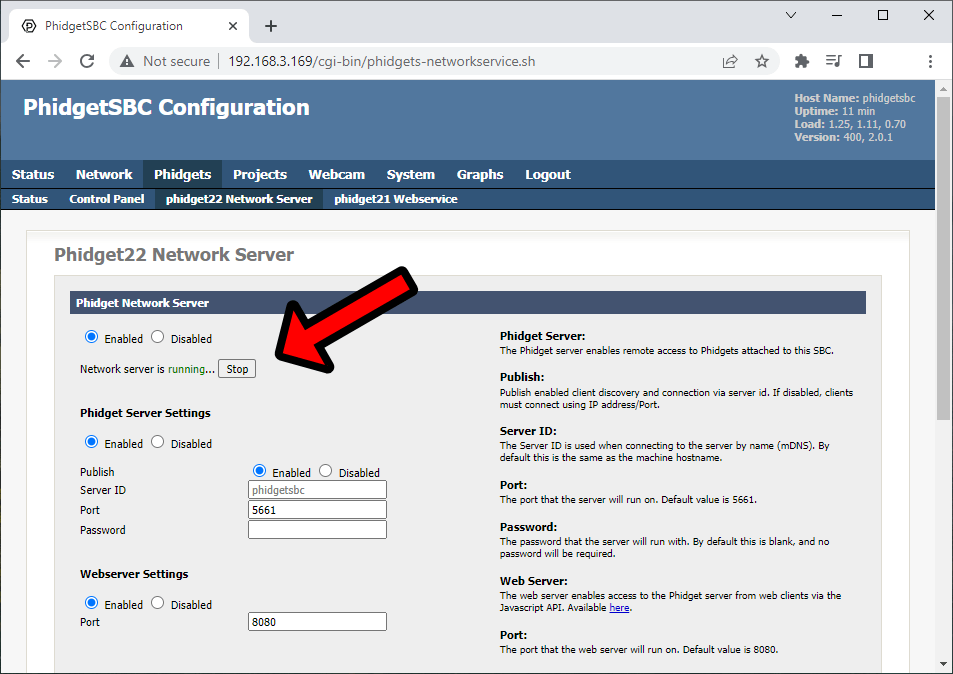
For this project, we will create a simple webpage that is hosted by the Phidget SBC4. Using the Phidget Network Server and the Phidget22 JavaScript libraries, we will send commands to the Power Plug Phidget to remotely control a light. The interface will also provide information about ambient light and sound values.
Configuration
We will be using the Phidget Network Server to communicate with the DC Motor Phidgets connected to the Phidget SBC4. The Phidget Network Server can be enabled by navigating to Phidgets > phidget22 Network Server.
Webpage Code
We will create an HTML file at /var/www/ titled homeautomation.html.
HTML Layout
<style>
	table {
		margin:auto;
		width:500px;
	}
	th, td {
		border-color:black;
		border-style:ridge;
		border-width:1px;
	}
</style>
<title>Home Automation Example</title>
<body>
	<h2 style="text-align:center">Sensors</h2>
	<table style="width:25%">
		<tr>
			<th style="width:35%">Light</th>
			<th id="lightLabel"></th>
		</tr>
		<tr>
			<th>Sound</th>
			<th id="soundLabel" style="text-align:center"></td>
		</tr>
	</table>
	<h2 style="	text-align:center">Light Control</h2>
	<center><button type="button" id="lightButton">Turn Light On</button></center>
</body>
JavaScript
This section of the code creates four DC Motor objects. Each object is mapped to a specific motor controller (and therefore, a specific motor) using setHubPort.
<script src="https://unpkg.com/phidget22@^3.10/browser/phidget22.min.js"></script>
<script>
async function runExample() {
	const conn = new phidget22.NetworkConnection(8080, 'phidgetsbc');
	await conn.connect();

	const lightSensor = new phidget22.LightSensor();
	const soundSensor = new phidget22.SoundSensor();
	const lightRelay = new phidget22.DigitalOutput();

	lightSensor.onIlluminanceChange = (illuminance) => {
		document.getElementById("lightLabel").innerHTML = illuminance.toString()+" lx";
	};
	soundSensor.onSPLChange = (SPL) => {
		document.getElementById("soundLabel").innerHTML = SPL.toString()+" dB";
	};

	lightRelay.setHubPort(0);
	lightRelay.setIsHubPortDevice(true);

	await lightSensor.open(5000);
	await soundSensor.open(5000);
	await lightRelay.open(5000);

	document.getElementById("lightButton").onclick = function() {
		lightRelay.setState(!lightRelay.getState());
		var lightString = lightRelay.getState() ? "Turn Light On" : "Turn Light Off"
		document.getElementById("lightButton").innerHTML = lightString;
    }
}

runExample();
Result
We now have a simple webpage that displays sound and light values, and a button to control a light source.
Going Forward
To improve on this project, consider the following:
- Create a script that runs on the Phidget SBC4 and logs sound and light values to a file. Use the web interface to display the values on a graph.
- Use a Phidget Dictionary in your script to make live sound and light values available for your webpage.