KIT4030 User Guide
The Phidget Cable Kit makes it easy to add a Phidget connector to your sensor so it can be plugged into a VINT Hub or InterfaceKit. With this kit, you have two different options depending on what tools you have available. If you have access to a soldering iron, we recommend the Solder and Heat Shrink method. If you don't have soldering tools, use the Butt Splice Connector method.
Solder and Heat Shrink
Tools needed:
- Soldering iron
- Solder
- Heat gun or lighter
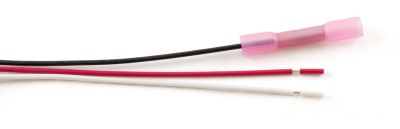
Step 1: Remove the insulation from the end of the wires of the Phidget cable. A cut has already been made so it can be pulled off by and. Strip the ends of the wires of your sensor to a similar length as the Phidget cable.
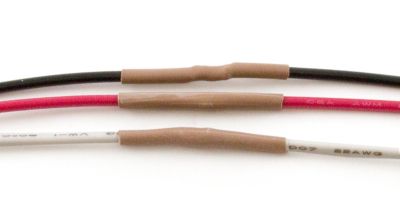
Step 2: Thread a piece of heat shrink tubing onto each wire and push it all the way to the connector.
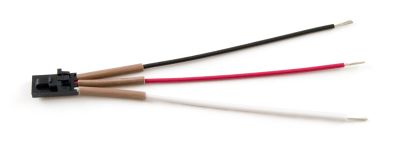
Step 3: Twist each sensor cable wire to the corresponding wire on your sensor. The red wire is 5V power, the black wire is ground, and the white wire is the data line.
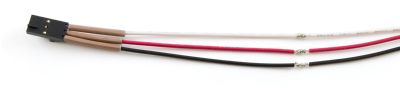
Step 4: Melt a small amount of solder into each wire connection. If you add too much solder, the heat shrink may not fit over the connection.

Step 5: Slide each piece of heat shrink so it's centered on the connection point, and use heat to shrink it in place. If you don't have a heat gun to do this, you can use a simple barbecue lighter or candle, just keep the cable far from the visible flame so it doesn't burn.
Butt Splice Connectors
Tools needed:
- Wire crimper or heavy pliers
- Heat gun or lighter
Step 1: Remove the insulation from the end of the wires of the Phidget cable. A cut has already been made so it can be pulled off by and. Strip the ends of the wires of your sensor to a similar length as the Phidget cable.
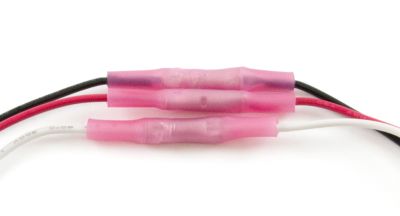
Step 2: Slide a butt splice connector onto one of the cables, visibly checking to make sure all of the strands go inside the metal tube.
Step 3: Using a crimp tool or pliers, crush the metal tube on the side the cable is inserted. Make sure it's being crushed onto the bare wire and not the wire insulation. You should be looking down into the connector as you crush it, to make sure it's secure before you attempt to move the cable. Repeat for the other two wires.
Step 4: Repeat for the wires of your sensor, matching each wire with the appropriate Phidget cable wire. The red wire is 5V power, the black wire is ground, and the white wire is the data line.
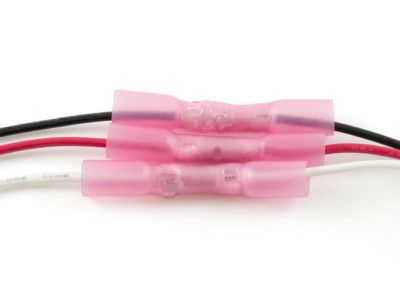
Step 5: Use a heat gun to shrink the ends of the connector tight to the cable. This provides strain relief on the weakest part of the connection where the metal is crushed around the stranded wire. If you don't have a heat gun to do this, you can use a simple barbecue lighter or candle, just keep the cable far from the visible flame so it doesn't burn.