Language - Swift
Introduction
If this is your first time working with a Phidget, we suggest starting with the Getting Started page for your specific device. This can be found in the user guide for your device. That page will walk you through installing drivers and libraries for your operating system, and will then bring you back here to use Swift specifically. Swift is capable of using the complete Phidget22 API, including events. We also provide example code in Swift for all Phidget devices.
Swift is capable of using the complete Phidget API, including events. When using it on iOS devices, however, Phidgets can only be remotely controlled over a network using the Phidget Network Service because they don't support direct USB connection.
Swift can be developed with Xcode on macOS.
Quick Downloads
List of download links, to be added once files are available
Getting Started with Swift
macOS
Xcode
Use our examples
Write your own code
iOS
Xcode
Use our examples
If Xcode is not already installed on your system, then you will need to install it. You can download it for free from the Mac app store.
Start by ensuring the Phidget Network Service is running on the computer that the Phidget is physically plugged in and connected to. This computer needs to have a USB port and should be running macOS or one of our other supported operating systems. For directions on how to set up and run the Phidget Network Service refer to the page for that operating system.
Then, on the macOS system that will be used for developing the iOS application, download and unpack the Phidget Examples for Swift. The easiest way to confirm that your environment is set up is to compile and the Phidgets app. Start by opening the Phidgets.xcodeproj in Xcode.
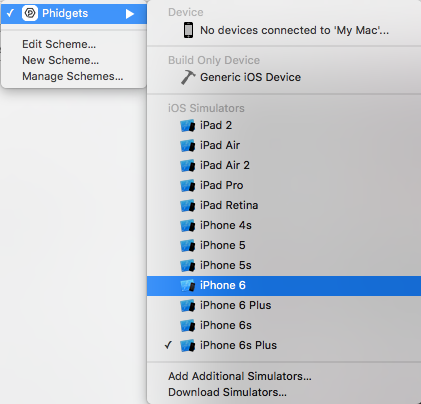
Next, select the target you want the application to run on. In order to run the example on a physical device, you must be an Apple Developer, otherwise you can choose to run the example on a simulator.
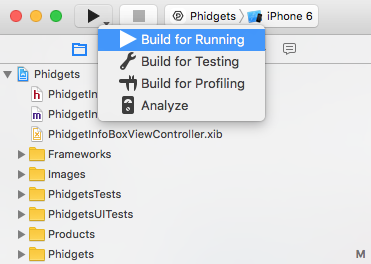
To run the example, click on the Run button.
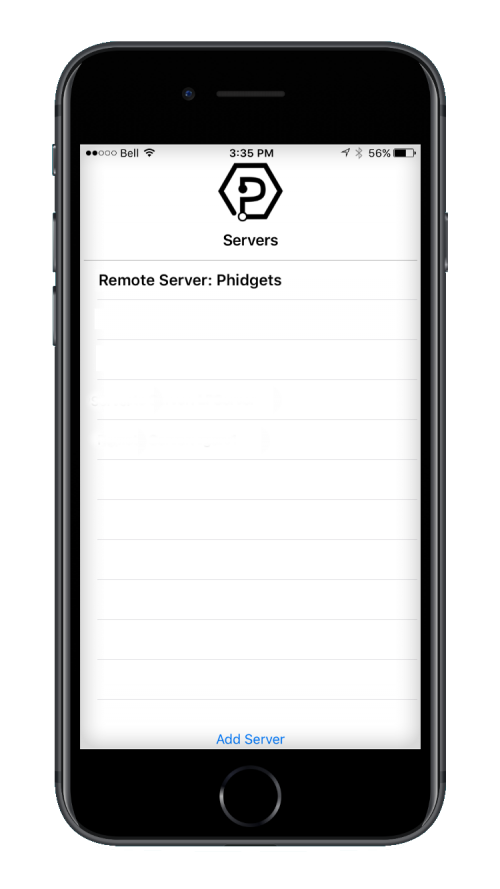
The program will detect any servers that are currently online and have Phidgets connected. Here is an example output:
After confirming that the Phidgets Example is working, you can proceed to run the example for your specific device. Do this by continuing to navigate through the hierarchy until you reach your device, after tapping your device the example will show automatically. Currently, we have example programs for the following software objects:
- DigitalInput
- DigitalOutput
- VoltageInput
- VoltageRatioInput
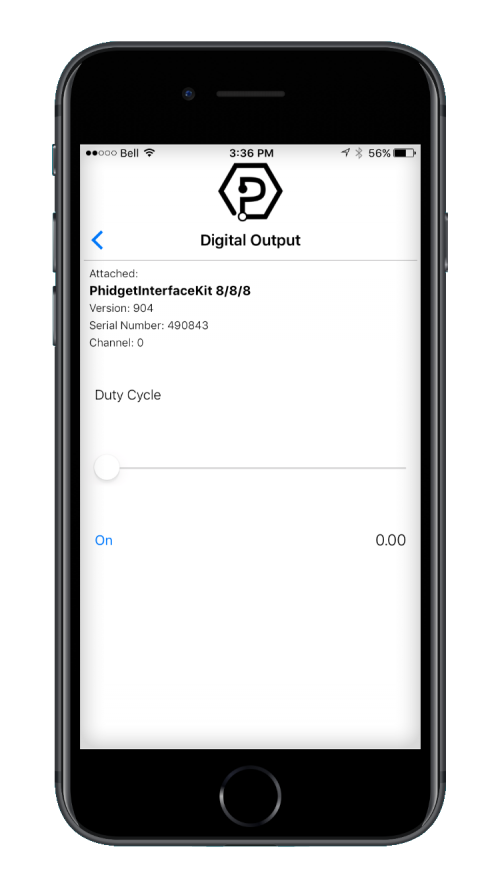
Here is an example of what the DigitalOutput example looks like:
Once you have the Swift example running, we have a teaching section below to help you follow them.
Write your own code
Edit the Examples
copy template of this section from other language pages
Further Reading
Phidget Programming Basics - Here you can find the basic concepts to help you get started with making your own programs that use Phidgets.
Data Interval/Change Trigger - Learn about these two properties that control how much data comes in from your sensors.
Using Multiple Phidgets - It can be difficult to figure out how to use more than one Phidget in your program. This page will guide you through the steps.
Polling vs. Events - Your program can gather data in either a polling-driven or event-driven manner. Learn the difference to determine which is best for your application.
Logging, Exceptions, and Errors - Learn about all the tools you can use to debug your program.
Phidget Network Service - Phidgets can be controlled and communicated with over your network- either wirelessly or over ethernet.
Common Problems and Solutions / Workarounds
If you know of common problems using this lanaguage (for example, having to create sub-VIs when using multiple phidgets in labview) put them here.


