Language - LabVIEW: Difference between revisions
No edit summary |
|||
| Line 1: | Line 1: | ||
[[Category:Language]] | [[Category:Language]] | ||
__TOC__ | __TOC__ | ||
== Quick Downloads == | |||
=== Documentation === | |||
=== Example Code === | |||
=== Libraries === | |||
{{WindowsQuickDownloads}} | |||
== Getting Started with LabVIEW == | |||
Welcome to using Phidgets with LabVIEW! By using LabVIEW, you will have access to the complete {{Phidget22API}}, including events. We also provide example code in LabVIEW for all Phidget devices. | |||
== Windows == | |||
{{Windows_Languages}} | |||
====Use our examples==== | |||
One of the best ways to start programming with Phidgets is to use our example code as a guide. In order to run the examples, you will need to download and install the LabVIEW from [http://www.ni.com/en-ca/shop/labview.html Nation Instruments]. | |||
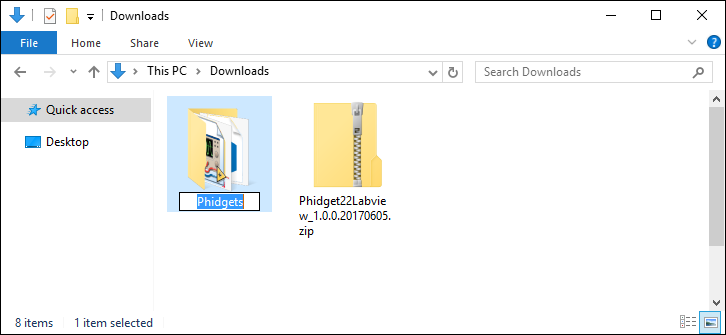
Next, download and unpack the Phidgets LabVIEW library: | |||
*[{{SERVER}}/downloads/phidget22/all/https://wwwdev/downloads/phidget22/libraries/any/Phidget22Labview.zip Phidget LabVIEW library] | |||
Rename the folder to ''Phidgets'' | |||
[[Image:Labview_rename.png|link=|center]] | |||
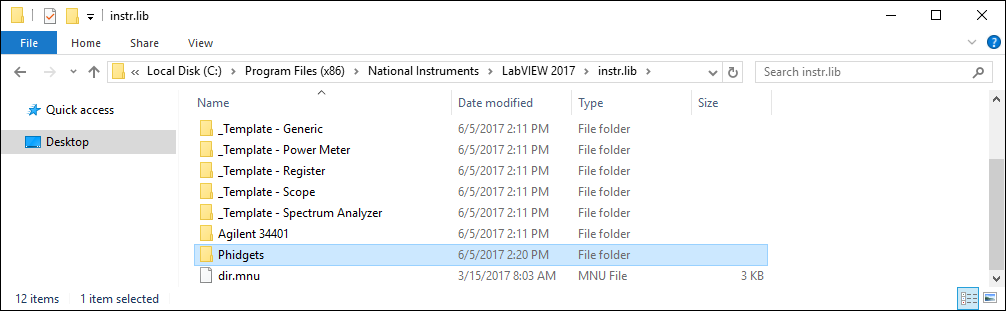
Navigate to the following directory: | |||
*For 32-bit LabVIEW -> C:/Program Files (x86)/National Instruments/LabVIEW 20xx/instr.lib | |||
*For 64-bit LabVIEW -> C:/Program Files/National Instruments/LabVIEW 20xx/instr.lib | |||
Place the renamed folder at this location: | |||
[[Image:Labview_copy.png|link=|center]] | |||
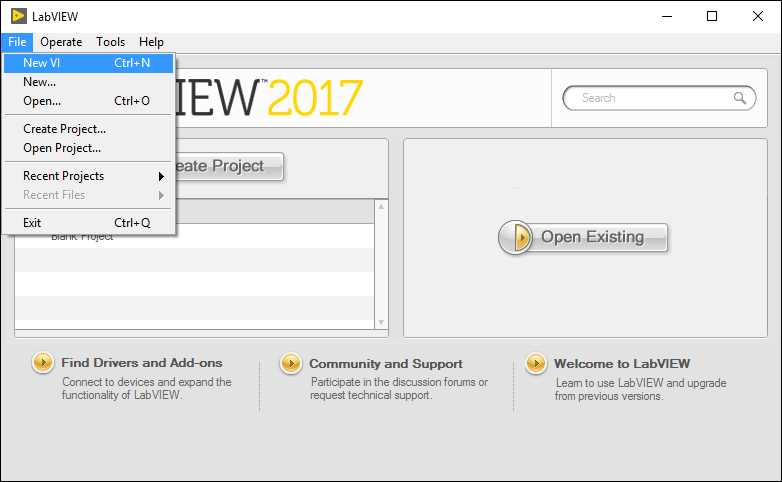
Next, open LabVIEW and create a new VI: | |||
[[Image:Labview_newvi.png|link=|center]] | |||
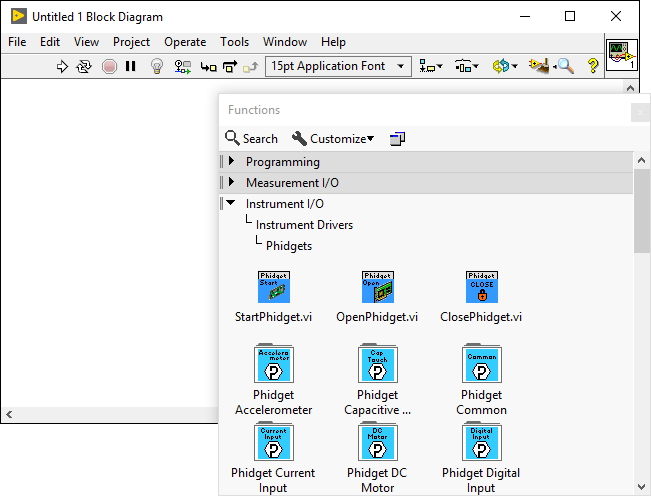
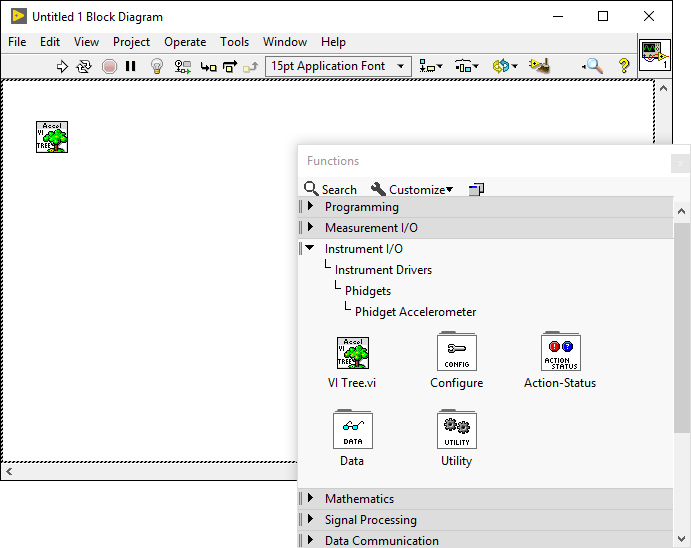
Navigate to the block diagram window that was generated and open the functions palette (''View'' -> ''Functions Palette''). Next, navigate to ''Instrument I/O'' -> ''Instrument Drivers'' -> ''Phidgets'' | |||
[[Image:Labview_functionspalette.PNG|link=|center]] | |||
Next, select a palette that will work for your Phidget and drag the ''VI Tree.vi'' onto your block diagram: | |||
[[Image:Labview_vitree.png|link=|center]] | |||
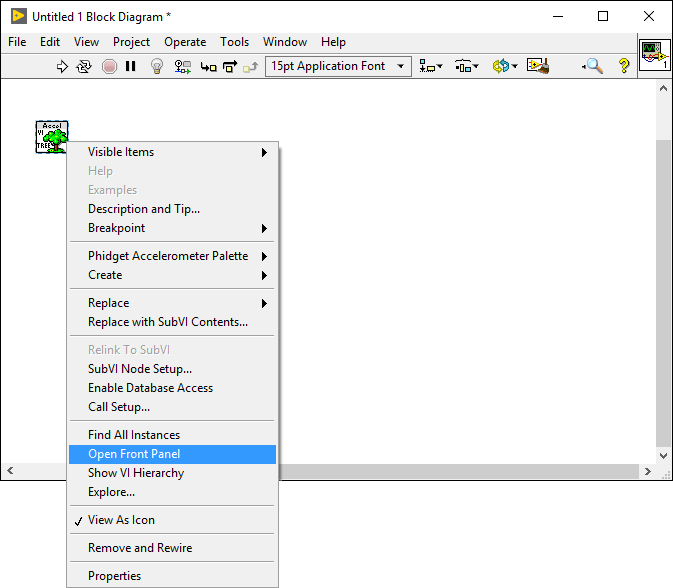
Right-click on ''VI Tree.vi'' and select ''Open Front Panel'': | |||
[[Image:Labview_openfrontpanel.png|link=|center]] | |||
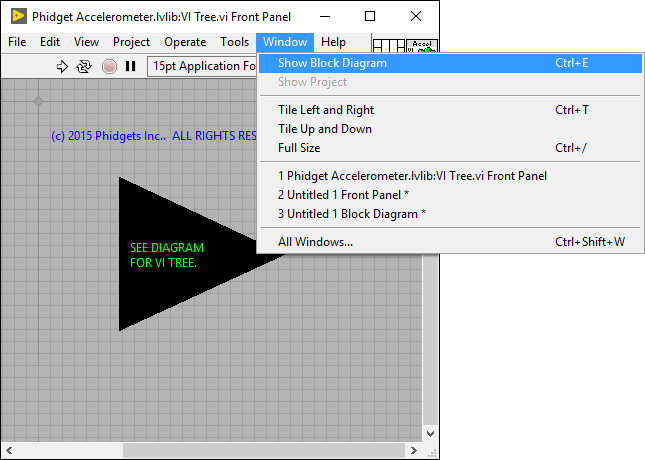
From the front panel, navigate to the block diagram (''Window'' -> ''Block Diagram'') | |||
[[Image:Labview_showblock.png|link=|center]] | |||
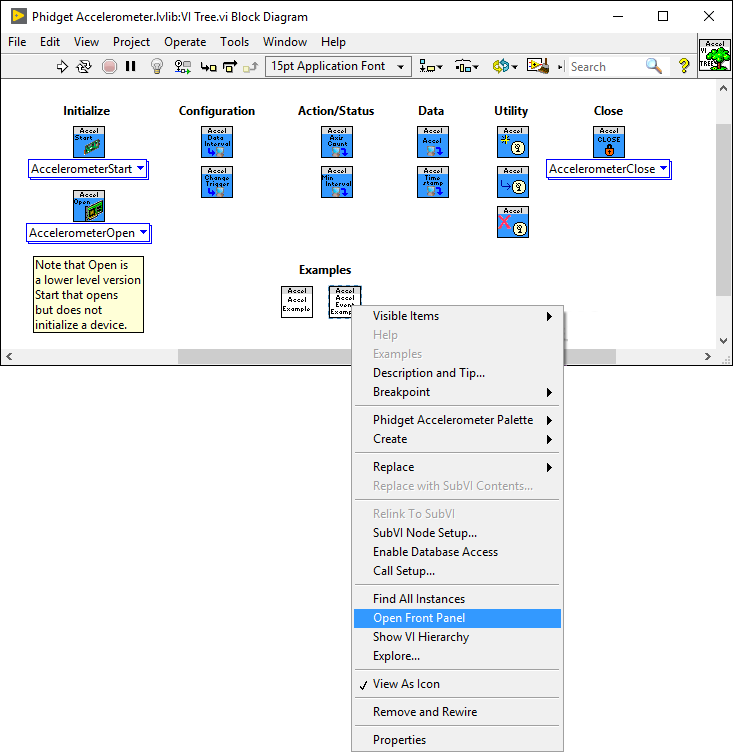
[[Image: | The examples are located near the bottom of the block diagram. Right-click the example you would like to use and select ''Open Front Panel'': | ||
[[Image:Labview_runexample.png|link=|center]] | |||
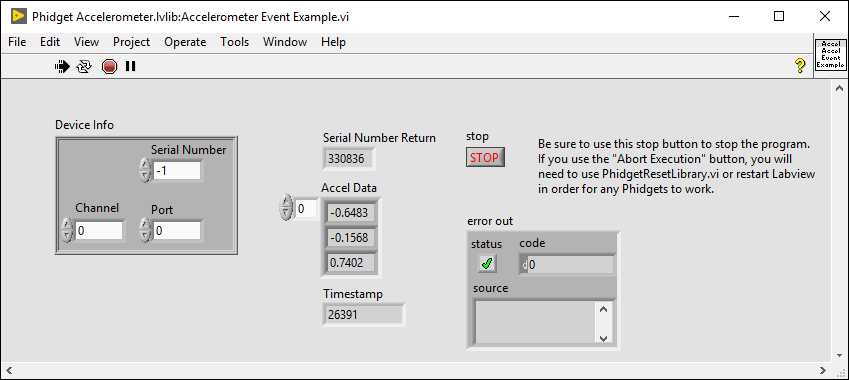
[[Image: | When you are ready, press run and the application will demonstrate the Phidget's functionality. Here is an example of a Accelerometer channel on a Spatial Phidget: | ||
[[Image:Labview_run.PNG|link=|center]] | |||
You should now have the example up and running for your device. Play around with the device and experiment with some of the functionality. When you are ready, the next step is configuring your project and writing your own code! | |||
====Write Your Own Code==== | ====Write Your Own Code==== | ||
Revision as of 23:39, 5 June 2017
Quick Downloads
Documentation
Example Code
Libraries
Getting Started with LabVIEW
Welcome to using Phidgets with LabVIEW! By using LabVIEW, you will have access to the complete Phidget22 API, including events. We also provide example code in LabVIEW for all Phidget devices.
Windows
If you haven't already, please visit the Windows page before you continue reading. There you will be instructed on how to properly set up your Windows machine so you can follow the guides below!
Use our examples
One of the best ways to start programming with Phidgets is to use our example code as a guide. In order to run the examples, you will need to download and install the LabVIEW from Nation Instruments.
Next, download and unpack the Phidgets LabVIEW library:
Rename the folder to Phidgets
Navigate to the following directory:
- For 32-bit LabVIEW -> C:/Program Files (x86)/National Instruments/LabVIEW 20xx/instr.lib
- For 64-bit LabVIEW -> C:/Program Files/National Instruments/LabVIEW 20xx/instr.lib
Place the renamed folder at this location:
Next, open LabVIEW and create a new VI:
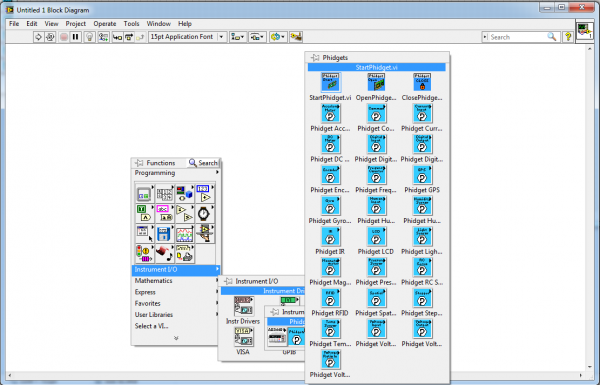
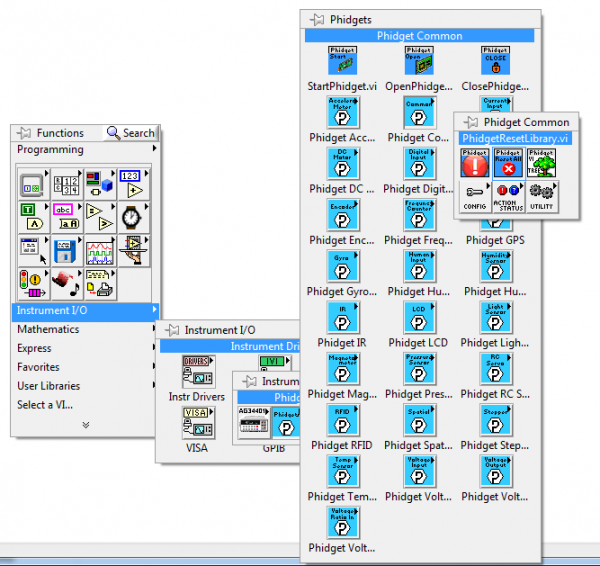
Navigate to the block diagram window that was generated and open the functions palette (View -> Functions Palette). Next, navigate to Instrument I/O -> Instrument Drivers -> Phidgets
Next, select a palette that will work for your Phidget and drag the VI Tree.vi onto your block diagram:
Right-click on VI Tree.vi and select Open Front Panel:
From the front panel, navigate to the block diagram (Window -> Block Diagram)
The examples are located near the bottom of the block diagram. Right-click the example you would like to use and select Open Front Panel:
When you are ready, press run and the application will demonstrate the Phidget's functionality. Here is an example of a Accelerometer channel on a Spatial Phidget:
You should now have the example up and running for your device. Play around with the device and experiment with some of the functionality. When you are ready, the next step is configuring your project and writing your own code!
Write Your Own Code
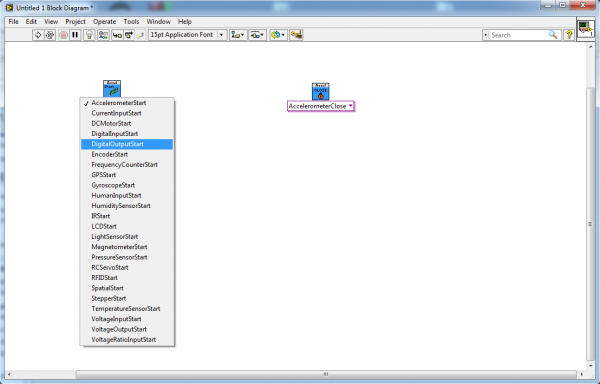
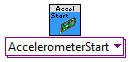
1. To start working with a new Phidget, you will first need matching Start and Close VIs. These are found at the top of the Phidgets palette.
2. Next, select the type of Phidget you wish to use from the drop-down menu.
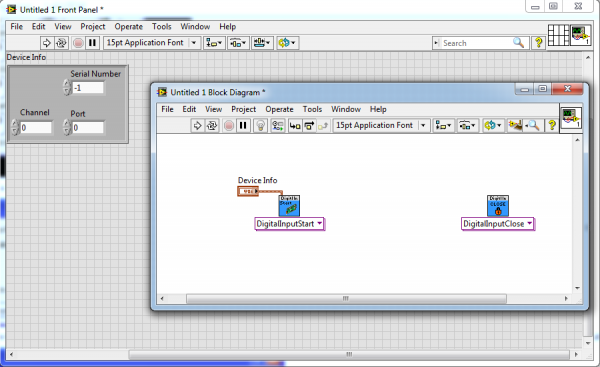
3. Add device information and any desired initialization paramaters to the Start VI. Many Phidgets VIs use terminals with special values or formats. For these is is best to right click the terminal, and select Create->Control or Create->Constant.

4. You are now ready to write code for your Phidget, as outlined in the Code Snippets section, and the methods outlined in the examples for your device.
Edit the Examples
By following the instructions for your operating system and compiler above, you probably now have a working example and want to understand it better so you can change it to do what you want. This teaching section has resources for you to learn from the examples and write your own.
Your main reference for writing LabVIEW code will be this page, the examples, the Phidget22 API, and the VI help files.
Examples of more complex general topics such as using multiple Phidgets and connecting to a Phidget over the Network Server can be found under the VI Tree for the Phidget Common palette.
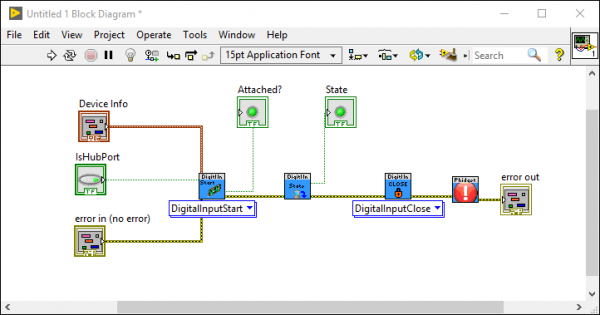
Example Flow
Most LabVIEW examples follow the same basic flow of starting a Phidget, reading some data, and closing the Phidget.
Code Snippets
The following code snippets describe how to do various general tasks with Phidgets. You should be able to find places in the examples where these snippets exist, and modify them to suit your requirements.
Step One: Initialize, Open and Wait for Attachment (plugging in) of the Phidget
The entire process of opening and initializing a Phidget can be done by using the version of StartPhidget.vi that corresponds to your device.
In most cases, StartPhidget.vi will also attempt to wait for the first data to become available from the device for 5 seconds after initialization.
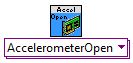
If you'd prefer to initialize the device manually, you can use OpenPhidget.vi for your device and call the individual functions to set up the device.
Step Two: Do Things with the Phidget
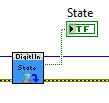
You can read data and interact with your Phidget both by polling it for its current state (or to set a state), or by catching events that trigger when the data changes.
To poll devices, simply place the corresponding blocks.

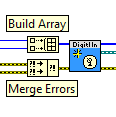
To use events, there are three main blocks for each type, to create, execute, and close the event handler.
When creating the event, all devices using an event of the same type must be grouped into an array to ensure the events get processed correctly.
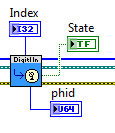
Once created, the events will be processed by [Name]EventExe.vi. When an event occurs, the pertinent information will be output, as well as information to reference which device caused it.
After a program has run its course, the event handler must be closed.

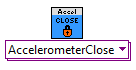
Step Three: Close and Delete
Closing a Phidget is done by using the appropriate version of ClosePhidget.vi
Further Reading
Phidget Programming Basics - Here you can find the basic concepts to help you get started with making your own programs that use Phidgets.
Data Interval/Change Trigger - Learn about these two properties that control how much data comes in from your sensors.
Using Multiple Phidgets - It can be difficult to figure out how to use more than one Phidget in your program. This page will guide you through the steps.
Polling vs. Events - Your program can gather data in either a polling-driven or event-driven manner. Learn the difference to determine which is best for your application.
Logging, Exceptions, and Errors - Learn about all the tools you can use to debug your program.
Phidget Network Server - Phidgets can be controlled and communicated with over your network- either wirelessly or over ethernet.
Common Problems and Solutions/Workarounds
Issue: I cannot attach to an object any more after running my program once
What this means is you probably aborted the VI which stopped the program before the Phidget could be closed. Aborting execution will not release the Phidget device properly and will consequently make it unusable until the Phidgets library (or LabVIEW) has been restarted.
To resolve this, you may open a new VI, place PhidgetResetLibrary.vi, and run it. This will completely reset the current Phidget library, making it possible again to connect to all Phidgets.
Note that this action will close all Phidgets that are currently open in LabVIEW, and should not be used while other Phidgets-related LabVIEW VIs are running.
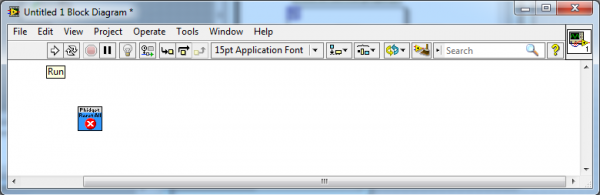
In order to prevent this from happening you should use a software stop button when possible instead of halting operation. That way the Close subVI gets called and the Phidget will be released.