1002 User Guide: Difference between revisions
From Phidgets Support
| Line 26: | Line 26: | ||
===Testing Using Windows 2000 / XP / Vista / 7=== | ===Testing Using Windows 2000 / XP / Vista / 7=== | ||
Make sure you have the current version of the Phidget library installed on your PC. If you don't, follow these steps: | |||
# Go to the Quick Downloads section on the Windows page | |||
# Download and run the Phidget21 Installer (32-bit, or 64-bit, depending on your system) | |||
# You should see the [[Image:Ph.jpg|link=]] icon on the right hand corner of the Task Bar. | |||
===Testing Using Mac OS X=== | ===Testing Using Mac OS X=== | ||
Revision as of 17:36, 18 July 2012
Getting Started
Checking the Contents
You should have received:
|
In order to test your new Phidget you will also need:
|
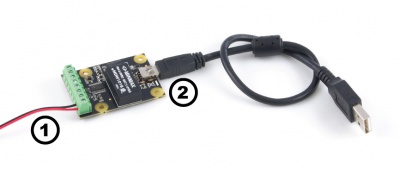
Connecting the Pieces
|
|
Testing Using Windows 2000 / XP / Vista / 7
Make sure you have the current version of the Phidget library installed on your PC. If you don't, follow these steps:
- Go to the Quick Downloads section on the Windows page
- Download and run the Phidget21 Installer (32-bit, or 64-bit, depending on your system)
- You should see the
 icon on the right hand corner of the Task Bar.