|
|
| (66 intermediate revisions by 5 users not shown) |
| Line 1: |
Line 1: |
| | <metadesc>Communicate over USB with sensors, controllers, and relays with Phidgets! Program in macOS using a wide variety of programming languages.</metadesc> |
| [[Category:OS]] | | [[Category:OS]] |
| __TOC__
| |
|
| |
|
| ==Quick Downloads== | | ==Quick Downloads== |
| Already know what you're doing? Here you go:
| | Our libraries support macOS 10.11 and newer. |
| *[{{SERVER}}/downloads/phidget22/libraries/macos/Phidget22.dmg macOS Installer Download] | | * [https://cdn.phidgets.com/downloads/phidget22/tools/macos/Phidget22ControlPanel.dmg Phidget22 Control Panel (for macOS 10.15 and newer)] |
| | * [https://cdn.phidgets.com/downloads/phidget22/libraries/macos/Phidget22.dmg Phidget22 Installer (for macOS 10.14 and earlier)] |
| | |
| | ===Other Resources=== |
| | * [https://cdn.phidgets.com/downloads/phidget22/libraries/macos/Phidget22_macosdevel.zip macOS Development Files] |
| | * [{{SERVER}}/downloads/phidget22/libraries/macos/Phidget22/ Previous Releases] |
|
| |
|
| ==Getting Started with macOS== | | ==Getting Started with macOS== |
| Welcome to using Phidgets with macOS. If you haven't already, check out the [[:Category:UserGuide|user guide]] for your device. If you are ready to go, the first step in creating macOS applications with Phidgets is installing the Phidget libraries!
| |
|
| |
| ===Install=== | | ===Install=== |
| | To get started, download the appropriate [[#Quick Downloads|package]] for your machine from the list above. This will install the Phidget Control Panel and the Phidget Network Server. These are powerful tools that will help you develop your Phidget applications. |
|
| |
|
| To install the core Phidget files onto your system, follow these steps:
| | ===Phidget Control Panel=== |
| | | After downloading, drag the application into your Applications folder: |
| | | [[Image:Macos_standalone_install.png|link=https://cdn.phidgets.com/docs/images/c/c8/Macos_applications_controlpanel.png|center|600px]] |
| 1. Download the Phidget installer for your system:
| |
| *[{{SERVER}}/downloads/phidget22/libraries/macos/Phidget22.dmg macOS Installer Download]
| |
| | |
| | |
| 2. Open up the installer, and double click on {{Code|Phidgets.pkg}} to install the libraries.
| |
| | |
| [[File:OSX Install 1.png|link=|alt=macOS Install|center]] | |
| | |
| 3. Continue with the installation.
| |
| | |
| [[File:OSX Install 2.png|link=|alt=macOS Install|center]]
| |
|
| |
|
| Success! You have finished installing the Phidgets software on your machine. Before you begin coding, let's verify that your Phidget is able to communicate with your machine.
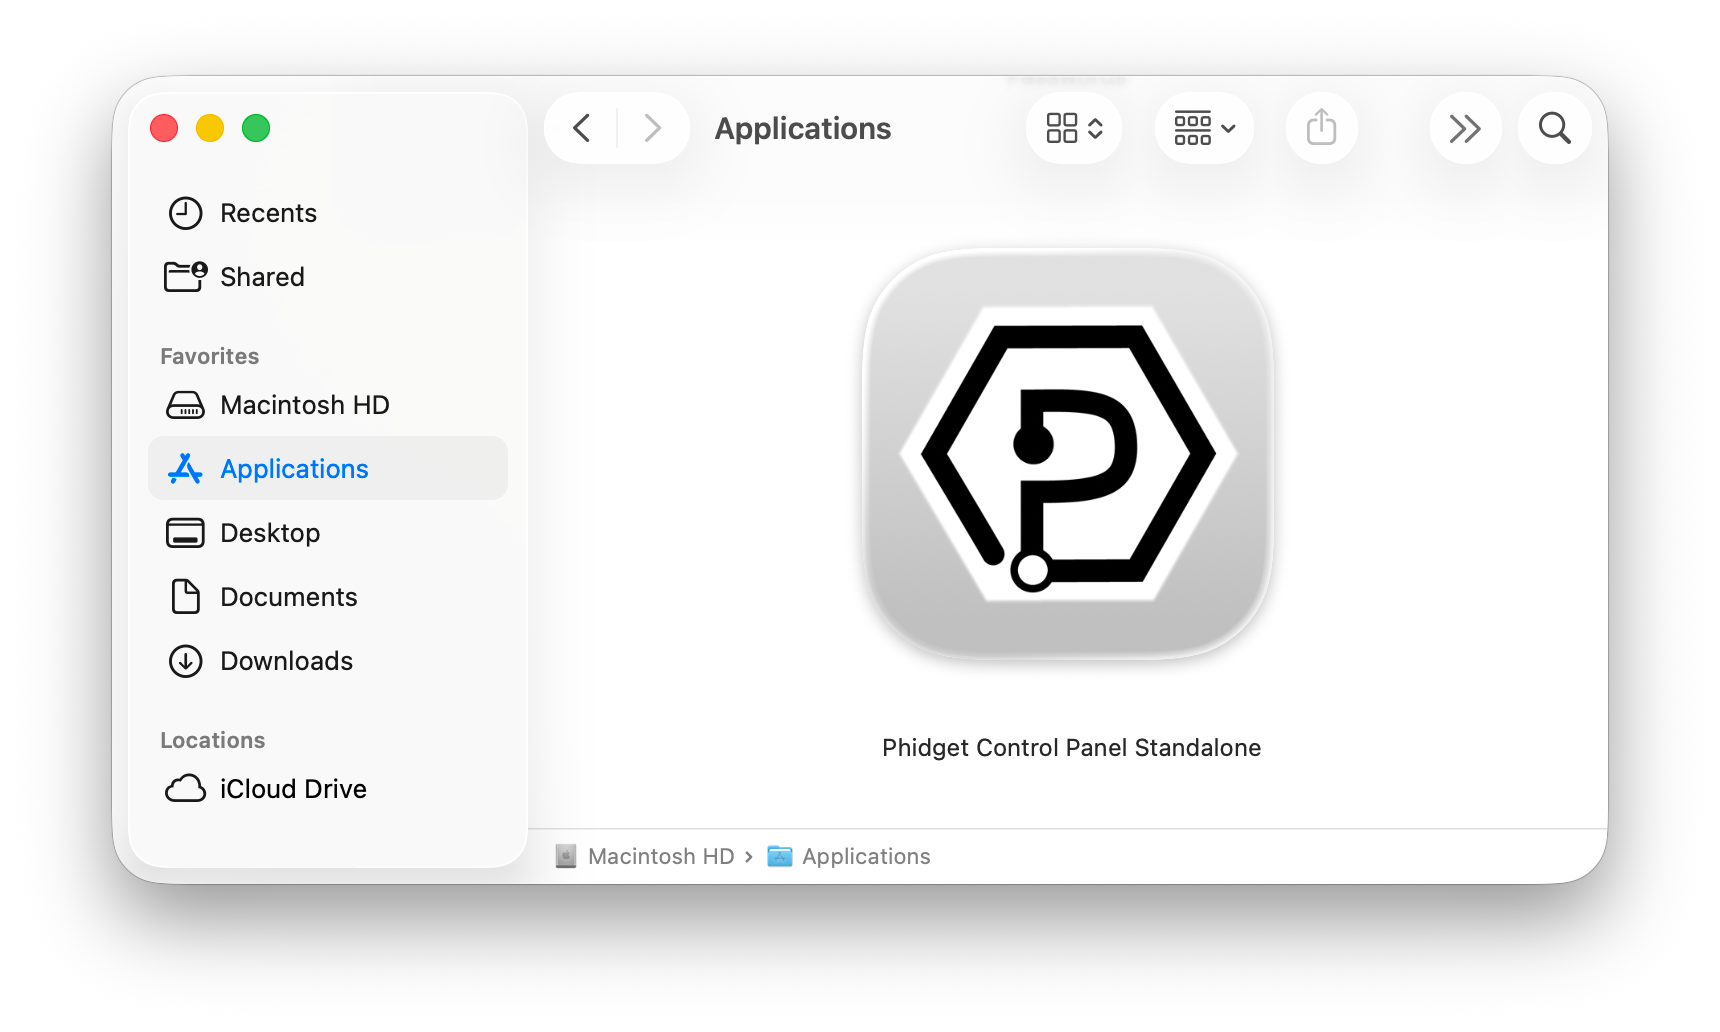
| | You can then find the application in the Applications folder by searching for ''Phidget Control Panel''. |
| | [[Image:Macos_applications_controlpanel.png|link=https://cdn.phidgets.com/docs/images/c/c8/Macos_applications_controlpanel.png|600px|center]] |
|
| |
|
| ===Verify===
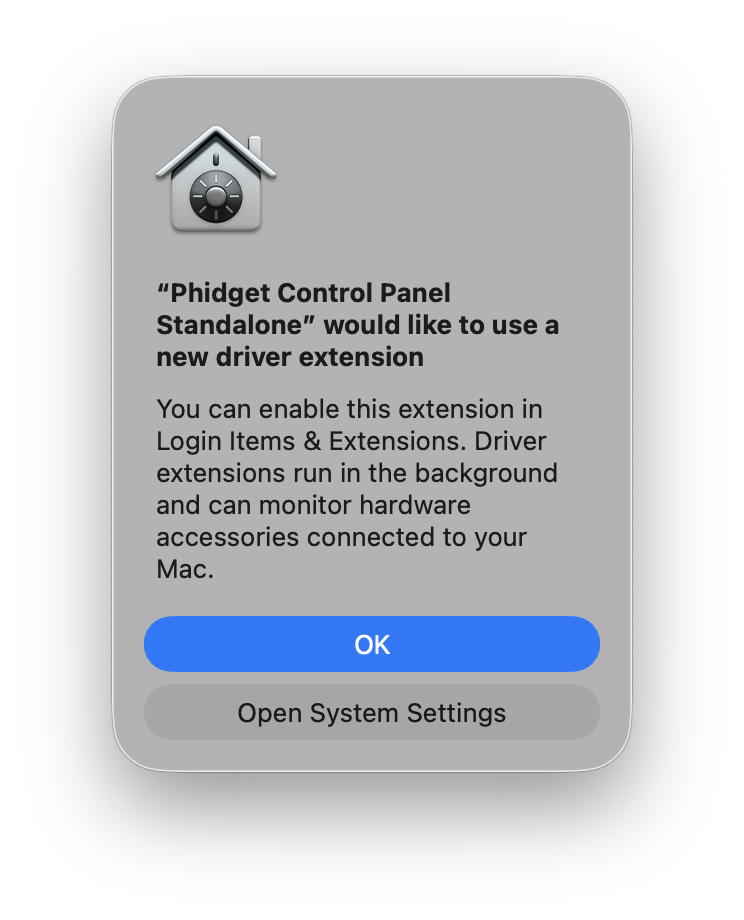
| | When you open the application for the first time, you will see the following notice: |
| The best way to verify that your libraries are installed and your Phidget is working is to use the Phidget Control Panel. The Phidget Control Panel is a powerful tool that will help you develop your applications using Phidgets. Get started by following the instructions below:
| | [[Image:Macos_install_extension.png|link=https://cdn.phidgets.com/docs/images/9/9e/Macos_install_extension.png|300px|center]] |
|
| |
|
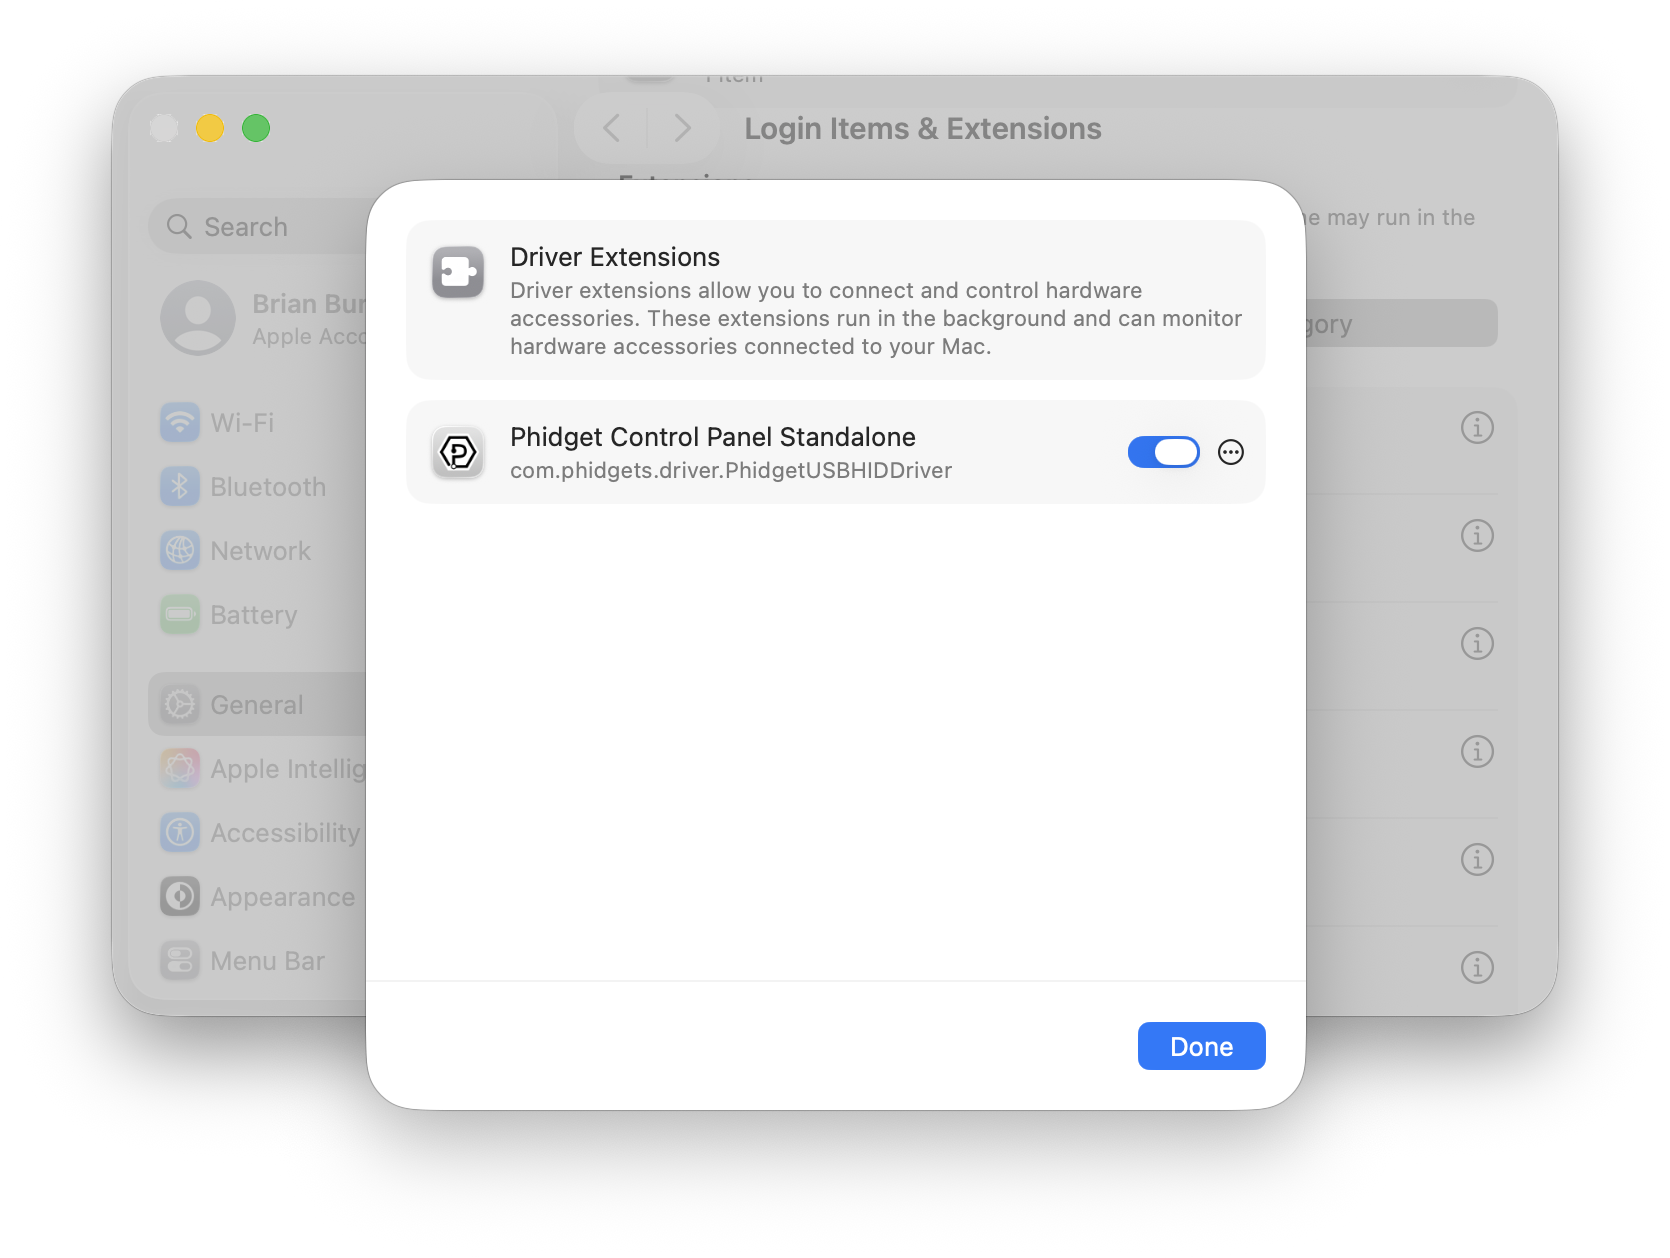
| | Follow the link in the pop-up, or navigate to ''System Settings > General > Login Items & Extensions > Extensions'', and give permissions: |
| | [[Image:Macos_install_extension_permission.png|link=https://cdn.phidgets.com/docs/images/a/ac/Macos_install_extension_permission.png|600px|center]] |
| | <center>''Note: The driver extension is only required for legacy USB Phidgets running a HID USB stack. Refer to your product’s specifications page for information about its USB stack.''</center> |
|
| |
|
| 1. Open Finder and navigate to the Phidget Control Panel in the Applications list.
| |
|
| |
|
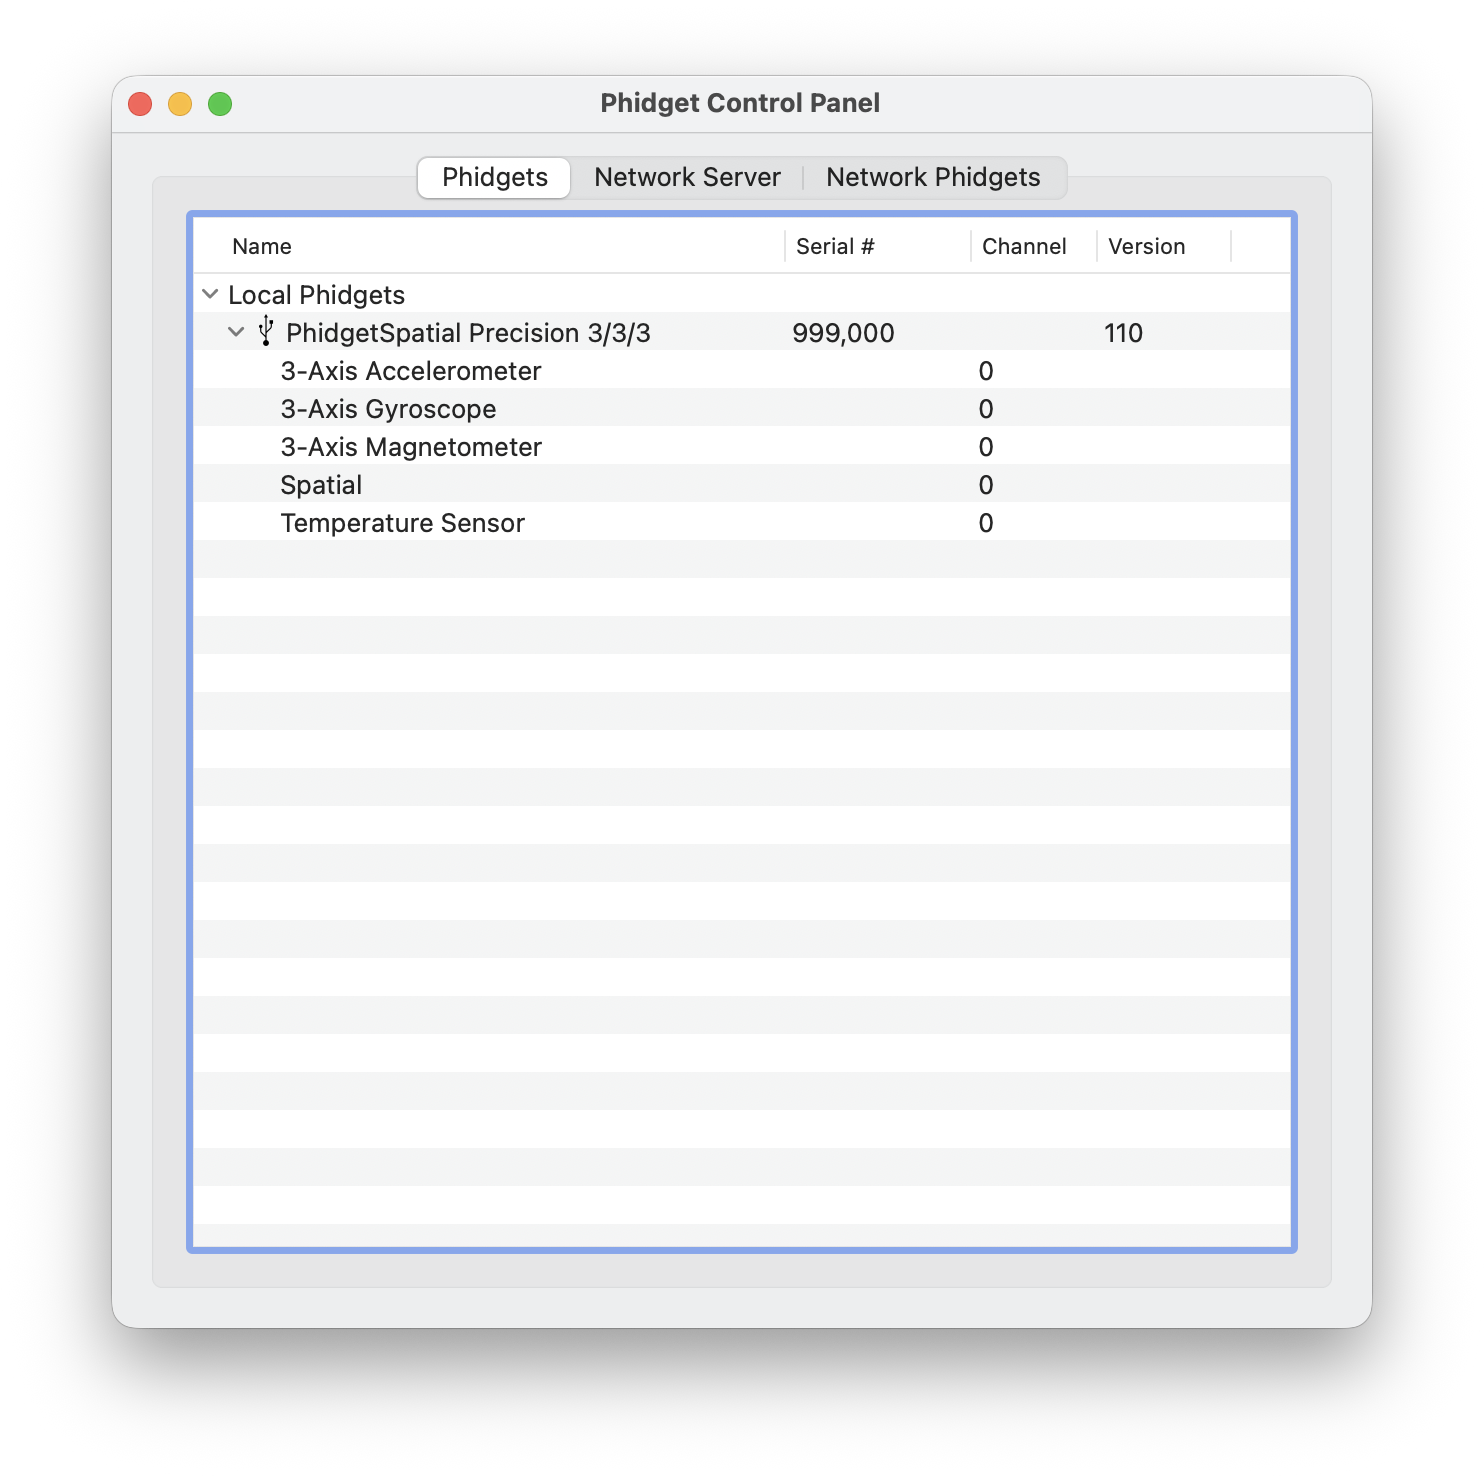
| [[File:OSX Finder Apps.png|link=|900px|alt=macOS Finder Apps|center]] | | After running the application, you will see all the Phidgets that are plugged into your machine, as well as any Phidgets that are on your network. |
| | [[Image:Os_macos_controlpanel.png|600px|link=https://cdn.phidgets.com/docs/images/a/a1/Os_macos_controlpanel.png|center]] |
|
| |
|
| 2. Double click on the Phidgets icon to bring up the Phidget Control Panel. You can now see all the Phidgets that are plugged into your machine, as well as any Phidgets that are on the network.
| |
| [[File:OSX ControlPanel General.png|link=|alt=macOS Control Panel General|center]]
| |
|
| |
|
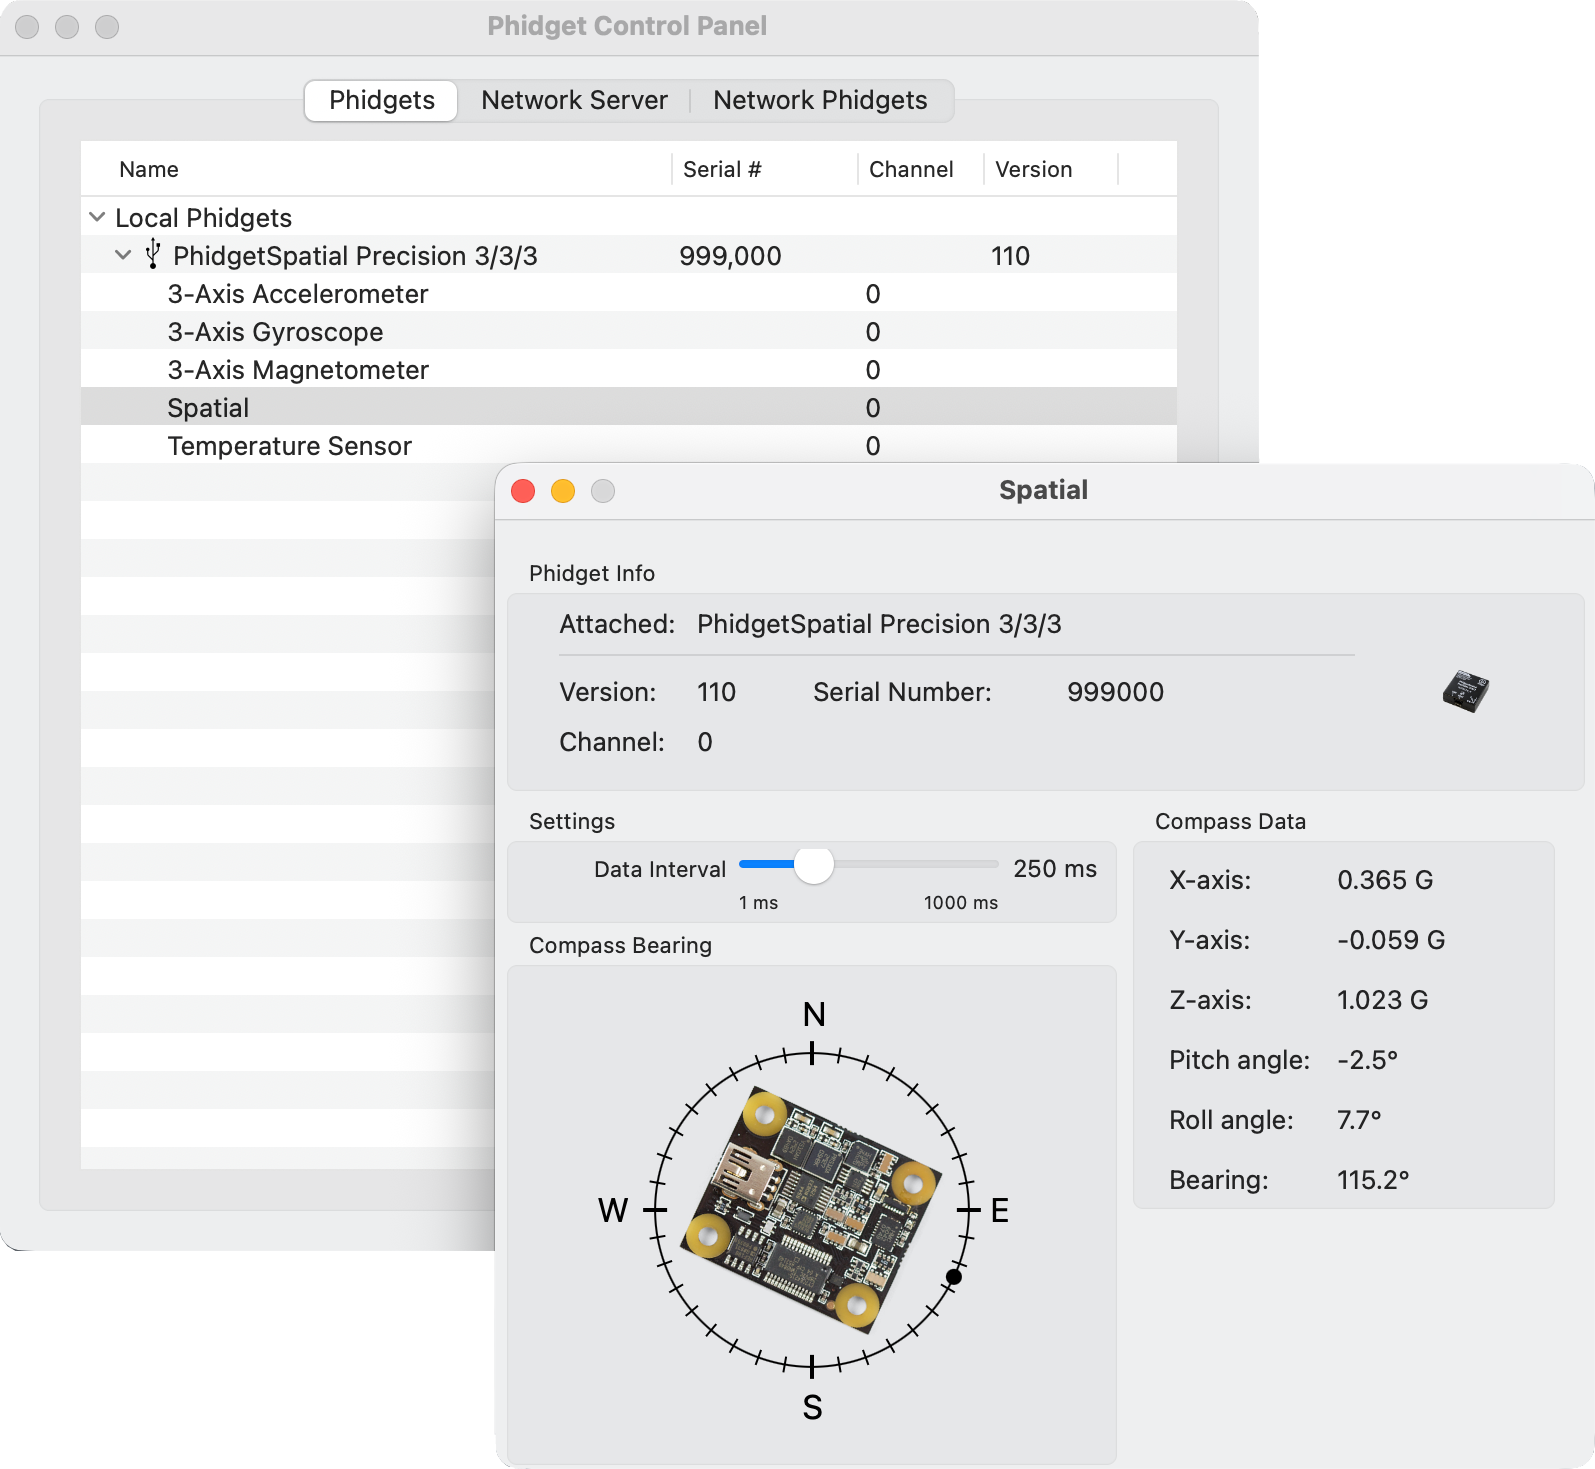
| 3. Click on the arrow beside a device to expand it so that you can see all available channels. Double click on one of these channels to open up a window that lets you interact with it.
| | Click on the arrow beside a device to expand it so that you can see all available channels. Double-click on one of these channels to open up a window that lets you interact with it. |
| [[File:OSX Control Panel Channel.png |link=|alt=macOS Control Panel Channel]]
| |
|
| |
|
|
| |
|
| The Phidget Control Panel can be used for testing devices, updating firmware, enabling a network server, and more! Visit the [[Phidget Control Panel#macOS|Phidget Control Panel]] page if you want to delve a little deeper.
| | [[File:Os_macos_controlpanel_example.png|link=https://cdn.phidgets.com/docs/images/3/37/Os_macos_controlpanel_example.png|center|600px]] |
|
| |
|
| Your Phidget is now able to communicate with your development machine. The next step is selecting a programming language so you can start to write some code!
| |
|
| |
|
| ''If you do not see your device in the Phidget Control Panel, visit the [[General Troubleshooting|general troubleshooting page]].''
| | The Phidget Control Panel can be used for testing devices, updating firmware, enabling a Phidget Network Server, and more. Visit the [[Phidget Control Panel|Phidget Control Panel page]] for more information. |
|
| |
|
| ===Programming=== | | ===Programming=== |
| Ready to write some code? Select one of the programming languages below:
| | When you are ready to develop your own applications, visit our [{{SERVER}}/docs/Programming_Resources programming resources page] and select your programming language to get started. |
| | |
| * [[Language - C/C++|C/C++]]
| |
| * [[Language - C Sharp|C#]]
| |
| * [[Language - Python | Python]]
| |
| * [[Language - Java | Java]]
| |
| * [[Language - Objective C | Objective-C]]
| |
| * [[Language - JavaScript | JavaScript]]
| |
| * [[Language - Swift | Swift]]
| |
| * [[Language - Max/MSP|Max/MSP]]
| |
| | |
| ==Phidget Network Service==
| |
| | |
| The Phidget Network Service allows you to remotely control Phidgets over a network. For more information, please see the [[Phidget Network Service]] page.
| |
| | |
| Drivers for the Phidget Network Service on macOS are already included in the [[#Quick Downloads | Drivers]] above. If you have the Phidget Control Panel app installed, you already have the Network Service installed.
| |
| | |
| There are two ways that you can connect to a Phidget hosted on another computer. The first method is by using the IP address/host name and port of the host computer. The second method makes the use of [http://en.wikipedia.org/wiki/Multicast_DNS mDNS], which allows Phidgets to be found and opened on the network by a server id instead of an IP address/host name. When using a server id, both the client and server will need to be running an implementation of zero configuration networking. The Phidget Network Service takes advantage of the [https://support.apple.com/kb/DL999?locale=en_US Bonjour] software, which is built-in to macOS. It is a tool developed by Apple to locate devices, such as Phidgets, on a network.
| |
| | |
| This section helps you install, check, and use the Network Service on macOS, but we also have an overview of the [[Phidget Network Service]] in general.
| |
| | |
| ===Using the Network Service===
| |
| | |
| To use a Phidget over the Network Service, you'll want to:
| |
| # Have two different computers connected to the same network. We will call the computer that has the Phidget directly connected to the USB port the '''host'''. The '''client''' will be the computer that runs a Phidget application to connect to the Phidget attached to the host. Please note that if you only have a single computer, you can also connect to the Phidget over the Network Service. The computer will simply act as both a host and client. This will allow you to bypass the [[General Phidget Programming # Details for Open() | one application per Phidget limitation]].
| |
| # Start the Network Service on the computer that directly connects to the Phidget
| |
| # Run your program on the remote computer that will control the Phidget over the network
| |
| | |
| First ensure that the Phidget drivers have been installed on both the host and client computers. Next, we will set up the Network Service and run the Phidget example program on the client. Please follow these steps:
| |
| | |
| 1. On the host computer, double click on the [[File:Ph.jpg|link=]] icon in the Apps list to bring up the Control Panel. In the {{Code|Network Service}} tab, you can start, restart or stop the Network Service. You can also choose to have the Network Service start up automatically upon boot up by checking the box beside {{Code|Start automatically on boot}}. Otherwise, you will have to manually turn the Network Service on everytime you wish to use it. You'll need administrator privileges in order to make changes to these settings. You can see the status of the Network Service at the top of the window beside the Start/Stop button, where it will say "Network Service is running" or "Network Service is stopped".
| |
| | |
| [[File:macOS_ControlPanel_NetworkService_Setup_Stopped.jpg|link=|left|425px|alt=macOS Control Panel Network Service Setup]]
| |
| | |
| [[File:macOS_ControlPanel_NetworkService_Running.jpg|link=|425px|alt=macOS Control Panel Network Service Setup]]
| |
| | |
| 2. Ensure that the Phidget is plugged in to the host.
| |
| | |
| 3. On the client computer, open up the Phidget Control Panel. On the {{Code|Phidgets}} tab you will see the Phidget that is plugged into the host as one of the entries listed under the heading of {{Code|Remote Server: <Hostname>}}. Double click on one of the Phidget's objects to open the example application.
| |
| | |
| [[File:macOS_ControlPanel_NetworkService_List.PNG|link=|alt=macOS Control Panel Network Service]]
| |
| | |
| 4. The example application will open up, and you will be able to communicate with the Phidget over the Network Service.
| |
| | |
| [[File:macOS_network_Example.jpg|link=|alt=macOS Control Panel Example]]
| |
| | |
| 5. You can confirm that this Phidget is truly being used of the Network Service by stopping the Network Service while the example application is still open. On the host's Phidget Control Panel, go to the {{Code|Network Service}} tab and hit {{Code|Stop Network Service}} to terminate the Network Service. Now, take a look at the example application on the client. Since the application can no longer find this Phidget over the Network Service, all of the information disappears and the window says that "Nothing" is attached to this channel.
| |
| | |
| [[File:macOS_ControlPanel_NetworkService_Disconnected.PNG|link=|alt=macOS Control Panel Network Service Stopped]]
| |
|
| |
|
| ==Advanced Information== | | ==Software License== |
| These files that were placed onto your system as part of the installation process:
| | By downloading the installer and/or development files, you agree to adhere to the terms of the [{{SERVER}}/documentation/Licenses/Phidgets_EULA.pdf Phidgets End User License Agreement]. The Phidget libraries and development files are covered by the The 3-Clause BSD License. |
| *{{Code|Phidget22.framework}} contains the actual Phidget library, which is used at run-time. It is placed into {{Code|/Library/Frameworks}}.
| |
| *{{Code|Phidget.kext}} is the kernel extension. It is placed into {{Code|/System/Library/Extensions}}.
| |
| *{{Code|phidgetnetworkservice22}} is the Phidget Network Service. It is placed into {{Code|/usr/local/bin}}.
| |
Quick Downloads
Our libraries support macOS 10.11 and newer.
Other Resources
Getting Started with macOS
Install
To get started, download the appropriate package for your machine from the list above. This will install the Phidget Control Panel and the Phidget Network Server. These are powerful tools that will help you develop your Phidget applications.
Phidget Control Panel
After downloading, drag the application into your Applications folder:
You can then find the application in the Applications folder by searching for Phidget Control Panel.
When you open the application for the first time, you will see the following notice:
Follow the link in the pop-up, or navigate to System Settings > General > Login Items & Extensions > Extensions, and give permissions:
Note: The driver extension is only required for legacy USB Phidgets running a HID USB stack. Refer to your product’s specifications page for information about its USB stack.
After running the application, you will see all the Phidgets that are plugged into your machine, as well as any Phidgets that are on your network.
Click on the arrow beside a device to expand it so that you can see all available channels. Double-click on one of these channels to open up a window that lets you interact with it.
The Phidget Control Panel can be used for testing devices, updating firmware, enabling a Phidget Network Server, and more. Visit the Phidget Control Panel page for more information.
Programming
When you are ready to develop your own applications, visit our programming resources page and select your programming language to get started.
Software License
By downloading the installer and/or development files, you agree to adhere to the terms of the Phidgets End User License Agreement. The Phidget libraries and development files are covered by the The 3-Clause BSD License.