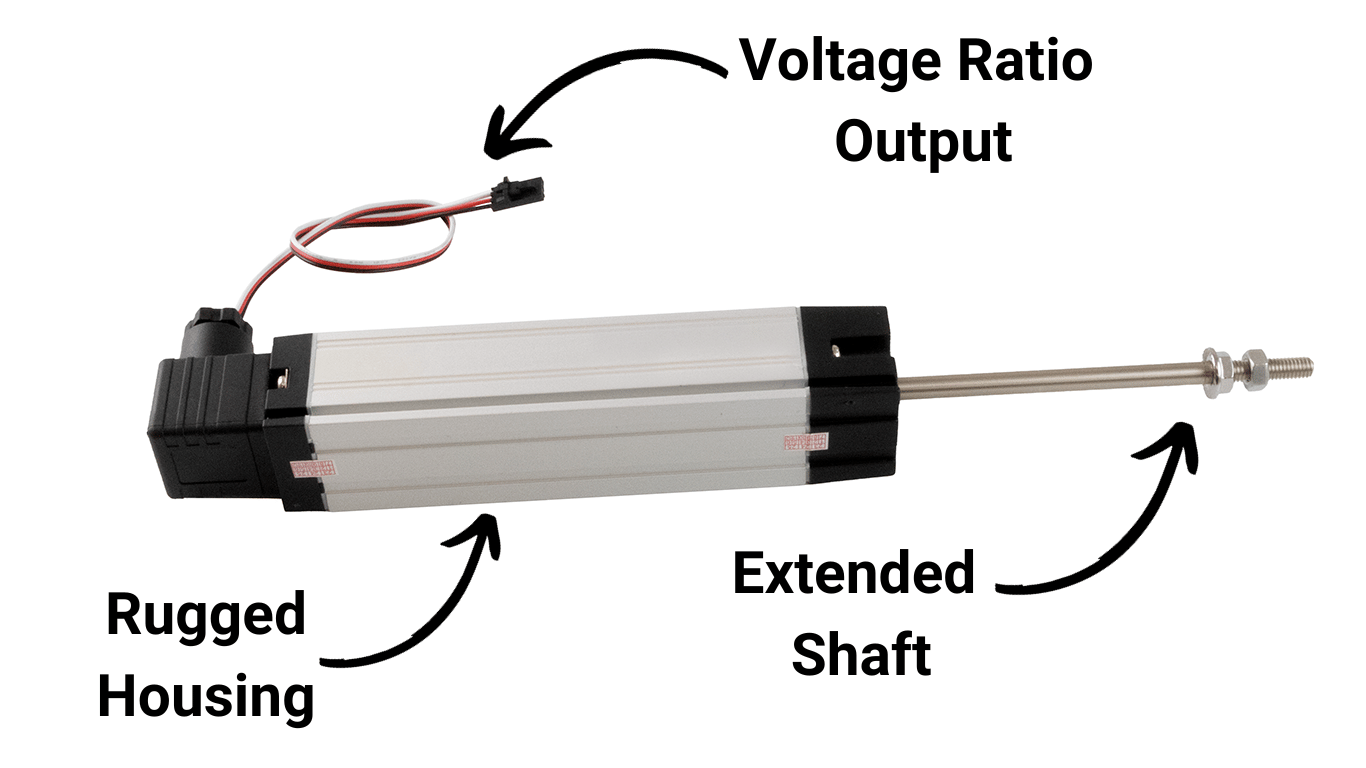
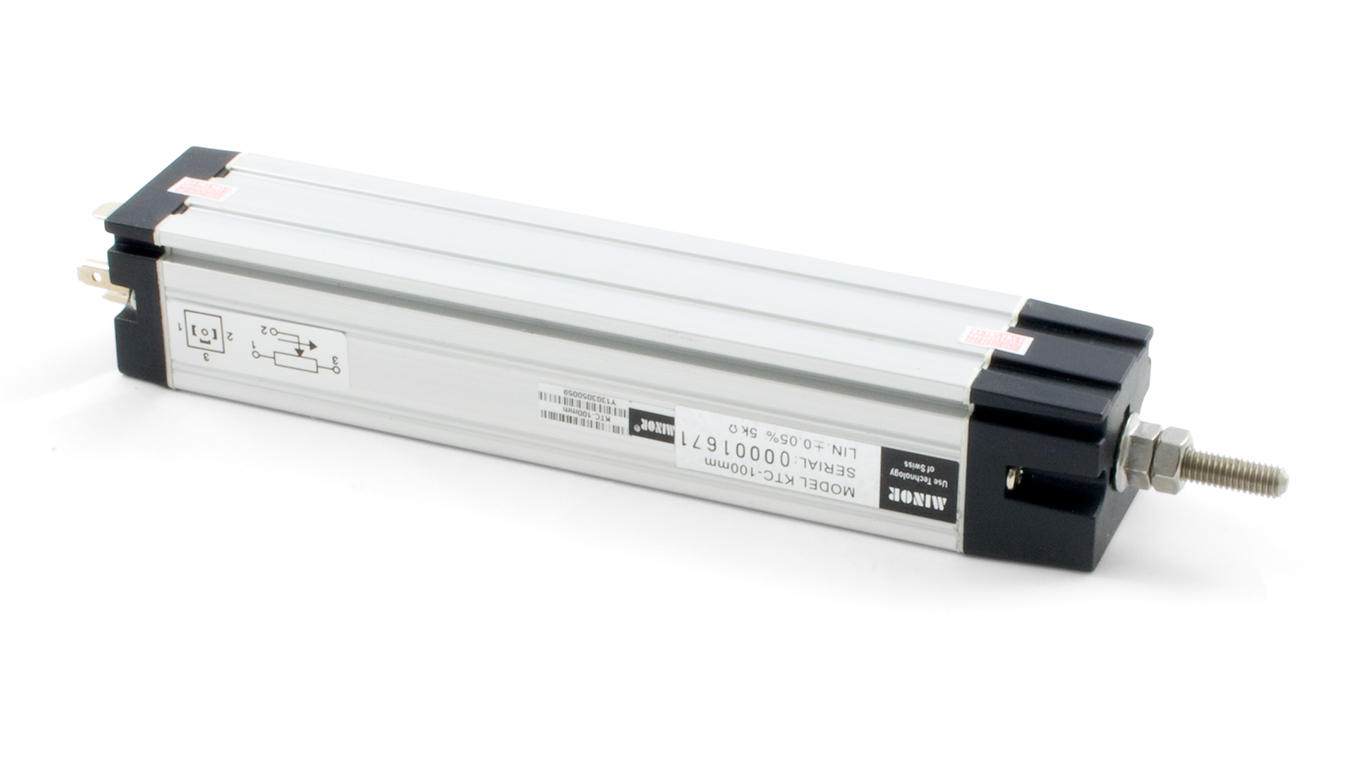
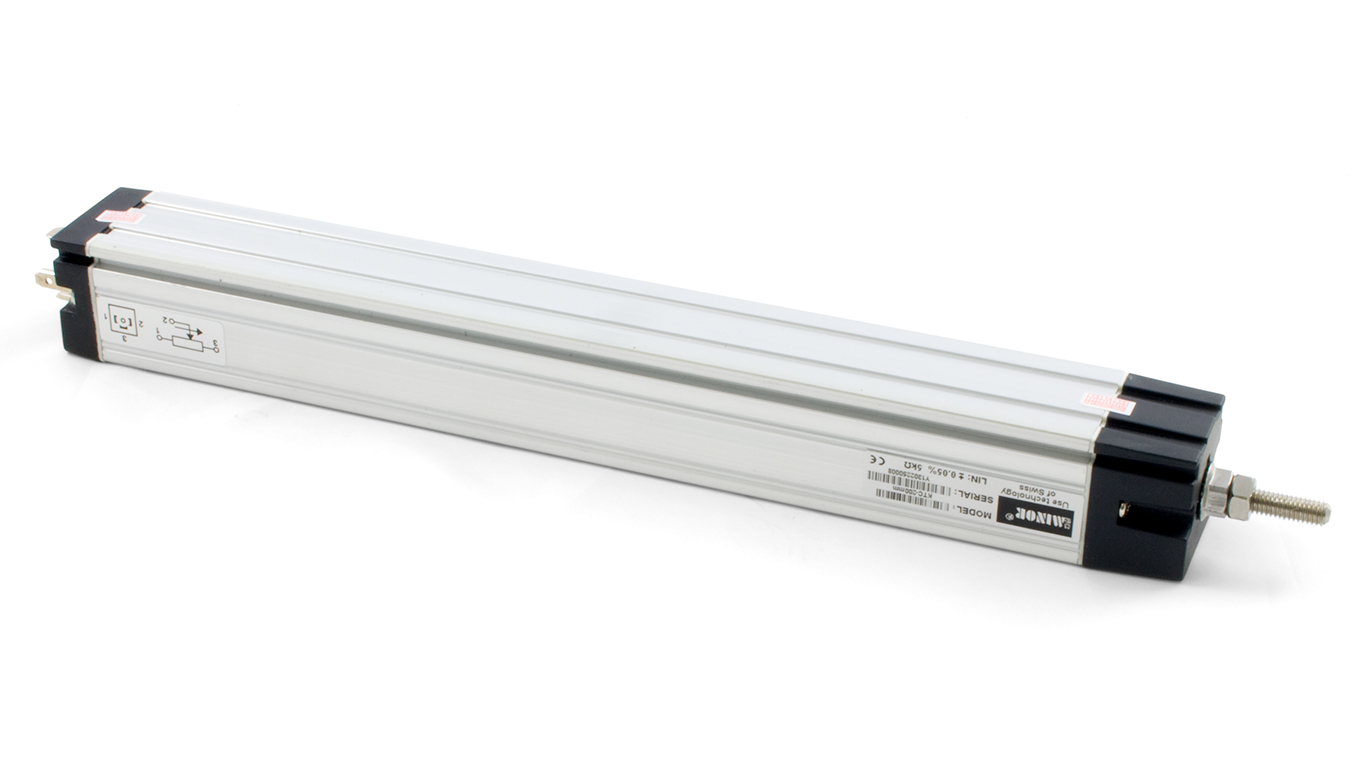
What Is a Linear Potentiometer?
Linear potentiometers provide a simple and cost-effective method of measuring an object's linear position.
The shaft functions as the wiper of the potentiometer. As it's extended, a proportional voltage is generated.
Example
The 3759_0 is used with a VINT Hub Phidget. The results are displayed on a Graphic LCD Phidget
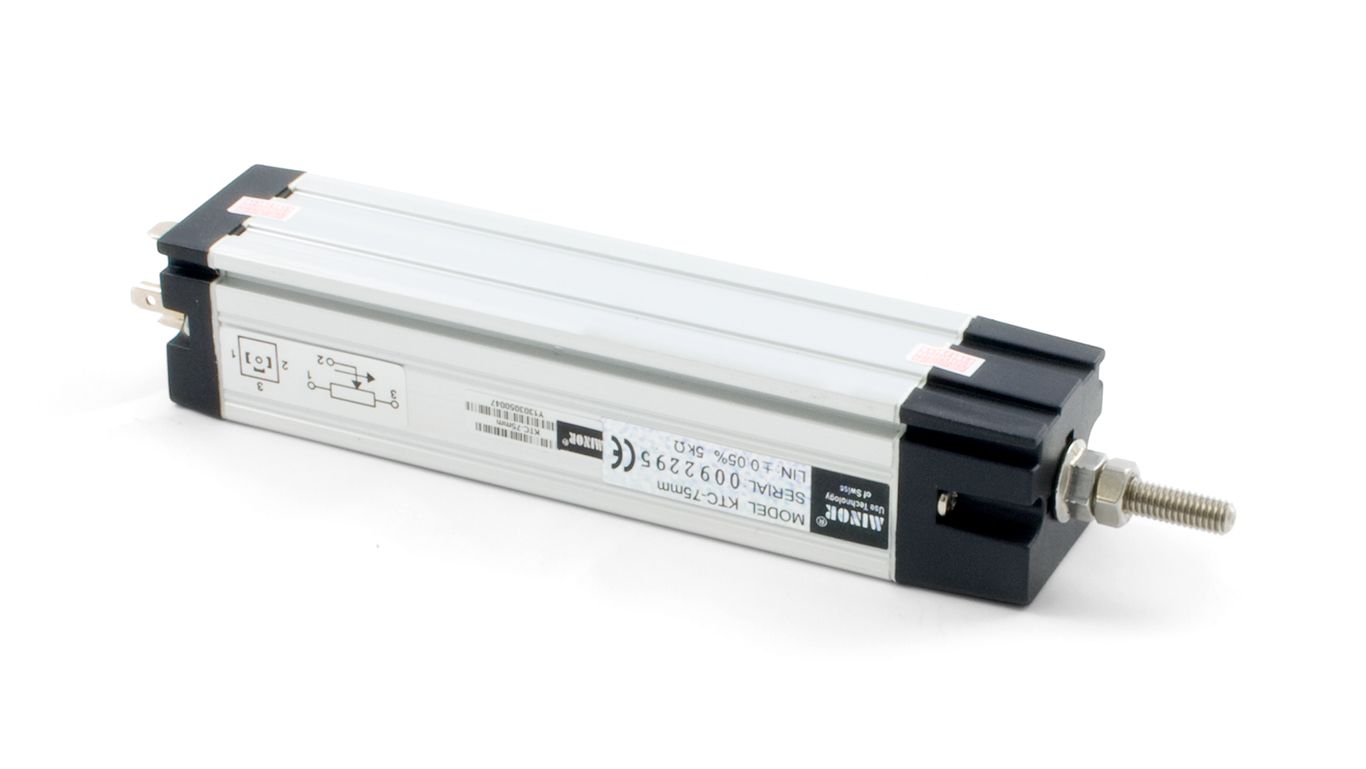
Which Linear Potentiometer Should I Use?
Phidgets Inc. currently offers four types of linear potentiometers:
How Do I Get Data From My Linear Potentiometer?
All linear potentiometers sold by Phidgets Inc. connect directly to our VINT Hubs and any of our voltage input devices that support the VoltageRatioInput API.
There are also voltage inputs built into many of our Motor Controllers. If your project includes a motor controller, the onboard voltage input used with the VoltageRatioInput API is a great option.
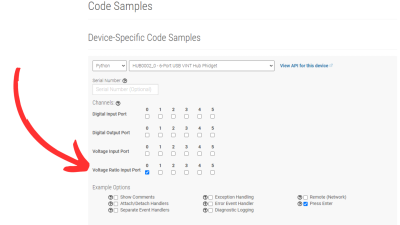
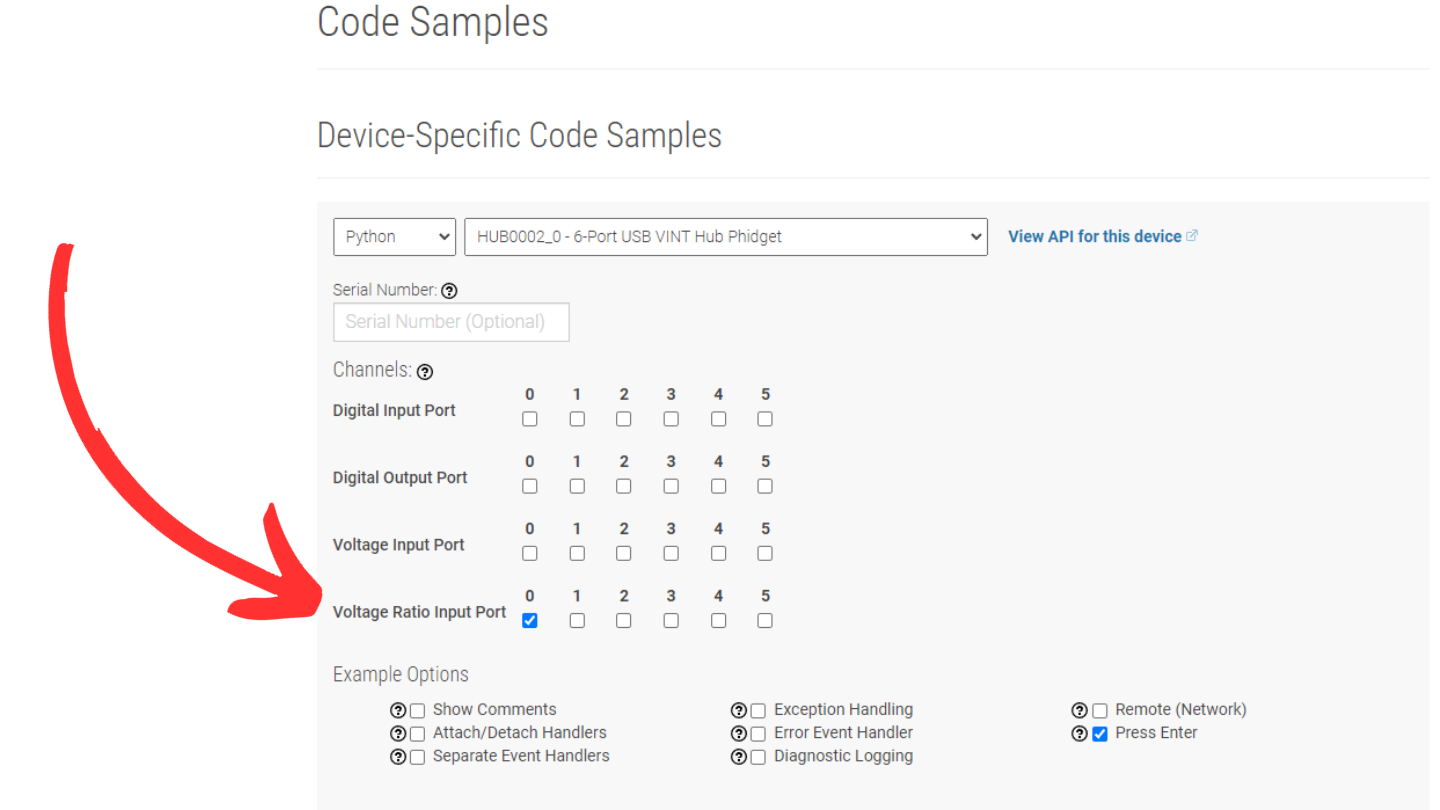
Generating a code sample for the VINT Hub Phidget. Writing Code
The code examples below are copied directly from the Phidget Code Sample Generator. The first example shows code for connecting a linear potentiometer directly to a VINT Hub Phidget, and the other shows using a generic voltage input device.
When using a voltage input device with our linear potentiometers, remember to use the VoltageRatioInput API instead of the VoltageInput API for the best results.
Example Code - VINT Hub Phidget
Click on your preferred programming language to view the code example.
from Phidget22.Phidget import *
from Phidget22.Devices.VoltageRatioInput import *
import time

def onVoltageRatioChange(self, voltageRatio):
	print("VoltageRatio: " + str(voltageRatio))

def main():
	voltageRatioInput0 = VoltageRatioInput()

	voltageRatioInput0.setIsHubPortDevice(True)
	voltageRatioInput0.setHubPort(0)

	voltageRatioInput0.setOnVoltageRatioChangeHandler(onVoltageRatioChange)

	voltageRatioInput0.openWaitForAttachment(5000)

	time.sleep(5)

	voltageRatioInput0.close()

main()
import com.phidget22.*;
import java.lang.InterruptedException;

public class Java_Example {

	public static void main(String[] args) throws Exception {
		VoltageRatioInput voltageRatioInput0 = new VoltageRatioInput();

		voltageRatioInput0.setIsHubPortDevice(true);
		voltageRatioInput0.setHubPort(0);

		voltageRatioInput0.addVoltageRatioChangeListener(new VoltageRatioInputVoltageRatioChangeListener() {
			public void onVoltageRatioChange(VoltageRatioInputVoltageRatioChangeEvent e) {
				System.out.println("VoltageRatio: " + e.getVoltageRatio());
			}
		});

		voltageRatioInput0.open(5000);

		Thread.sleep(5000);

		voltageRatioInput0.close();
	}
}
using System;
using Phidget22;

namespace ConsoleApplication
{
	class Program
	{

		private static void VoltageRatioInput0_VoltageRatioChange(object sender, Phidget22.Events.VoltageRatioInputVoltageRatioChangeEventArgs e)
		{
			Console.WriteLine("VoltageRatio: " + e.VoltageRatio);
		}

		static void Main(string[] args)
		{
			VoltageRatioInput voltageRatioInput0 = new VoltageRatioInput();

			voltageRatioInput0.IsHubPortDevice = true;
			voltageRatioInput0.HubPort = 0;

			voltageRatioInput0.VoltageRatioChange += VoltageRatioInput0_VoltageRatioChange;

			voltageRatioInput0.Open(5000);

			//Wait until Enter has been pressed before exiting
			Console.ReadLine();

			voltageRatioInput0.Close();
		}
	}
}
#include <phidget22.h>
#include <stdio.h>

static void CCONV onVoltageRatioChange(PhidgetVoltageRatioInputHandle ch, void * ctx, double voltageRatio) {
	printf("VoltageRatio: %lf\n", voltageRatio);
}

int main() {
	PhidgetVoltageRatioInputHandle voltageRatioInput0;

	PhidgetVoltageRatioInput_create(&voltageRatioInput0);

	Phidget_setIsHubPortDevice((PhidgetHandle)voltageRatioInput0, 1);
	Phidget_setHubPort((PhidgetHandle)voltageRatioInput0, 0);

	PhidgetVoltageRatioInput_setOnVoltageRatioChangeHandler(voltageRatioInput0, onVoltageRatioChange, NULL);

	Phidget_openWaitForAttachment((PhidgetHandle)voltageRatioInput0, 5000);

	//Wait until Enter has been pressed before exiting
	getchar();

	Phidget_close((PhidgetHandle)voltageRatioInput0);

	PhidgetVoltageRatioInput_delete(&voltageRatioInput0);
}
Example Code - Generic Voltage Input
Click on your preferred programming language to view the code example.
from Phidget22.Phidget import *
from Phidget22.Devices.VoltageRatioInput import *
import time

def onVoltageRatioChange(self, voltageRatio):
	print("VoltageRatio: " + str(voltageRatio))

def main():
	voltageRatioInput0 = VoltageRatioInput()

	voltageRatioInput0.setOnVoltageRatioChangeHandler(onVoltageRatioChange)

	voltageRatioInput0.openWaitForAttachment(5000)

	time.sleep(5)

	voltageRatioInput0.close()

main()
import com.phidget22.*;
import java.util.Scanner; //Required for Text Input
import java.io.IOException;

public class Java_Example {

	public static void main(String[] args) throws Exception {
		VoltageRatioInput voltageRatioInput0 = new VoltageRatioInput();

		voltageRatioInput0.addVoltageRatioChangeListener(new VoltageRatioInputVoltageRatioChangeListener() {
			public void onVoltageRatioChange(VoltageRatioInputVoltageRatioChangeEvent e) {
				System.out.println("VoltageRatio: " + e.getVoltageRatio());
			}
		});

		voltageRatioInput0.open(5000);

		//Wait until Enter has been pressed before exiting
		System.in.read();

		voltageRatioInput0.close();
	}
}
using System;
using Phidget22;

namespace ConsoleApplication
{
	class Program
	{

		private static void VoltageRatioInput0_VoltageRatioChange(object sender, Phidget22.Events.VoltageRatioInputVoltageRatioChangeEventArgs e)
		{
			Console.WriteLine("VoltageRatio: " + e.VoltageRatio);
		}

		static void Main(string[] args)
		{
			VoltageRatioInput voltageRatioInput0 = new VoltageRatioInput();

			voltageRatioInput0.VoltageRatioChange += VoltageRatioInput0_VoltageRatioChange;

			voltageRatioInput0.Open(5000);

			//Wait until Enter has been pressed before exiting
			Console.ReadLine();

			voltageRatioInput0.Close();
		}
	}
}
#include <phidget22.h>
#include <stdio.h>

static void CCONV onVoltageRatioChange(PhidgetVoltageRatioInputHandle ch, void * ctx, double voltageRatio) {
	printf("VoltageRatio: %lf\n", voltageRatio);
}

int main() {
	PhidgetVoltageRatioInputHandle voltageRatioInput0;

	PhidgetVoltageRatioInput_create(&voltageRatioInput0);

	PhidgetVoltageRatioInput_setOnVoltageRatioChangeHandler(voltageRatioInput0, onVoltageRatioChange, NULL);

	Phidget_openWaitForAttachment((PhidgetHandle)voltageRatioInput0, 5000);

	//Wait until Enter has been pressed before exiting
	getchar();

	Phidget_close((PhidgetHandle)voltageRatioInput0);

	PhidgetVoltageRatioInput_delete(&voltageRatioInput0);
}
Installation and Mounting
Additional Hardware
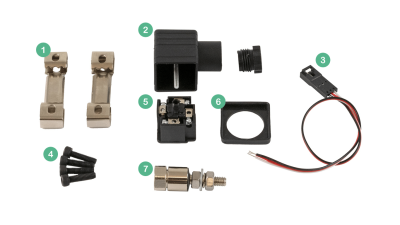
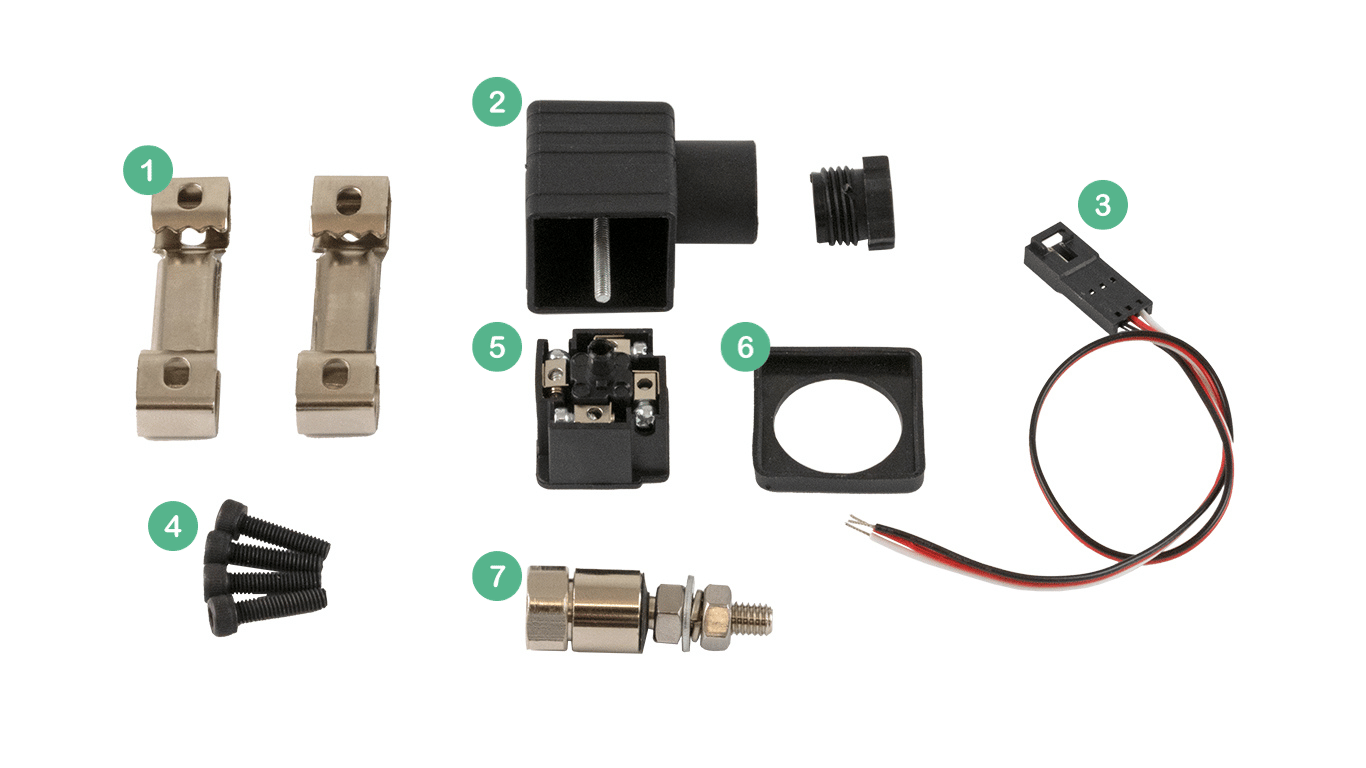
Hardware that is packaged with all linear potentiometers All of our linear potentiometers come packaged with the following items:
- 2x Mounting Brackets
- 1x Wiring Harness with Cap
- 1x Phidget Cable Adapter
- 4x Mounting Screws
- 1x Wiring Terminals (comes embedded in wiring harness)
- 1x Rubber Seal
- 1x Ball Joint Attachment
Connecting Phidget Cable Adapter
To connect your Phidget cable to the potentiometer, follow the images below:
Remove the protective cap to expose the potentiometer terminals.
Separate the wiring harness.
Wire your Phidget Cable Adapter using the guide above.
Re-assemble your wiring harness. The rubber seal can also be added at this point if required.
Install the right-angle cap and you are ready to start using your linear potentiometer!
The mounting brackets can be slid into place as shown above.
The ball joint attachment can be secured to the end of the shaft.


