LED Brightness
In this lesson, you’ll learn how to write a program that dims an LED!
Write Code (Java)
Copy the code below into the project you created. If you don't have a project or forgot how to create one, revisit the Configure section.
Not your programming language? Set your preferences so we can display relevant code examples
package gettingstarted;

//Add Phidgets Library
import com.phidget22.*;

public class GettingStarted {
    //Handle Exceptions
    public static void main(String[] args) throws Exception{

        //Create
        DigitalOutput redLED = new DigitalOutput();

        //Address
        redLED.setHubPort(1);
        redLED.setIsHubPortDevice(true);

        //Open
        redLED.open(1000);

        //Use your Phidgets with Duty Cycle | Duty Cycle controls the power to your Phidget (Digital Output object). Duty Cycle values range from 0.0 - 1.0.
        redLED.setDutyCycle(0.1);
        Thread.sleep(1000);
        redLED.setDutyCycle(0.0);
    }
}
//Add Phidgets Library
import com.phidget22.*;

//Define
DigitalOutput redLED;

void setup(){
  try{

    //Create
     redLED = new DigitalOutput();

    //Address
    redLED.setHubPort(1);
    redLED.setIsHubPortDevice(true);

    //Open
    redLED.open(1000);

  }catch(Exception e){
    e.printStackTrace();
  }
}

void draw(){
  try{

    //Use your Phidgets with Duty Cycle | Duty Cycle controls the power to your Phidget (Digital Output object). Duty Cycle values range from 0.0 - 1.0.
    redLED.setDutyCycle(0.1);
    delay(1000);
    redLED.setDutyCycle(0.0);
    delay(1000);

  }catch(Exception e){
    e.printStackTrace();
  }
}
Write Code (Python)
Copy the code below into the project you created. If you don't have a project or forgot how to create one, revisit the Configure section.
Not your programming language? Set your preferences so we can display relevant code examples
#Add Phidgets Library
from Phidget22.Phidget import *
from Phidget22.Devices.DigitalOutput import *
#Required for sleep statement
import time

#Create
redLED = DigitalOutput()

#Address
redLED.setHubPort(1)
redLED.setIsHubPortDevice(True)

#Open
redLED.openWaitForAttachment(1000)

# Use your Phidgets with Duty Cycle | Duty Cycle controls the power to your Phidget (Digital Output object). Duty Cycle values range from 0.0 - 1.0.
redLED.setDutyCycle(0.1)
time.sleep(1)
redLED.setDutyCycle(0.0)
Write Code (C#)
Copy the code below into the project you created. If you don't have a project or forgot how to create one, revisit the Configure section.
Not your programming language? Set your preferences so we can display relevant code examples
//Add Phidgets Library
using Phidget22;

namespace GettingStarted{
    class Program{
        static void Main(string[] args){

            //Create
            DigitalOutput redLED = new DigitalOutput();

            //Address
            redLED.HubPort = 1;
            redLED.IsHubPortDevice = true;

            //Open
            redLED.Open(1000);

            //Use your Phidgets with Duty Cycle | Duty Cycle control the power supply to your Phidget (Digital Output Object). Settling the Duty Cycle will control your LEDs Brightness. Duty Cycle values range from 0.0 - 1.0.
            redLED.DutyCycle = 0.1;
            System.Threading.Thread.Sleep(1000);
            redLED.DutyCycle = 0.0;
        }
    }
}
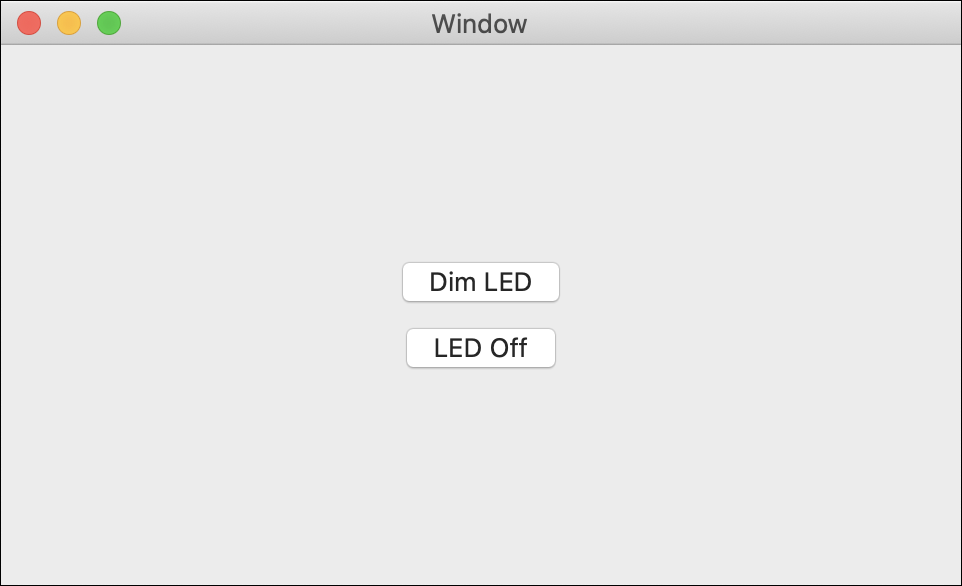
Write Code (Swift)
Create two buttons in your window and copy the code below into the project you created. If you don't have a project or forgot how to create one, revisit the Configure section.
Not your programming language? Set your preferences so we can display relevant code examples
Create two buttons
import Cocoa
//Add Phidgets Library
import Phidget22Swift

class ViewController: NSViewController {

    //Create
    let redLED = DigitalOutput()

    override func viewDidLoad() {
        super.viewDidLoad()
        do{
            //Address
            try redLED.setHubPort(1)
            try redLED.setIsHubPortDevice(true)

            //Open
            try redLED.open()
        }catch{
            print(error)
        }
    }

    @IBAction func dimLED(_ sender: Any) {
        do{
            //Use your Phidgets with Duty Cycle | Duty Cycle control the power supply to your Phidget (Digital Output Object). Settling the Duty Cycle will control your LEDs Brightness. Duty Cycle values range from 0.0 - 1.0.
            try redLED.setDutyCycle(0.1)
        }catch{
            print(error)
        }
    }

    @IBAction func turnLEDOff(_ sender: Any) {
        do{
            //Use your Phidgets with Duty Cycle | You can turn your LED off by setting the state to false or the Duty Cycle to 0.0
            try redLED.setDutyCycle(0.0)
        }catch{
            print(error)
        }
    }
}
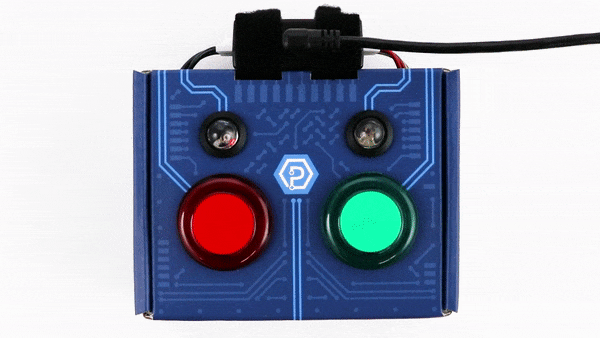
Run Your Program
You will see the red LED blink dimly.
Run Your Program
You will see the red LED blink dimly.
Run Your Program
You will see the red LED blink dimly.
Run Your Program
Click on the buttons to dim the red LED and turn it off.
What happens when I set the Duty Cycle?
Setting the duty cycle sets the fraction of time the output is on (high), as shown in the diagram below:
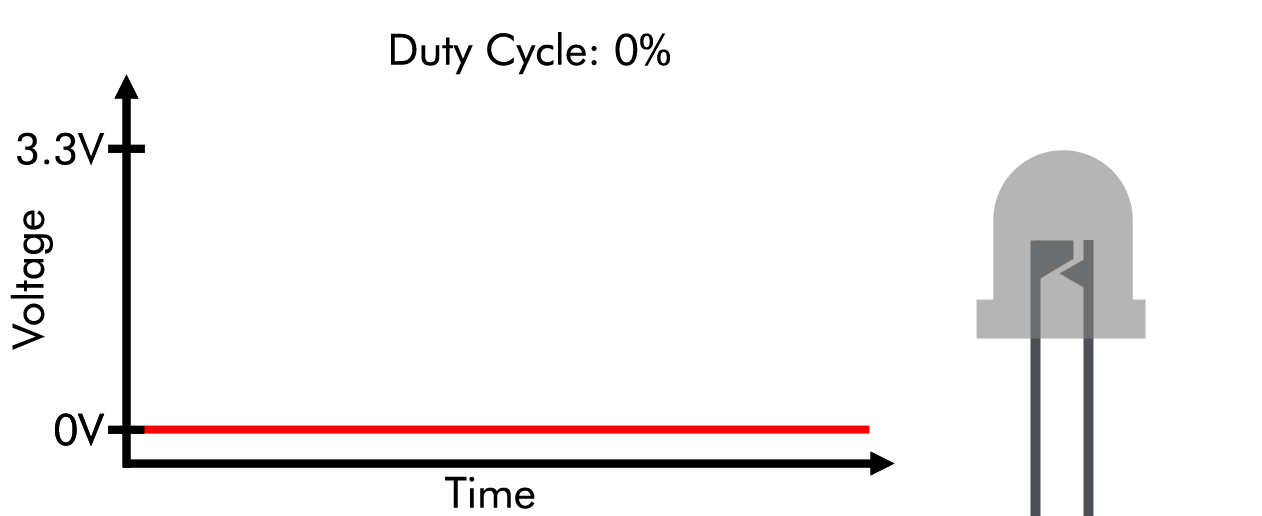
As the diagram shows, a duty cycle of 100% (or 1.0) is equivalent to a TRUE state, and a duty cycle of 0% or (0.0) is equivalent to a FALSE state.
Practice
- Change your Duty Cycle value to 0, 0.5, and 1. Note what happens to your LED with each value.
- Modify your program so the brightness of your LED slowly increases and decreases before turning off. Hint: Use a loop.
Practice
- Change your Duty Cycle value to 0, 0.5, and 1. Note what happens to your LED with each value.
- Modify your program so the brightness of your LED slowly increases and decreases before turning off. Hint: Use a loop.
Practice
- Change your Duty Cycle value to 0, 0.5, and 1. Note what happens to your LED with each value.
- Modify your program so the brightness of your LED slowly increases and decreases before turning off. Hint: Use a loop.
Practice
- Change your Duty Cycle value to 0, 0.5, and 1. Note what happens to your LED with each value.
- Add a slider that can be used to dim/brighten the LED. Use a label to communicate the current value of the slider to the user.
Troubleshoot
I am getting a "Timed Out" exception.
- Make sure the USB cable from your VINT Hub to your computer is attached properly.
- Make the Phidget cable (the black, red and white one) is connected to your VINT Hub and to your Humidity Phidget properly).
- Make sure no other program is running that uses Phidgets. If a Phidget is already in use in another program, it will be busy and won't respond to this one.
Still having issues?
Visit the Advanced Troubleshooting Page or contact us (education@phidgets.com).