Data Interval
In this lesson, you will learn how to use the Data Interval so you can change how often your sensors report data!
Write Code (Java)
Copy the code below into the project you created. If you don't have a project or forgot how to create one, revisit the Configure section.
Not your programming language? Set your preferences so we can display relevant code examples
package gettingstarted;

//Add Phidgets Library
import com.phidget22.*;

public class GettingStarted {
    //Handle Exceptions
    public static void main(String[] args) throws Exception {

        //Create
        TemperatureSensor temperatureSensor = new TemperatureSensor();

        //Temperature Event |  Event code runs when data input from the sensor changes. The following event is a Temperature change event. The contained code will only run when the temperature input changes.
        temperatureSensor.addTemperatureChangeListener(new TemperatureSensorTemperatureChangeListener() {
            public void onTemperatureChange(TemperatureSensorTemperatureChangeEvent e) {
                System.out.println("Temperature: " + e.getTemperature());
            }
        });

        //Open
        temperatureSensor.open(5000);

        //Set Data Interval | The Data Interval controls how often the program collects data from your Phidget. The Data Interval ranges from 500 ms - 60000 ms.
        temperatureSensor.setDataInterval(1000);

        //Keep program running
        while (true) {
            Thread.sleep(150);
        }
    }
}
//Add Phidgets Library
import com.phidget22.*;

//Define
TemperatureSensor temperatureSensor;

void setup(){
  try{

    //Create
     temperatureSensor = new TemperatureSensor();

    //Temperature Event |  Event code runs when data input from the sensor changes. The following event is a Temperature change event. The contained code will only run when the temperature input changes.
    temperatureSensor.addTemperatureChangeListener(new TemperatureSensorTemperatureChangeListener() {
      public void onTemperatureChange(TemperatureSensorTemperatureChangeEvent e) {
        System.out.println("Temperature: " + e.getTemperature());
      }
    });

    //Open
    temperatureSensor.open(1000);

    //Set Data Interval | The Data Interval controls how often the program collects data from your Phidget. The Data Interval ranges from 500 ms - 60000 ms.
    temperatureSensor.setDataInterval(1000);

  }catch(Exception e){
    e.printStackTrace();
  }
}

void draw(){
  delay(150);
}
Write Code (Python)
Copy the code below into the project you created. If you don't have a project or forgot how to create one, revisit the Configure section.
Not your programming language? Set your preferences so we can display relevant code examples
#Add Phidgets Library
from Phidget22.Phidget import *
from Phidget22.Devices.TemperatureSensor import *
import time

#Temperature Change Event |  Event code runs when data input from the sensor changes. The following event is a Temperature change event. The contained code will only run when the temperature input changes.
def onTemperatureSensor_TemperatureChange(self, temperature):
    print("Temperature: " + str(temperature))

#Create
temperatureSensor = TemperatureSensor()

#Subscribe to event | Subscribing to an Event tells your program to start listening to a Phidget.
temperatureSensor.setOnTemperatureChangeHandler(onTemperatureSensor_TemperatureChange)

#Open
temperatureSensor.openWaitForAttachment(5000)

#Set Data Interval | The Data Interval controls how often the program collects data from your Phidget. The Data Interval ranges from 500 ms - 60000 ms.
temperatureSensor.setDataInterval(1000)

#Keep program running
while(True):
    time.sleep(0.15)
Write Code (C#)
Copy the code below into the project you created. If you don't have a project or forgot how to create one, revisit the Configure section.
Not your programming language? Set your preferences so we can display relevant code examples
//Add Phidgets Library
using Phidget22;
using Phidget22.Events;

namespace GettingStarted{
    class Program{

        //Temperature Change Event |  Event code runs when data input from the sensor changes. The following event is a Temperature change event. The contained code will only run when the temperature input changes.
        private static void TemperatureSensor_TemperatureChange(object sender, Phidget22.Events.TemperatureSensorTemperatureChangeEventArgs e)
        {
            System.Console.WriteLine("Temperature: " + e.Temperature);
        }

        static void Main(string[] args)
        {
            //Create
            TemperatureSensor temperatureSensor = new TemperatureSensor();

            //Subscribe to event | Subscribing to an Event tells your program to start listening to a Phidget.
            temperatureSensor.TemperatureChange += TemperatureSensor_TemperatureChange;

            //Open
            temperatureSensor.Open(5000);

            //Set Data Interval | Data Interval controls how often the program collects data from your Phidget.
            temperatureSensor.DataInterval = 1000;

            // Keep Program Running
            while (true)
            {
                System.Threading.Thread.Sleep(150);
            }
        }
    }
}
Write Code (Swift)
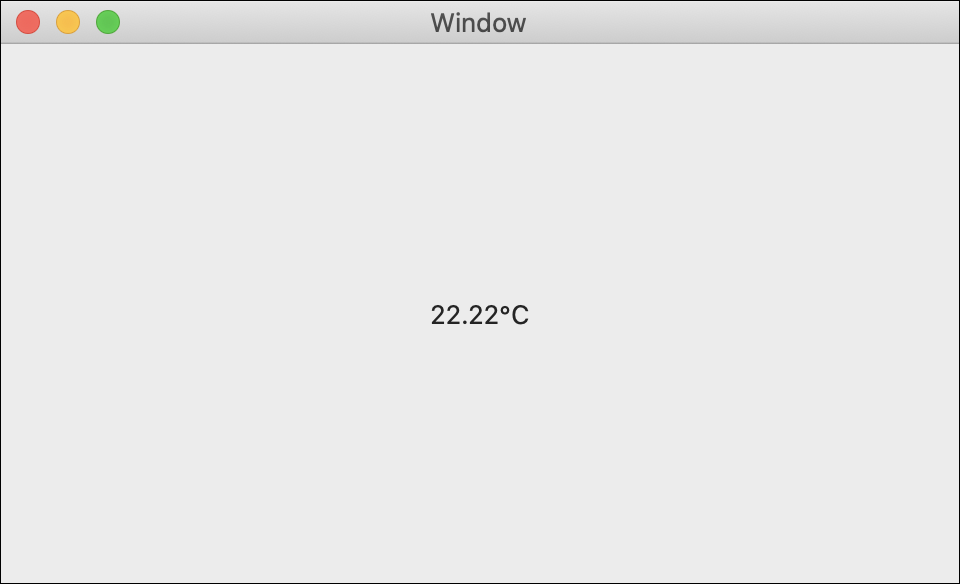
Create a label in your window and copy the code below into the project you created. If you don't have a project or forgot how to create one, revisit the Configure section.
Not your programming language? Set your preferences so we can display relevant code examples
Create a label
 import Cocoa
//Add Phidgets Library | You used cocoapods to install the Phidget library. The statement below give your program access to that code.
import Phidget22Swift

class ViewController: NSViewController {

    @IBOutlet weak var temperatureLabel: NSTextField!

    //Create | Here you have created a TemperatureSensor object. TemperatureSensor is a class in your Phidgets library that gathers temperature data from your Phidget.
    let temperatureSensor = TemperatureSensor()


    override func viewDidLoad() {
        super.viewDidLoad()
        do{
            //Subscribe to event
            let _ = temperatureSensor.temperatureChange.addHandler(onTemperatureChange)

            //Subscribe to events
            //Attach Handler | Use the attach handler to set a new data interval!
            let _ = temperatureSensor.attach.addHandler(onAttach)

            //Open | Open establishes a connection between your object and your physical Phidget.
            try temperatureSensor .open()

        }catch{
            print(error)
        }
    }

    //Data event
    func onTemperatureChange(sender:TemperatureSensor, temperature: Double){
        DispatchQueue.main.async {
            //Use your Phidget | Update the label with the latest temperature data.
            self.temperatureLabel.stringValue = String(temperature) + "°C"
        }
    }

    //Attach event
    func onAttach(sender:Phidget){
        do{
            //Set a data interval
            try temperatureSensor.setDataInterval(1000)
        }catch{
            print(error)
        }
    }
}
Run Your Program
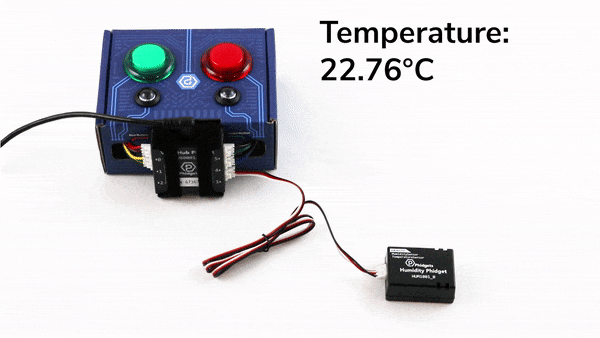
You will see the temperature displayed in degrees Celsius once every second.
What happens when I set the Data Interval?
By setting the Data Interval, you are changing how often your sensor reports data to your program. For example, when using the temperature sensor above, if you set the data interval to 1000ms (or 1 second), the Phidget will measure temperature every second and report back.
Do All Phidgets Have A Data Interval?
Only Phidgets that are sensing or measuring a value will have a data interval. For example, if you were controling a motor, there would be no data interval because the Phidget is not measuring anything.
How Can I Find the DataInterval Range?
This is discussed in the Using the Sensor API advanced lesson.
Practice
- Set the Data Interval to the minimum value: 500ms. Note the Output.
- Set the Data Interval to the maximum value: 60,000 ms. Note the Output.
- Would the LED or buttons have a data interval? Why or why not?
Troubleshoot
I am getting a "Timed Out" exception.
- Make sure the USB cable from your VINT Hub to your computer is attached properly.
- Make the Phidget cable (the black, red and white one) is connected to your VINT Hub and to your Humidity Phidget properly).
- Make sure no other program is running that uses Phidgets. If a Phidget is already in use in another program, it will be busy and won't respond to this one.
Still having issues?
Visit the Advanced Troubleshooting Page or contact us (education@phidgets.com).