Products for USB Sensing and Control

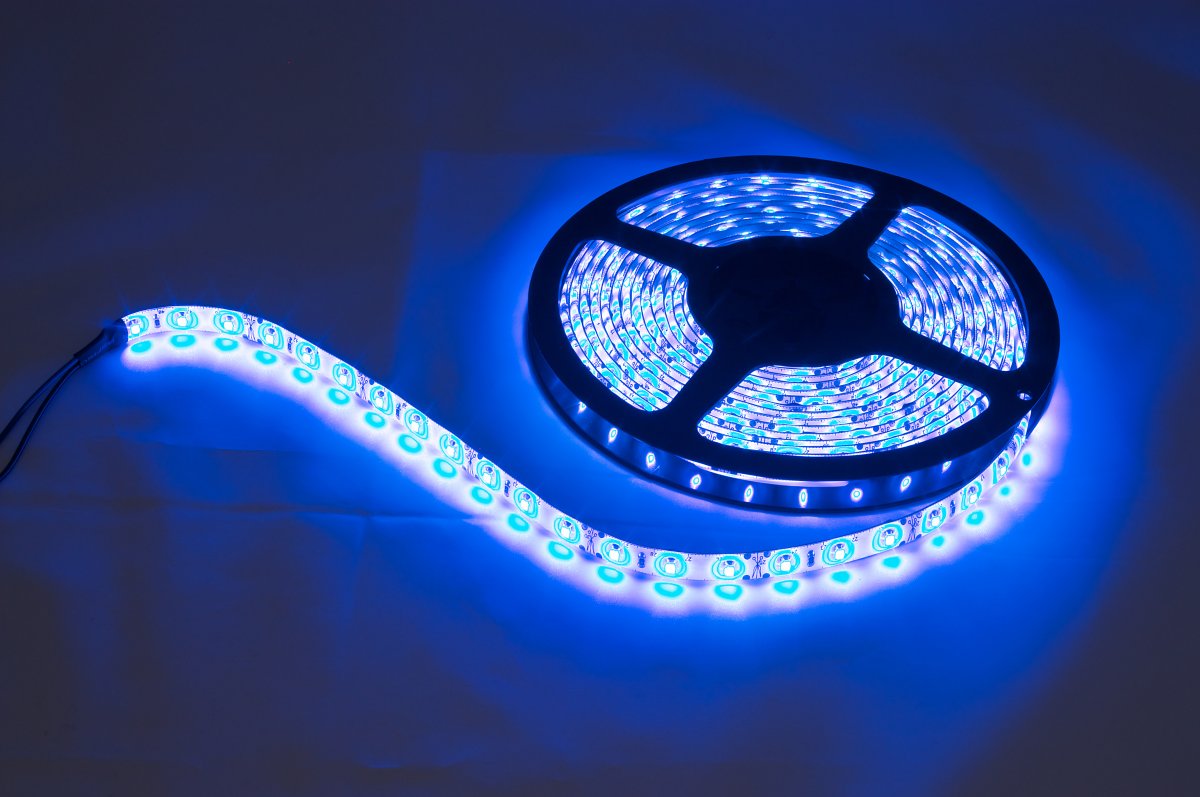
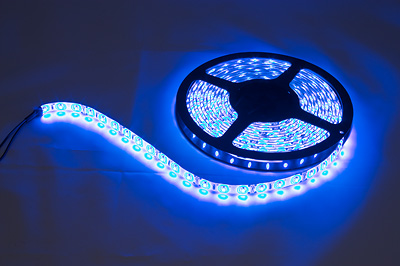
The 3615 is a 5 meter long, 8 mm wide, flexible LED strip with adhesive backing which can be cut in multiples of 3-LED sections. The strip contains 300 blue LEDs with a light beam of 120°.
The strip requires between 9 to 12 Volts DC and consumes 1.5A when running at 12V and 361mA when running at 9V.
Caution: Running the strip at more than 12V can damage the LEDs.
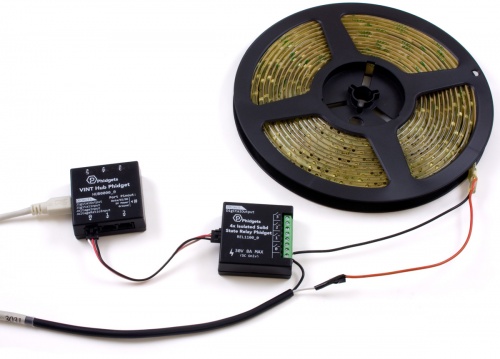
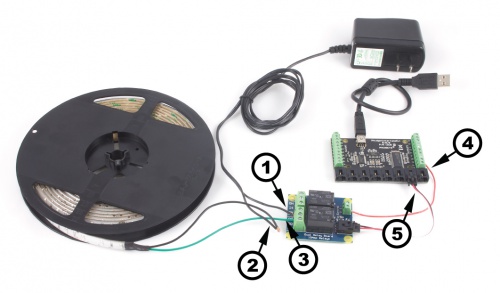
In order to turn this LED strip on and off, you can use a relay board. See the User Guide for examples of how to connect the power supply and the LED strip to the relay.
| Product | Electrical Properties | ||
|---|---|---|---|
| Part Number | Price | Load Current Max (DC) | Load Voltage Max (DC) |
 16x Isolated Solid State Relay Phidget
|
$50.00 | (per channel) 8 A | (per channel) 30 V DC |
 4x Isolated Solid State Relay Phidget
|
$25.00 | (per channel) 8 A | (per channel) 30 V DC |
 4x Relay Phidget
|
$30.00 | 7 A | * 30 V DC |
 PhidgetInterfaceKit 0/0/4
|
$55.00 | 7 A | * 30 V DC |
 PhidgetInterfaceKit 0/0/8
|
$85.00 | 2 A | 120 V DC |
 Relay Phidget
|
$10.00 | 7 A | * 30 V DC |
 Signal Relay Phidget
|
$12.00 | 2 A | 120 V DC |
 Solid State Relay Phidget
|
$15.00 | * 10 A | 30 V DC |
 Dual Relay Board
|
$17.00 | 7 A | * 30 V DC |
 Dual SSR Relay Board
|
$30.00 | (per channel) 9 A | 40 V DC |
 SSR Relay Board 0.5A
|
$10.00 | 500 mA | 40 V DC |
 SSR Relay Board 2.5A
|
$15.00 | 2.5 A | 40 V DC |
 DC Solid State Relay - 120V 75A
|
$45.00 | 75 A | 120 V DC |
 DC Solid State Relay - 30V 100A
|
$30.00 | 100 A | 30 V DC |
 DC Solid State Relay - 30V 50A
|
$20.00 | 50 A | 30 V DC |
 DC Solid State Relay - 50V 80A
|
$25.00 | 80 A | 50 V DC |
 PhidgetInterfaceKit 0/0/4
|
$55.00 | 7 A | * 30 V DC |
 PhidgetInterfaceKit 0/0/8
|
$85.00 | 2 A | * 120 V DC |
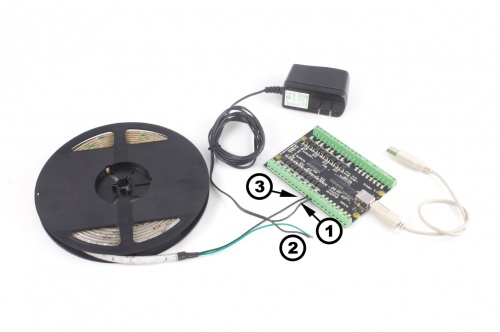
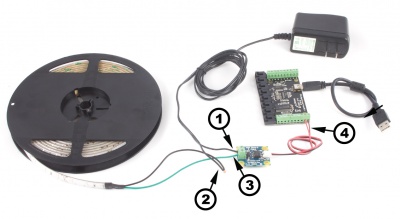
You could also use an open-collector relay board, which is just a solid state relay that switches to ground instead of closing a circuit. See the User Guide for examples of how to connect the power supply and the LED strip to the board.
| Product | Relay Properties | Electrical Properties | ||
|---|---|---|---|---|
| Part Number | Price | Number of Relays | Load Current Max (DC) | Load Voltage Max (DC) |
|
16x Isolated Solid State Relay Phidget
|
$50.00 | 16 | (per channel) 8 A | (per channel) 30 V DC |
|
4x Isolated Solid State Relay Phidget
|
$25.00 | 4 | (per channel) 8 A | (per channel) 30 V DC |
 PhidgetInterfaceKit 0/16/16
|
$95.00 | 16 | — | — |
This strip requires a 12V power supply. We recommend a 2A power supply to ensure that the LEDs have enough power. Select the power supply from the list below that matches your region's wall socket type.
| Product | Electrical Properties | ||
|---|---|---|---|
| Part Number | Price | Power Supply Current | Output Voltage |
 Power Supply 12VDC 0.5A - EU
|
$1.50 | 500 mA | 12 V |
 Power Supply 12VDC 0.5A - US
|
$1.50 | 500 mA | 12 V |
 Power Supply 12VDC 2.0A - AU
|
$10.00 | 2 A | 12 V |
 Power Supply 12VDC 2.0A - EU
|
$10.00 | 2 A | 12 V |
 Power Supply 12VDC 2.0A - UK
|
$10.00 | 2 A | 12 V |
 Power Supply 12VDC 5A
|
$20.00 | 5 A | 12 V |
 Power Supply-12VDC 2.0A - US
|
$10.00 | 2 A | 12 V |
| |
| Go to this device's product page |
This manual describes how to connect and control the 3615 LED strip using Phidgets I/O boards and relays.
I/O Boards:
Relays:
Note: Be aware that the LEDs can get damaged if the proper polarity is not respected: Anode (+), Cathode (-).
Note: Be aware that the LEDs can get damaged if the proper polarity is not respected: Anode (+), Cathode (-).
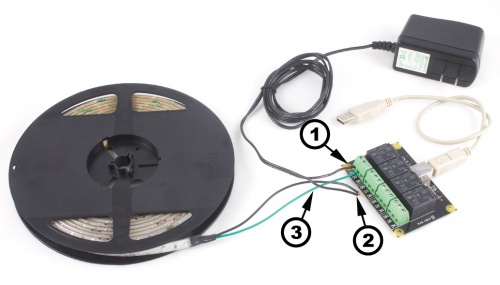
If you connect the power supply live wire to NC (Normally Closed) terminal, the LED strip will be ON when the switch is off.
Note: Be aware that the LEDs can get damaged if the proper polarity is not respected: Anode (+), Cathode (-).

If you connect the power supply live wire to NC (Normally Closed) terminal, the LED strip will be ON when the switch is off.
Note: Be aware that the LEDs can get damaged if the proper polarity is not respected: Anode (+), Cathode (-).
If you connect the white anode wire to NC (Normally Closed) terminal, the LED strip will be ON when the switch is off.
Note: Be aware that the LEDs can get damaged if the proper polarity is not respected: Anode (+), Cathode (-).
Note: Be aware that the LEDs can get damaged if the proper polarity is not respected: Anode (+), Cathode (-).
| Light Properties | |
|---|---|
| Emitting Color | Blue |
| Controlled By | Relay |
| Dominant Wavelength | 470 nm |
| Luminous Intensity | 280 mcd |
| Beam Angle | 120° |
| Electrical Properties | |
| Supply Voltage Min | 9 V DC |
| Supply Voltage Max | 12 V DC |
| Current Consumption Min | 200 mA |
| Current Consumption Max | 1.3 A |
| Physical Properties | |
| Strip Length | 5 m |
| LEDs per Reel | 300 |
| Customs Information | |
| Canadian HS Export Code | 8541.41.00 |
| American HTS Import Code | 8541.41.00.00 |
| Country of Origin | CN (China) |

